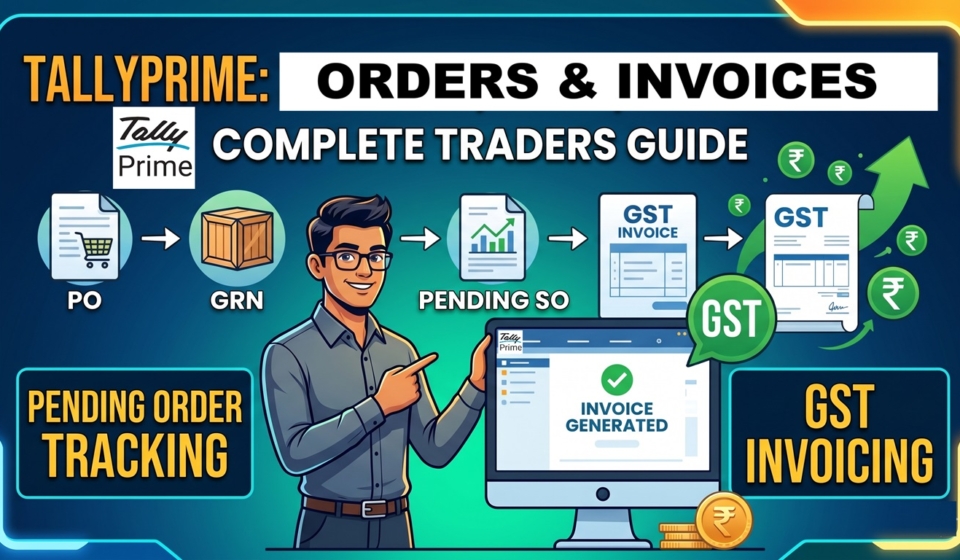
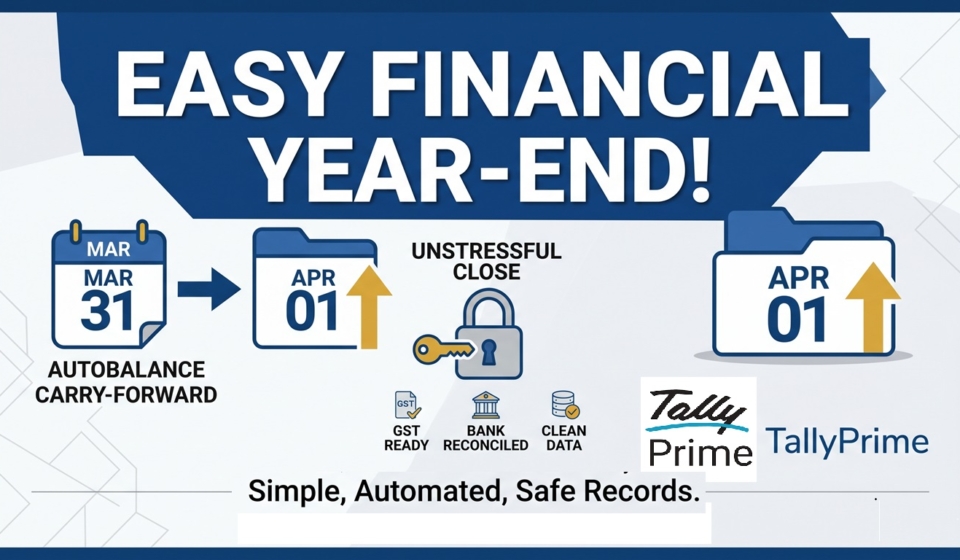
Accountants and CAs Prefer TallyPrime

Why Accountants and CAs Prefer TallyPrime for Managing SME Clients

TL;DR

Accountants and CAs Prefer TallyPrime for Managing SME Clients. TallyPrime is the gold standard for Indian accountants. It handles GST and MCA Audit Trail rules in one place. TallyPrime 7.0 even manages your buyer-supplier network via Bharat Connect. You can handle hundreds of clients without any software lag. It is built for speed and total compliance.

Introduction: Why Accountants and CAs Prefer TallyPrime for Managing SME Clients?

The Direct Answer: Accountants prefer TallyPrime because it is reliable. It matches how an accountant’s brain works. It makes GST and statutory audits completely stress-free.

In my 20 years of practice, I’ve tried many tools. I always come back to Tally. Between you and me, managing multiple SME clients is hard. One client trades goods, while another manufactures them. They all share one big worry: staying compliant. TallyPrime gives them and me total peace of mind.

Accountants and CAs Prefer TallyPrime

Is the New Audit Trail (Edit Log) Actually a Lifesaver?

The MCA made the “Audit Trail” mandatory on April 1, 2023. This rule applies to all companies governed by the MCA. Some clients see this as a burden. To a CA, it is a massive lifesaver.

TallyPrime handles this rule perfectly:

  • Tracks Every Change: It records every creation, alteration, and deletion.
  • Total Transparency: The Edit Log cannot be disabled or tampered with.
  • User Accountability: It captures exact usernames and timestamps for every entry.

As your CA, I must certify your software is compliant. Tally makes this certification easy for me. It ensures the data you provide is 100% trustworthy.

Here you can take a look on TallyPrime Edit Log features.

Can We Really File GST Returns Without the Portal Headache?

Filing returns used to be a major portal headache. TallyPrime 7.0 has changed that entirely. It uses Connected Services to bridge your books and the government portal.

Tallyprime Key Features:

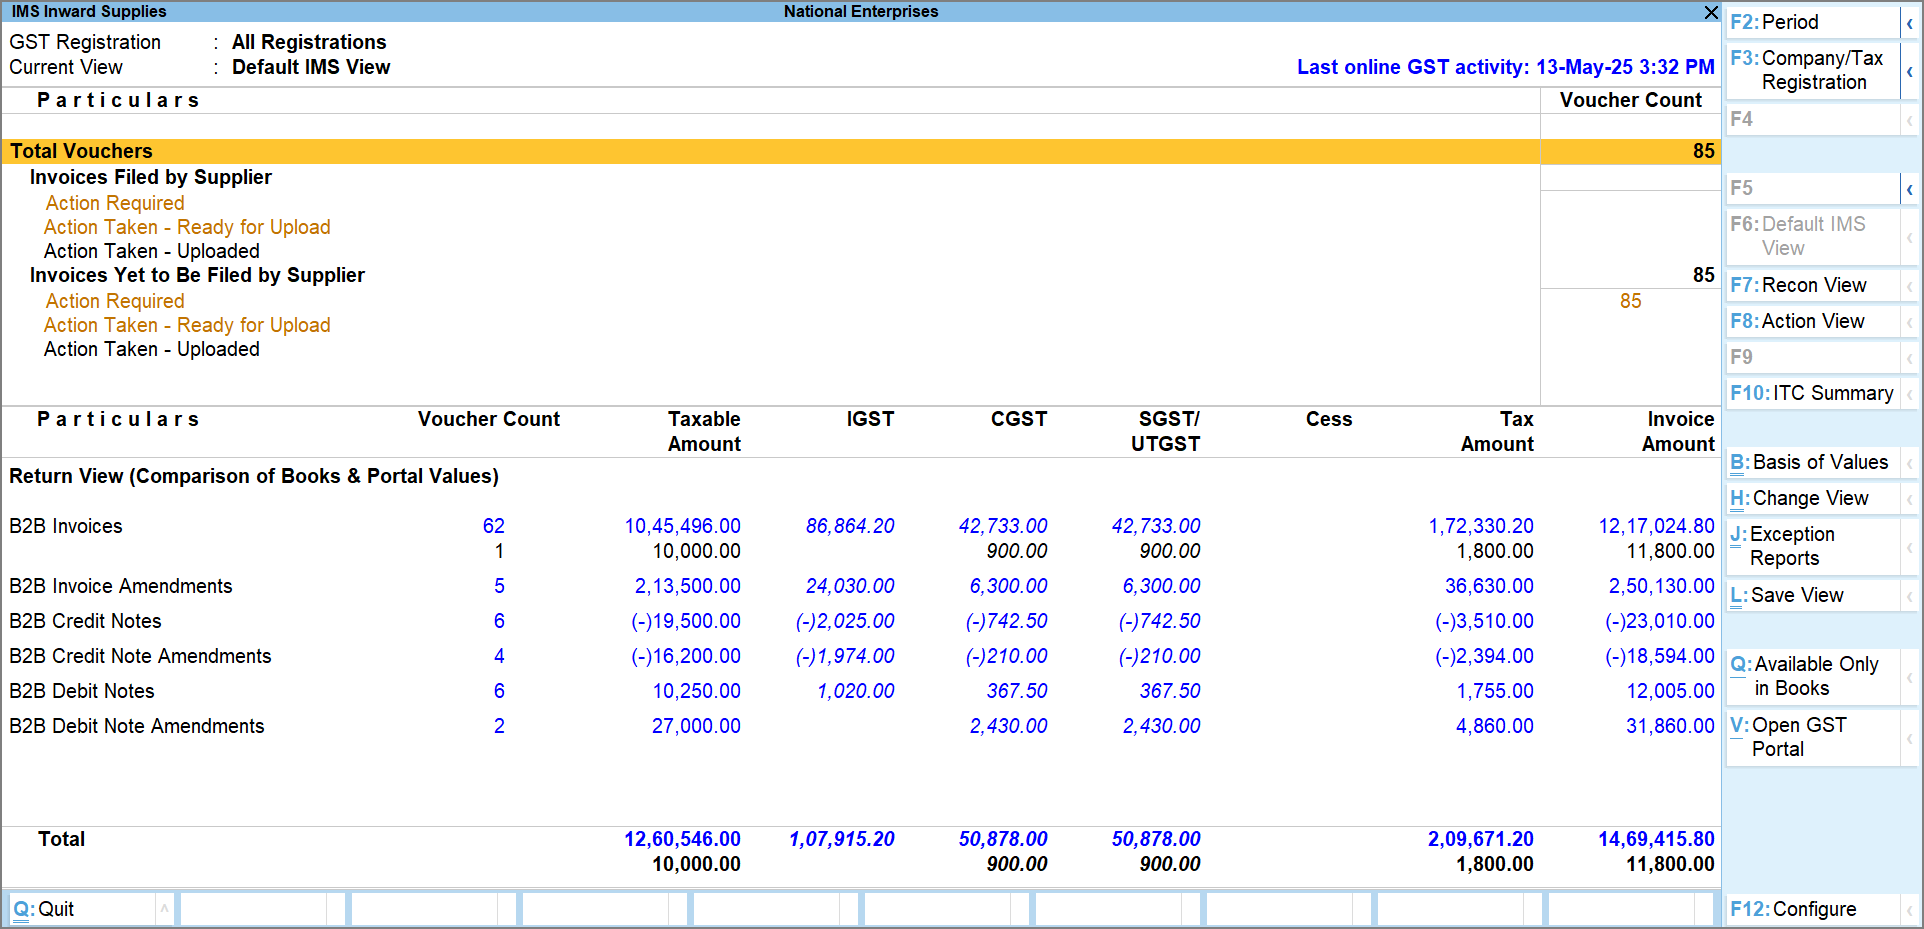
  • Invoice Management System (IMS): You can Accept, Reject, or keep invoices Pending. This happens directly within the IMS dashboard.
  • Error Correction: Tally checks for invalid HSN codes or inactive GSTINs first. It fixes these before you upload data. This prevents the “Processed with Error” status.
  • Seamless Reconciliation:
    • Matches your books with GSTR-2A and GSTR-2B.
    • Handles “Accept/Reject” actions for the IMS.
    • Finds missing or mismatched invoices from suppliers instantly.

Read more about GST Invoice Management System
Invoice Management System (IMS)

How Do I Manage 50+ Clients Without Getting Confused?

Managing 50 clients requires a system that never buckles. TallyPrime’s Multi-Company capabilities are designed for this. I can use different data for every single client.

I can switch from a Delhi manufacturer’s Balance Sheet to a Mumbai trader’s GST report. It takes just seconds. It keeps my workflow fast and my data organized. I can load multiple clients data in single tally screen.

What If My Client Is Growing or Working Remotely?

TallyPrime scales as your business grows. It is no longer stuck to one desk.

  • TallyPrime Gold (Multi-user): Many people can work at the same time. One person does billing while another checks stock.
  • Cloud & Browser Access: I use Tally on Cloud to work from anywhere. I check reports on my mobile phone while traveling.
  • Data Synchronization: You can sync data between the head office and factories. Just use Ctrl+A to save and sync instantly.

Conclusion: My Final Checklist for You

Choosing software is a big decision for any SME. Use this checklist to stay protected:

  • Does it have an un-editable Audit Trail?
  • Is it GST-ready with e-invoicing and IMS support?
  • Can your CA access it remotely for fast audits?

Software should be your partner, not your problem. Trust me on this.

Also read How to Streamline Purchase Approvals and Vendors Payments in TallyPrime

——————————————————————————–

FAQs (The Common Questions I Get)

Q1: Is TallyPrime slow with large data?
Answer: No. However, you must use SSD is a performance killer. Also, keep 8-16 GB of RAM for smooth billing.

Q2: Can I delete the Edit Log?
Answer: No. MCA rules require a permanent log. Tally prevents anyone from disabling or deleting it.

Q3: Does Tally work for international clients?
Answer: Yes. It supports multi-currency and exchange rates. This is essential for foreign trade.

Q4: What is TSS?
Answer: Tally Software Services is your subscription for upgrades new features.

Q5: Can I see reports on my phone?
Answer: Yes. Use browser access to see live data. It is secured via the Tally.NET server.

“I don’t just use TallyPrime to record entries; I use it to give my clients peace of mind during audit season.”
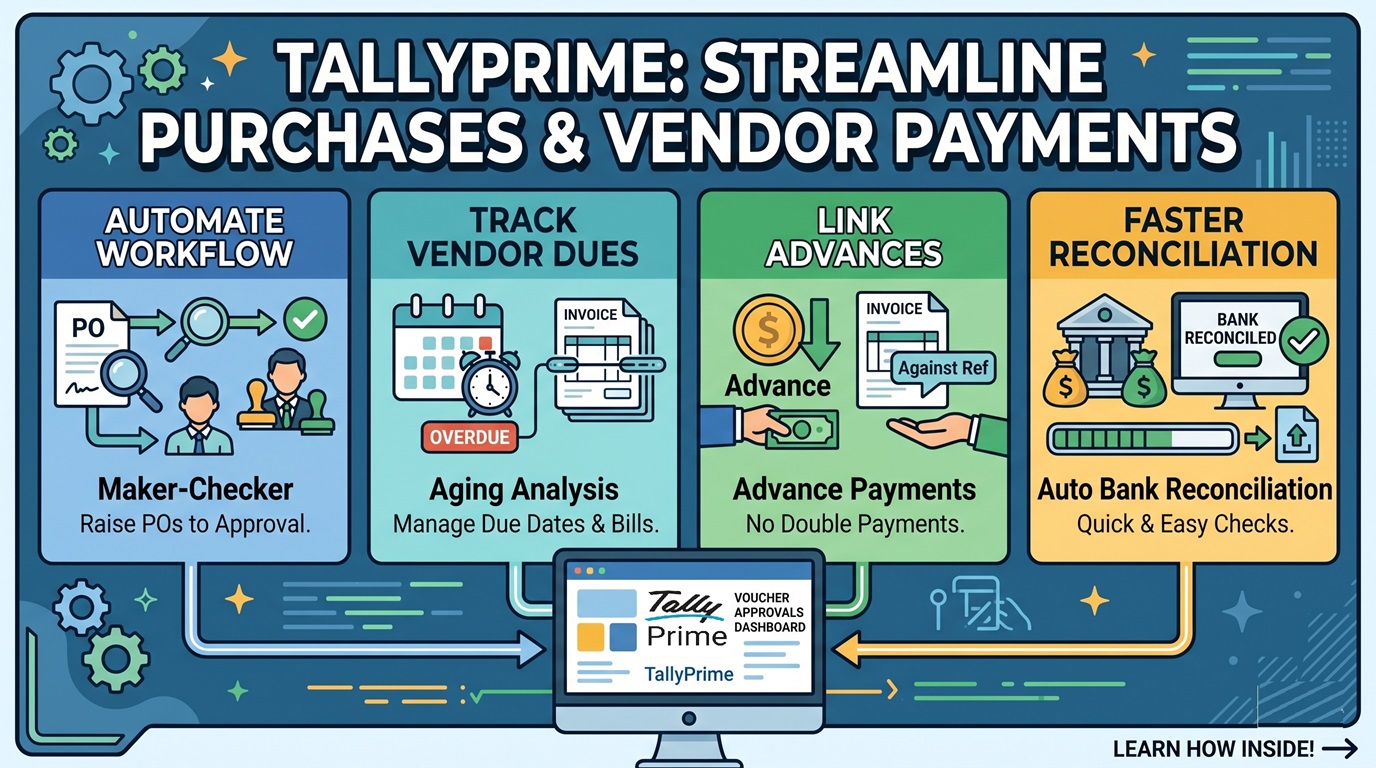
Streamline Purchase Approvals and Vendor Payments in TallyPrime

How to Streamline Purchase Approvals and Vendor Payments in TallyPrime

TL;DR

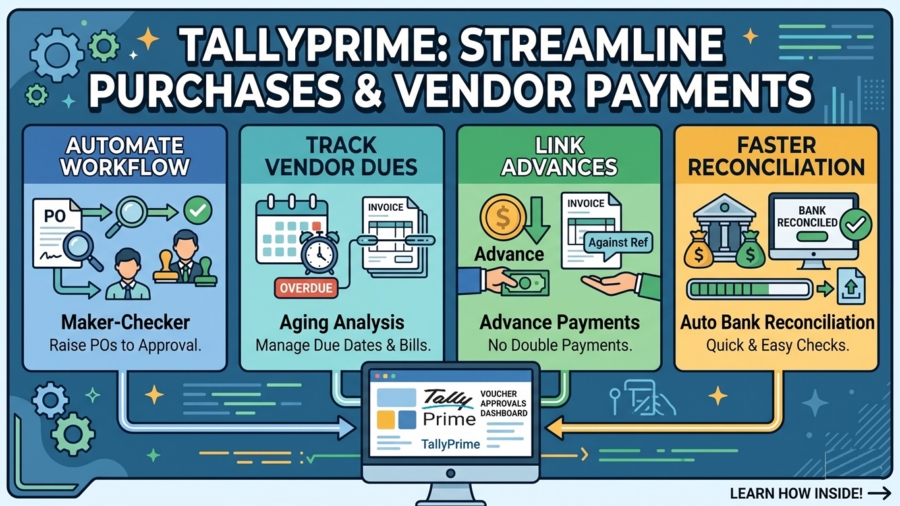
Streamline Purchase Approvals and Vendor Payments in TallyPrime is the best way to keep your business healthy and audit-ready. By using the TallyPrime built-in features, you can:

  • Automate your workflow: Seamlessly move from raising a Purchase Order (PO) to manager approvals.
  • Eliminate errors: Prevent double payments and catch billing mistakes before they affect your cash flow.
  • Track everything: Keep a sharp eye on due dates and manage vendor advances for raw materials or spare parts without losing the trail.
  • Save time: Features like Auto Bank Reconciliation and Potential Matches turn hours of manual checking into a few minutes of stress-free work.

Introduction: Streamline Purchase Approvals and Vendor Payments in TallyPrime

In my years managing accounts for diverse industrial units and dealerships, I’ve seen how messy paper-based bills can get. It usually starts with a forgotten invoice for raw materials buried under a stack of papers and ends with a panicked call from a supplier about an overdue payment. The stress comes from manual tracking errors, the confusion of managing multiple advances for spare parts, and the uncertainty of not knowing exactly how much cash is leaving the business next week.

I want to show you how I use TallyPrime to turn this chaos into a smooth, professional process.

Streamline Purchase Approvals and Vendor Payments in TallyPrime

Purchase Order in TallyPrime

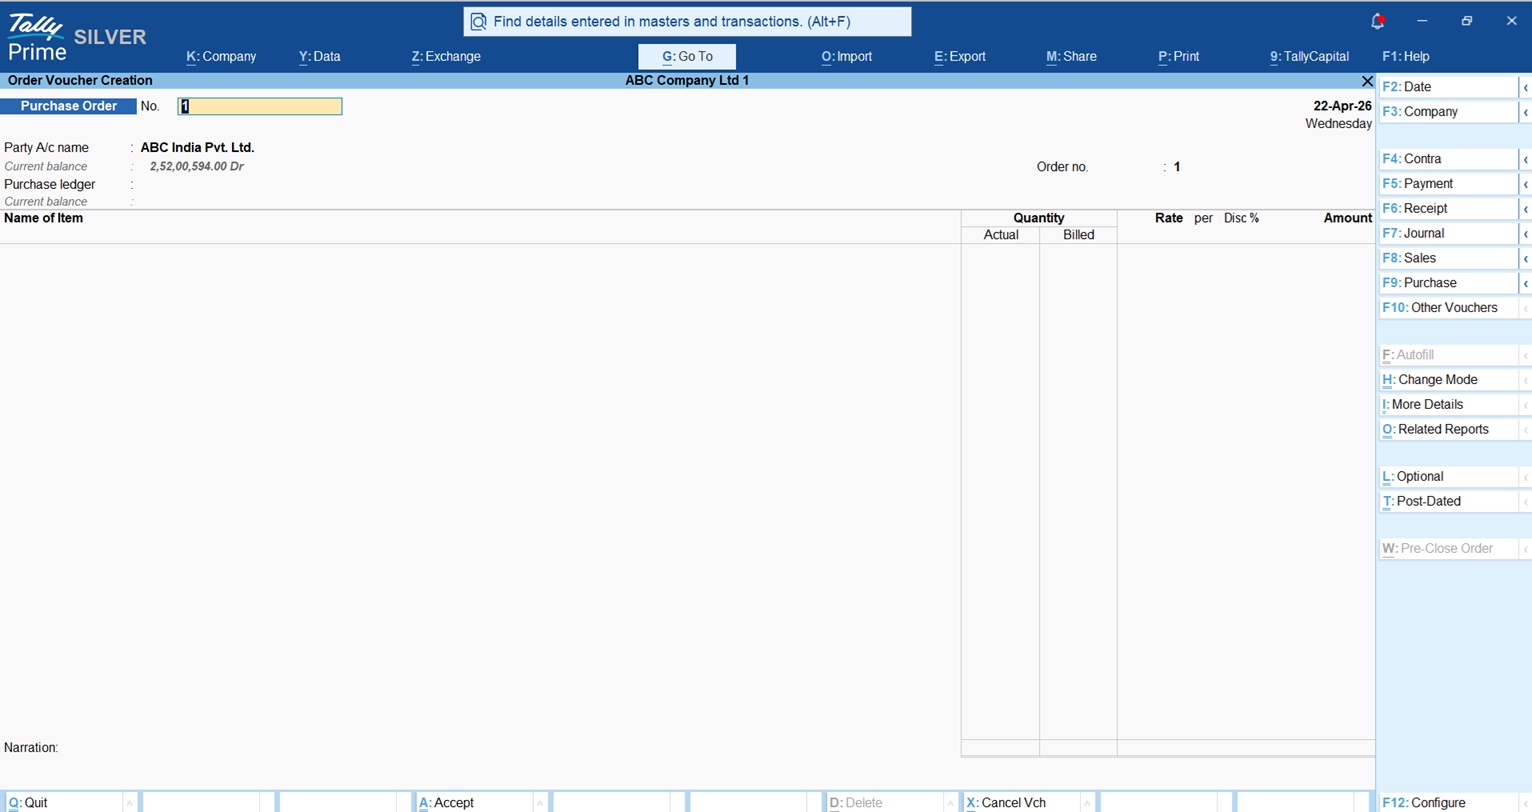
The journey begins with a Purchase Order (PO). Whether you are ordering a consignment of steel for a factory or specific spare parts for a dealership, a PO is your formal “demand” to the supplier. It ensures both parties are on the same page regarding quantity and price.

How to activate and record a PO:

  1. Go to the Gateway of Tally and select Vouchers.
  2. Press F10 (Other Vouchers).
  3. By default, POs are often inactive. Click Show Inactive to see the full list.
  4. Select Purchase Order and click Yes to activate it.
  5. Enter your vendor’s name, the “Due on” date for your items, and the specific items required.
Streamline Purchase Approvals and Vendor Payments in TallyPrime

Pro Tip: Remember, a Purchase Order is an “Inventory Voucher.” It helps you track what you’ve ordered versus what you’ve received, but it does not affect your bank balance or accounting ledgers until you record the actual purchase bill.

Set up an approval workflow in TallyPrime

I always recommend a “Maker-Checker” system for any growing unit. This means a junior staff member (the Maker) creates the entry, and the manager or owner (the Checker) reviews it before it is finalized. This gives you peace of mind that you don’t have to be tied to your desk to ensure mistakes aren’t being made.

This is the simplest way to create a “Maker-Checker” flow.

  1. The Maker’s Role: When the data entry person (the Maker) creates a voucher, they must press Ctrl + L to mark it as an Optional Voucher or from security control you can allow user to create only Optional Vouchers. This entry stays in Tally but does not affect your accounts or bank balance yet.
  2. The Checker’s Role: You (the Checker) go to Display More Reports > Exception Reports > Optional Vouchers. Review the entries. If everything looks good, open the voucher and press Ctrl + L again to remove the “Optional” tag and save it. Now, the entry is official and hits your books.
Streamline Purchase Approvals and Vendor Payments in TallyPrime

Using TallyPrime, you can assign “Data Entry” roles to junior staff through Users & Security. As the owner, you can use Remote Access via Tally.NET to log in from your home or even while traveling to see the Voucher Approvals dashboard. You can review the entry, check the amounts, and then can save the vouchers with Ctrl + L to remove optional tag.

How do I track exactly what I owe and when it’s due?

The secret to organized accounts is Bill-wise Details. If you don’t turn this on, you’re just looking at a total balance, which is useless when a vendor asks about a specific invoice from two months ago.

Setting it up:

  • Press F11 (Features) and set Enable Bill-wise entry to Yes.
  • In your vendor’s Party Ledger, ensure Maintain balances bill-by-bill is also set to Yes.
  • Specify a Default Credit Period (e.g., 30 days).

TallyPrime now automatically calculates the due date for every bill.
Expert Tip: Since TallyPrime Release 5.0, you can see the Due Date column directly in the Bill-wise details screen when you are making a payment. This allows you to settle the oldest bills first and avoid late-payment friction with your suppliers.

Understand More About Bill Wise Details In TallyPrime

What’s the best way to handle advance payments to vendors?

In industries like manufacturing or dealerships, we often pay an advance for custom orders—like a specific set of tractor spare parts. In TallyPrime, I record this using a Payment Voucher.

When you enter the amount, the Bill-wise Details screen pops up. You must select Advance. Give it a reference (like “ADV-101”). When the final bill arrives, you select Against Ref in the Bill-wise screen and link it to that specific advance. Tally will automatically calculate the remaining balance, ensuring you never pay the same amount twice.

Download Paid and Pending Bill Wise Detail TDL for TallyPrime

How can I see a “bird’s-eye view” of my vendor debts?

I use the Aging Analysis report to understand the “age” of my debts. This helps me prioritize payments—are we falling behind on 90-day old bills, or is most of our debt fresh?

Report NameWhat it tells me
Purchase Bills PendingTracks mismatches: Goods received without a bill, or bills received without the goods arriving.
Ledger OutstandingsA detailed list of every unpaid bill for a specific vendor, including overdue days.
Group OutstandingsSummarizes what you owe by category (e.g., “Raw Material Suppliers” vs “Service Providers”).
Aging AnalysisA summary showing how long bills have been overdue across buckets (0-15, 15-30 days).

Way to make bank payments faster in TallyPrime

Reconciling your bank statement manually is a chore I wouldn’t wish on anyone. With TallyPrime Auto Bank Reconciliation, you simply press Alt + O to import your bank statement.

TallyPrime automatically matches transactions by amount and instrument number. If a transaction doesn’t find an exact match, don’t worry, use Alt + S (Potential Matches). Tally will suggest likely candidates based on the date and amount, letting you reconcile them with a single click. This turns a stressful monthly activity into a quick, five-minute task.

Conclusion: My Checklist for a Smoother Office

To get your office running like a smooth machine, here is my personal action plan for you to implement today:

  1. Enable Bill-wise details in F11 and set credit periods for all key suppliers.
  2. Activate Purchase Orders for every order of raw materials or stock.
  3. Use Voucher Approvals to establish a “Maker-Checker” flow for all payments.
  4. Review the Aging Analysis report weekly to manage your cash flow effectively.
  5. Import your bank statement weekly and use “Potential Matches” to stay reconciled.

In my experience “Good accounting isn’t just about recording numbers; it’s about knowing exactly where your cash is at any moment.”

——————————————————————————–

FAQs

1. Can I adjust multiple advances against one bill? Yes. In the Bill-wise Details screen of your purchase invoice, you can select “Against Ref” multiple times to link various separate advance payments to that single bill.

2. Is GST applied to advances for services? Yes. Under current rules, GST liability for services arises at the time the advance is received. You must record a receipt voucher and report it in your GST returns.

3. What is a “3-way match”? It is an audit process where you compare three documents, the Purchase Order, the Receipt Note (GRN), and the Supplier’s Invoice to ensure quantities and prices are 100% consistent.

4. Does TallyPrime show me bills where the goods haven’t arrived yet? Yes. The Purchase Bills Pending report tracks two scenarios: Goods received but bills not received, and bills received where the inventory (Receipt Note) is still pending.

manage fabric stock

How to Manage Fabric Stock, GST and Dealer Billing Every Day on TallyPrime?

TL;DR

Running a textile business shouldn’t feel like a knot of thread. In TallyPrime these three expert moves can solve your problems:

  • Inventory Automation: Use Alternate Units to track fabric in both meters and rolls. This handles “shrinkage” perfectly because you can override the weight during the actual entry.
  • Production Control: Use a Bill of Materials (BOM) to turn raw fabric into finished garments automatically. One entry in the Manufacturing Journal updates your stock and calculates your true cost (including wages and power).
  • Billing & Collections: Use Bill-wise Details to link payments to specific invoices, ending the “On Account” confusion. Connected GST features handle the tax slabs and e-invoicing in seconds.

Introduction: Manage Fabric Stock, GST and Dealer Billing Every Day on TallyPrime

In my years working as an accountant with textile wholesalers and retailers, I’ve found that manage fabric stock shouldn’t be a frustrating or complicated task. You can easily manage Fabric Stock, GST, and Dealer Billing every day on TallyPrime with just these moves. Here is a simple guide to automating your textile business so you can spend less time reconciling and more time growing. 

manage fabric stock

Why Manage Fabric Stock, GST and Dealer Billing Every Day on TallyPrime?

In my years working as an accountant with textile wholesalers and industrial units, I’ve seen how messy fabric rolls and GST rates can get. I once had a client who couldn’t tell which of his 50 dealers had actually paid for a massive Diwali shipment because every payment was recorded as “On Account.” It was a nightmare of manual reconciliation.

If you are struggling with fabric shrinkage, different GST rates for shirts vs. synthetic cloth, or knowing exactly what’s sitting in your warehouse, you aren’t alone. TallyPrime simplifies these into a single, smooth workflow. By managing your stock, taxes, and billing every evening, you turn your data from a “headache” into a clear map for growth.

How Do I Organize Fabric Stock by Meters and Rolls?

The secret to a clean textile setup is organizing your “Inventory Masters” correctly before you even record your first sale.

Organize Your Godowns First

I always tell my clients: separate your physical locations in the software. Create a Raw Material Section for your fabric rolls and a Finished Goods Section for your ready-to-sell items. If you don’t do this, your Stock Summary will be a jumble that makes no sense.

The “Hidden Gem”: Alternate Units for Shrinkage

Textiles are tricky because you buy in rolls/bags but sell in meters/kgs.

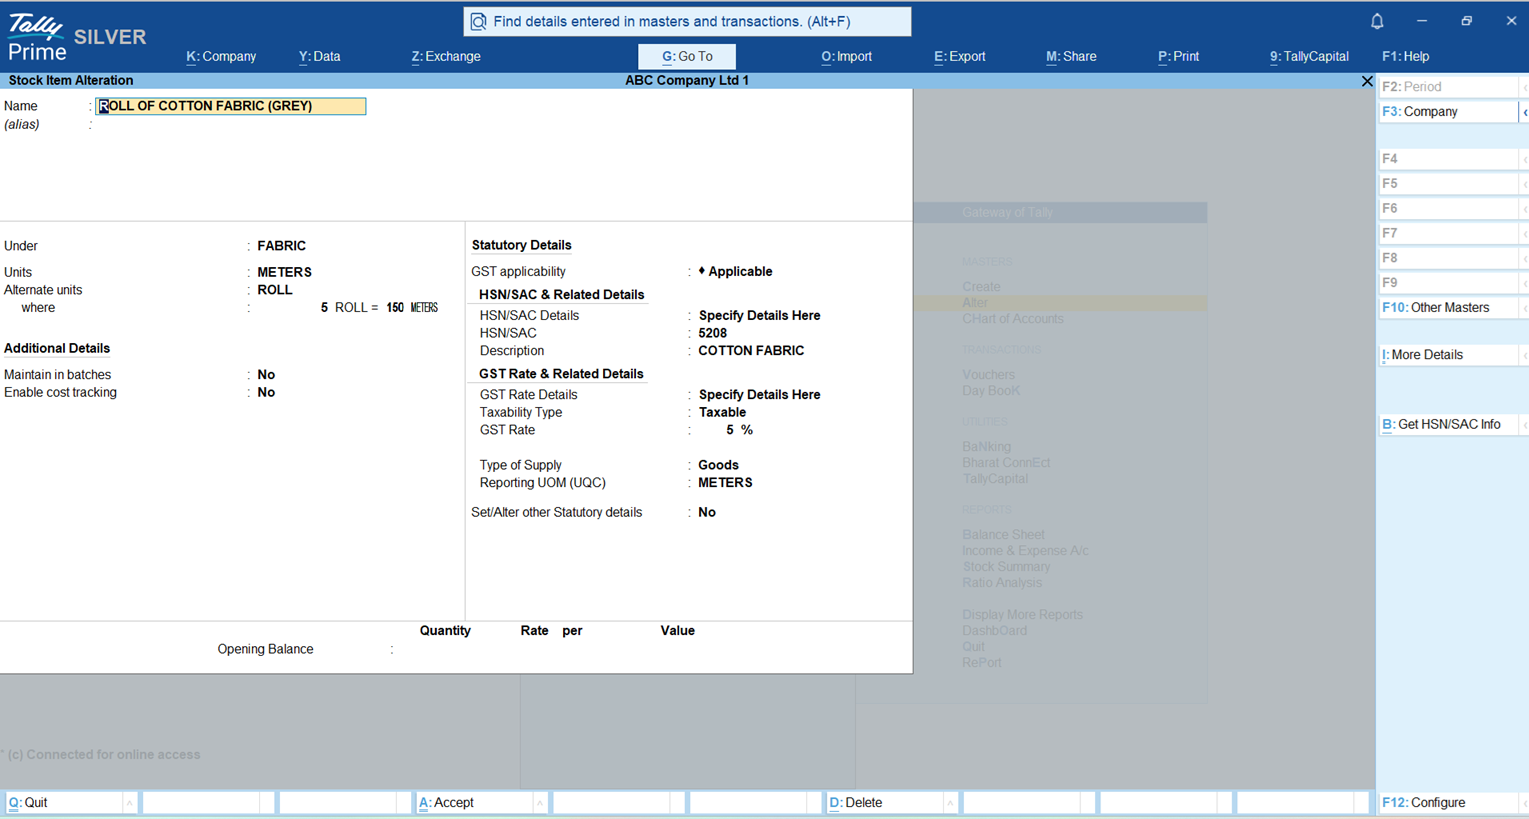
  • The Master Setup: Go to Create > Stock Item, press F12, and enable “Use Alternate Units.” You might set 1 Bag = 50kg as your standard.
  • The Expert Trick: In the real world, a bag of rice or a roll of fabric might arrive at 48.5kg instead of 50kg due to spillage or shrinkage. Do not change your master! Tally allows you to override this during the voucher entry. You simply type “148kg = 3 Bags” in the quantity field. Tally recalculates the rate instantly, keeping your inventory 100% accurate.
manage fabric stock

How Do I Handle Different GST Rates for Each Fabric?

GST in textiles is a moving target. As an expert, I stay on top of both current rates and the latest proposals from the GST Council.

Simplified Textile Tax & HSN Guide (2025-2026)

Item TypeHSN CodeCurrent GST RateProposed 2026 Rate (GoM)
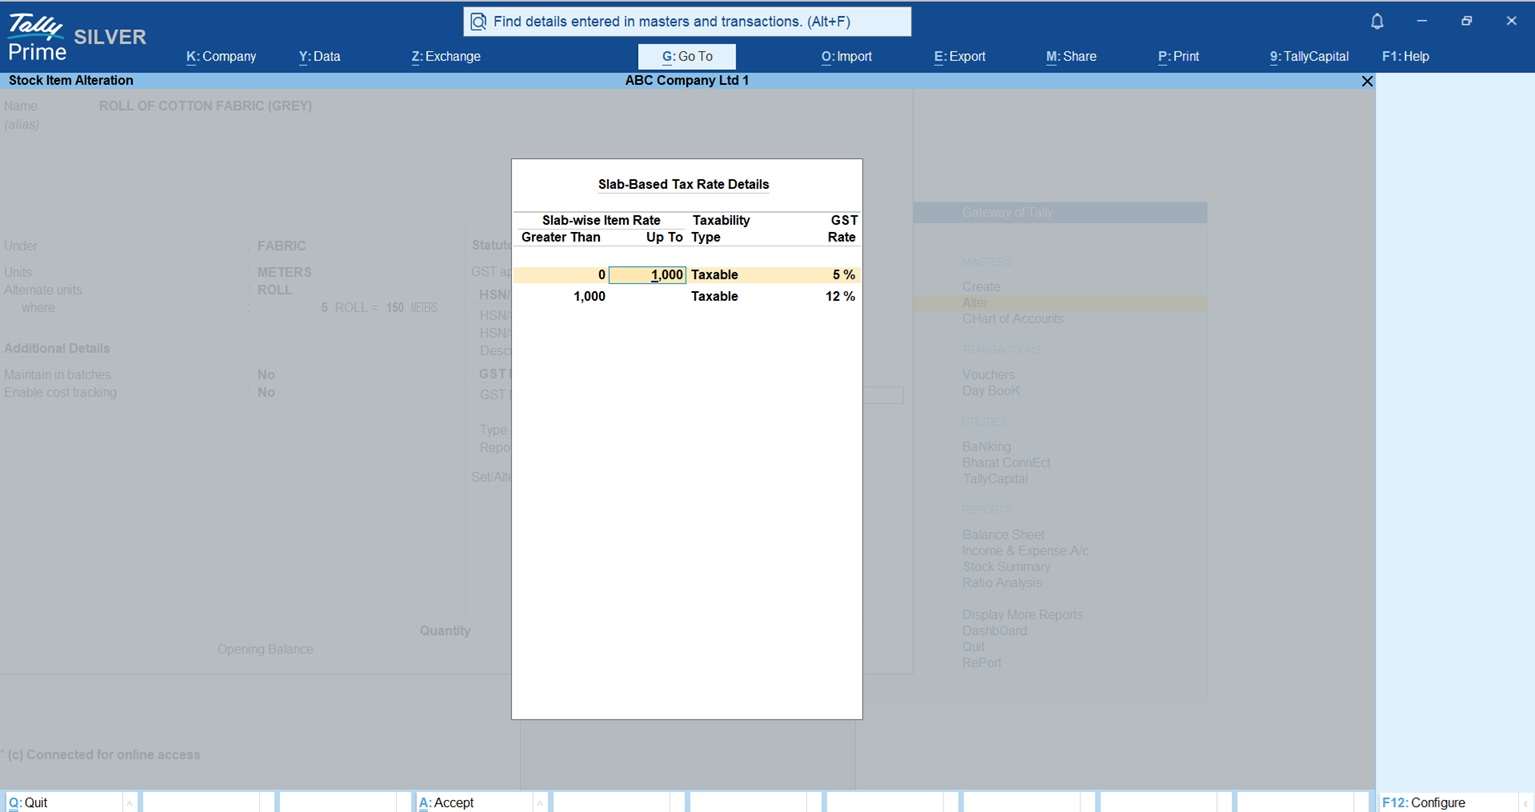
Apparel < ₹1,00061/625%5% (Up to ₹1,500)
Apparel > ₹1,00061/6212%12% (₹1,500 – ₹10,000)
High-Value Apparel61/6212%18% (Above ₹10,000)
Cotton Fabrics52085%5%
Synthetic Fibers540718%18%
Raw Cotton52015% (Reverse Charge)5% (Reverse Charge)
  • Reverse Charge (RCM): Remember, for raw cotton, the buyer pays the 5% tax directly to the government.
  • Exemptions: Raw jute and raw silk are 100% exempt. You don’t even need to register if you only deal in these.

Expert Tip: “Set your GST rates and HSN codes at the Item level once. If the price of a shirt changes from ₹900 to ₹1,100, Tally will automatically switch the tax from 5% to 12% without you lifting a finger.”

manage fabric stock

What is the Secret to Fast Daily Dealer Billing?

Speed is everything when a dealer is waiting for an invoice. The secret is Bill-wise Accounting.

Stop the “On Account” Mess

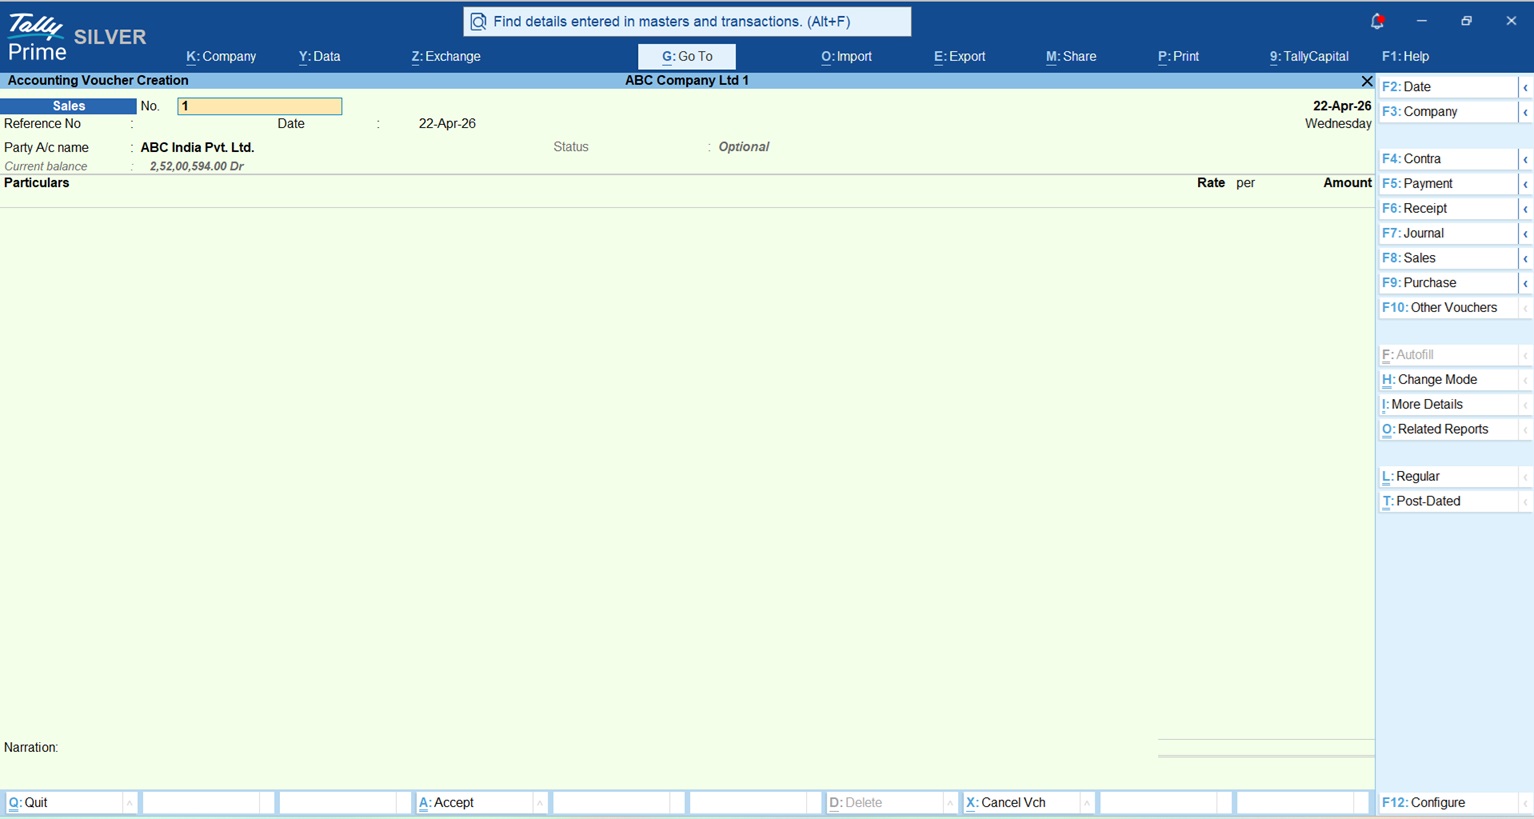
When you record a sale (F8), Tally asks for a “Reference.”

  1. New Reference: Use this for the invoice you just made.
  2. Against Reference: Use this when the dealer pays you later.

By linking the payment to the specific bill, you avoid the “On Account” trap where you have money in the bank but no idea who still owes you for what.

E-Invoicing & E-Way Bills

If you’re a large wholesaler, TallyPrime is “Connected.” This means it generates the IRN and QR code for E-Invoices and your E-Way Bills directly from the sales screen. No more jumping between the portal and your books.

Can Tally Help Me Track My Production Profits?

If you manufacture garments, you need to know your “Landing Cost.”

The BOM

Use the Bill of Materials (BOM) to define exactly what goes into a “Cotton Shirt”:

  • 2.2 Meters of Cotton Fabric (HSN 5208)
  • 7 Buttons + 1 Label + 1 Poly Bag

Read this Detailed post on Bill of Materials (BOM) – Definition, Examples, Format and Types

The Manufacturing Journal

Every evening, record what you produced. When you type “100 Shirts,” Tally automatically deducts the fabric and buttons from your “Raw Material” Godown and adds 100 shirts to your “Finished Goods” Godown.

Pro-Tip: Don’t forget to add Additional Costs like tailoring wages (e.g., 5% or a flat ₹50/shirt) and factory electricity in the journal. This gives you the actual cost per shirt, helping you set a selling price that guarantees profit.

Which Reports Should I Check Every Evening?

I tell all my clients to check these five reports before they leave the office:

  1. Stock Summary: See exactly how many meters and rolls are left. If the balance looks wrong, 9 times out of 10, someone picked the wrong Godown during entry.
  2. Outstanding Receivables: Your daily “Collection List.” See who is overdue and call them.
  3. Cash/Bank Book: Verify that the day’s physical cash matches the software.
  4. Profit & Loss A/c: Check your gross margins. Are your production costs eating your profits?
  5. GSTR-1 Report: Ensure all sales entries are clean and ready for the next tax filing.

This GST Summary TDL will help you in GSTR-1 Reports Check

Conclusion: My Final Checklist for Success

Textile accounting is a discipline, not a chore. Follow this daily checklist for a stress-free month-end:

  • Record all fabric purchases as soon as they hit the gate.
  • Enter your Manufacturing Journals daily to keep stock counts real.
  • Always use “Against Reference” for dealer payments to keep your balance sheet clean.

Frequently Asked Questions (FAQs)

1. What if my fabric roll length is shorter than the invoice due to spillage? Use the Alternate Units override during the Purchase entry. If 1 roll was supposed to be 100m but is actually 96m, enter “96m = 1 Roll” in the quantity field. Your stock stays accurate.

2. How do I handle the 5% tax on raw cotton? Set the Stock Item for Raw Cotton to “Is Reverse Charge Applicable? Yes” with a 5% rate. Tally will calculate the tax you need to pay the government on behalf of the farmer/supplier.

3. Can I see my profit for just one specific type of shirt? Yes! Check the Stock Item Profitability report. It compares your manufacturing cost (including labor/wages) against your sale price to show your exact margin.

4. Why is my stock showing a negative quantity? This usually happens when you sell a finished shirt before you have recorded the Manufacturing Journal. Always record your production before you record the sale!

5. How do I track stock across different branch warehouses? Use the Godowns feature to create hierarchy (e.g., Main Branch > Warehouse A). You can move stock between them using a Stock Transfer Journal.

TallyPrime Advanced Dashboard

TallyPrime Advanced Dashboard: Every Report, One Click Away

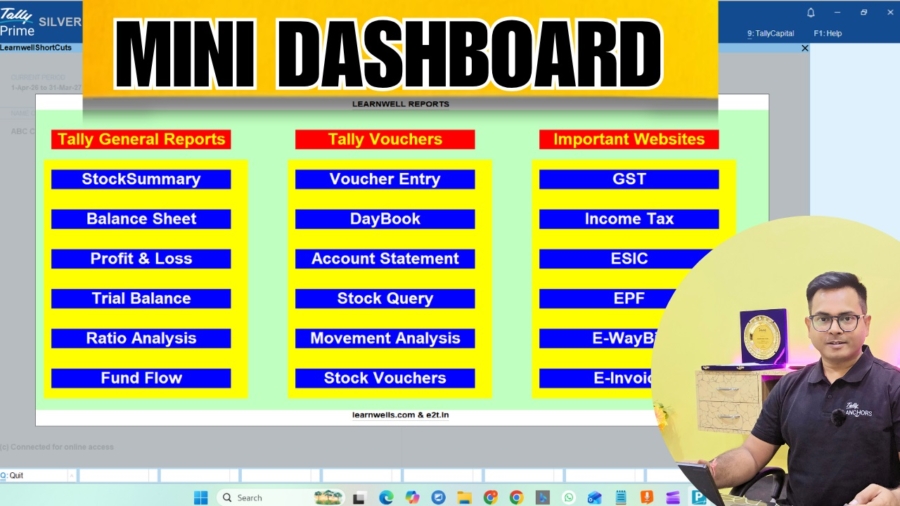
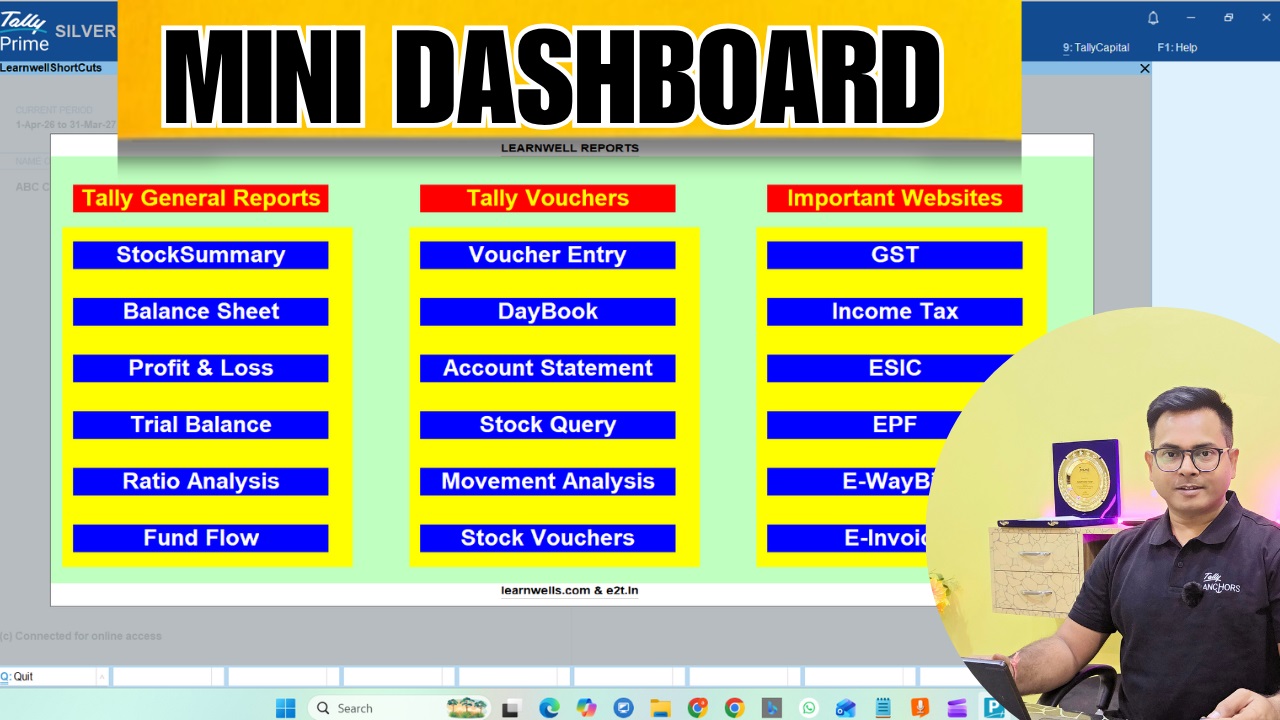
This TallyPrime Advanced dashboard isn’t just a list of links; it’s a productivity powerhouse designed for the modern accountant. Instead of digging through “Go To” or “Gateway of Tally,” you get a professional, visual interface right inside your workspace.

What’s Included in TallyPrime Advanced Dashboard?

  • Advanced Logic: I’ve integrated a custom drill-down system to open specific reports (like GSTR Summaries) using precise Report IDs for faster reconciliation.
  • Tally General Reports: Instant access to Stock Summary, Profit & Loss, Trial Balance, and Ratio Analysis.
  • One-Touch Vouchers: Jump straight into Voucher Entry, DayBook, or advanced Stock Queries without the usual menu-hopping.
  • Essential Web Links: Direct “Browse” buttons for the GST Portal, Income Tax, MCA, ESIC, and E-Way Bill—no more typing URLs in your browser.
TallyPrime Advanced Dashboard

Get Your Free TallyPrime Advanced Dashboard TDL & TCP File

I believe in empowering the accounting community. You can download the Demo TDL Source Code to learn how it’s built, or simply grab the Full TCP File to start using it immediately.

Also download this amazing ledger advance statement TDL

;; ===== LW_Report Definition =====
[#Menu: Gateway of Tally]
    Add : Item : Before : @@locQuit : "Adavnce Report" : Display : LW_MyReport
[Report: LW_MyReport]
    Form    : LW_MyForm
    Title   : "Custom Report"

[Form: LW_MyForm]
    Part    : LW_MyPart
    Width   : 80% Page
    Height  : 80% Page

[Part: LW_MyPart]
    Line    : LW_MyLine1,LW_MyLine2
    Background	: green

[Line: LW_MyLine1]
    Field   :LW_NewField,LW_NewField2


[Line: LW_MyLine2]
    Field   : LW_MyLine1_Field1, LW_MyLine1_Field2

[Field: LW_MyLine1_Field1]
    Use     : Name Field
    Set as  : "My Reports"
    Width   : 20

[Field: LW_MyLine1_Field2]
    Use     : Name Field
    Set as  : "Stock Summary"
    Key	: LearnwellStockSummary
    Width   : 20
    Style	: MyBoldBlue
    Background	: Red
    Color	: white
    Width	: 30

[Field: LW_NewField]
    Use     : Name Field
    Set as  : "Website"
    Width   : 20

[Field: LW_NewField2]
    Use     : Name Field
    Set as  : "Website"
    Key	: LearnwellWebsite
    Style	: MyBoldBlue
    Background	: Blue
    Color	: white
    Width	: 30
[Key	: LearnwellWebsite]
    Key	: LeftClick
    Action:BrowseURL:"https://learnwells.com/"

[Key	: LearnwellStockSummary]
    Key	: LeftClick
    Action:display:Stock Summary

[Style: MyBoldBlue]
    Font     : "Arial"
    Bold     : Yes
    Height	: 20

Installation is Easy:

  1. Open TallyPrime.
  2. Press F1 (Help) > TDLs & Add-ons.
  3. Press F4 (Manage Local TDLs).
  4. Set “Load TDL on Startup” to Yes and select the downloaded file.
  5. Your new Learnwell Mini Dashboard panel is ready to go!

You can get more TallyPrime TDL Files on Engage to tech

Join Tally TDL Course on Learnwell


Keywords: TallyPrime Free TDL, Tally Shortcuts Dashboard, Accountant Productivity Tool, Learnwell TDL, Free TCP File Download, Tally GST Shortcut, TallyPrime 7.0 Customization, Excel to Tally Automation.

TDL for TallyPrime

Detailed Ledger TDL for TallyPrime: All Master Info on One Screen!

With this Detailed Ledger TDL for TallyPrime you will find All Master Info on One Screen. If you use Tally Prime daily for accounting, you already know the frustration of opening ledger masters one by one just to check a client’s address, verify a GST number, or find a mobile number. It is a time-consuming process that interrupts your workflow.

But what if you could see all that crucial information perfectly organized on a single screen?

Today, we are thrilled to share a 100% Free Detailed Ledger TDL that solves this exact problem.

Why You Need This Detailed Ledger TDL for TallyPrime

By default, Tally Prime requires you to drill down into individual ledgers to view specific master details. This custom TDL alters that behavior by generating a comprehensive, wide-view report of all your ledgers.

At a single glance, you can now track and verify:

  • Ledger Name & Alias
  • Parent Group (e.g., Sundry Debtors, Indirect Expenses)
  • Complete Address (Address 1 & Address 2)
  • State
  • Mobile Number
  • PAN Number
  • GST Type & GST Number
  • Opening Balances

Whether you are conducting a quick audit, preparing for GST filing, or just trying to clean up your data, this all-in-one view is an absolute game-changer.

Created Effortlessly with Learnwell’s TDL Studio

You might be wondering how many lines of complex code it took to build this multi-column report. The answer? Zero hand-coding.

This entire detailed ledger report was generated using Learnwell’s TDL Studio. If you have ever wanted to customize Tally Prime for your specific business needs but felt intimidated by TDL programming, our TDL Studio bridges that gap. It allows you to design powerful, custom reports visually and effortlessly.

JOIN TDL COURSE

How to Load the Free TDL in Tally Prime

Ready to save time? Follow these simple steps to activate the report in your system:

;; ===== LW_Batch Scaffold =====

;; Reports
[#Menu: Gateway of Tally]
    Add : Item : Before : @@locQuit : "DETAILED LEDGER" : Display : LW_Report1
[Report: LW_Report1]
    Form    : LW_Form1
    Title   : "Custom Report 1"
    ;; -- Report attributes (relevant)
    ;; Use : DSP Template
    ;; Variable : SVFromDate, SVToDate
    ;; Set : SVFromDate : $$Date
    ;; Print Set : Report Title : "Trial Balance"

;; Forms
[Form: LW_Form1]
    Part    : LW_Part1
    Width   : 100% Page
    Height  : 100% Page
    ;; -- Form attributes (relevant)
    ;; Add : Part : At Beginning : MyPart
    ;; Delete : Part : OldPart
    ;; Buttons : Print Button, Export Button
    ;; Key : Ctrl+P : Print
    ;; On : Form Accept : $$IsEmpty:#MyVar

;; Parts
[Part: LW_Part1]
    Line    : LW_Part1_Line1_Heading, LW_Part1_Line1_Body
    Repeat  : LW_Part1_Line1_Body : LW_Collection1
    Scroll  : Vertical

    ;; -- Part attributes (relevant)
    ;; Add : Line : At End : MyLine
    ;; Delete : Line : OldLine
    ;; Break On : $$IsEmpty:$Name
    ;; Space Top : 1
    ;; Space Bottom : 1
    Common Border : Yes
    ;; Background : Yellow
    ;; Border : Thin Box
    ;; Total : Field1, Field2

;; Lines
[Line: LW_Part1_Line1_Heading]
    Field   : LW_Field1, LW_Field2, LW_Field3, LW_Field4, LW_Field5, LW_Field6, LW_Field7, LW_Field8, LW_Field9, LW_Field10, LW_Field11, LW_Field12
    Local   : Field : LW_Field1 : Info : "SR.No"
    Local   : Field : LW_Field2 : Info : "Ledger Name"
    Local   : Field : LW_Field3 : Info : "Alias"
    Local   : Field : LW_Field4 : Info : "Parent"
    Local   : Field : LW_Field5 : Info : "Address1"
    Local   : Field : LW_Field6 : Info : "Address2"
    Local   : Field : LW_Field7 : Info : "State"
    Local   : Field : LW_Field8 : Info : "Mobile Number"
    Local   : Field : LW_Field9 : Info : "Pan Number"
    Local   : Field : LW_Field10 : Info : "GST Type"
    Local   : Field : LW_Field11 : Info : "GST NUmber"
    Local   : Field : LW_Field12 : Info : "Opening"
    Local	: field:default:Border	: Thin Box
    ;; -- Line attributes (relevant)
    ;; Option : Alter On Enter
    ;; Option : Explode
    ;; Explode : ExplDetails
    ;; Space Top : 1
    ;; Space Bottom : 1
    ;; Border : Thin Bottom

[Line: LW_Part1_Line1_Body]
    Field   : LW_Field1, LW_Field2, LW_Field3, LW_Field4, LW_Field5, LW_Field6, LW_Field7, LW_Field8, LW_Field9, LW_Field10, LW_Field11, LW_Field12
     Local	: field:default:Border	: Thin Box
    ;; -- Line attributes (relevant)
    Option : Alter On Enter
    ;; Option : Explode
    ;; Explode : ExplDetails
    ;; Space Top : 1
    ;; Space Bottom : 1
    ;; Border : Thin Bottom

;; Fields
[Field: LW_Field1]
    Use     : Number Field
    Set as  :$$Line
    Width   : 5
    ;; -- Field attributes (relevant)
    ;; Type : String
    Align : Left
    ;; Format : "@Alpha"
    ;; Style : Normal Bold
    ;; Border : Thin Bottom
    ;; Table : YesNo
    ;; Inactive : $$IsEmpty:$Name
    ;; Skip : Yes

[Field: LW_Field2]
    Use     : Name Field
    Set as  : $Name
    Width   : 50
    Alter	: Ledger
    ;; -- Field attributes (relevant)
    ;; Type : String
    ;; Align : Left
    ;; Format : "@Alpha"
    ;; Style : Normal Bold
    ;; Border : Thin Bottom
    ;; Table : YesNo
    ;; Inactive : $$IsEmpty:$Name
    ;; Skip : Yes

[Field: LW_Field3]
    Use     : Name Field
    Set as  : $Onlyalias
    Width   : 20
    ;; -- Field attributes (relevant)
    ;; Type : String
    ;; Align : Left
    ;; Format : "@Alpha"
    ;; Style : Normal Bold
    ;; Border : Thin Bottom
    ;; Table : YesNo
    ;; Inactive : $$IsEmpty:$Name
    ;; Skip : Yes

[Field: LW_Field4]
    Use     : Name Field
    Set as  : $Parent
    Width   : 20
    ;; -- Field attributes (relevant)
    ;; Type : String
    ;; Align : Left
    ;; Format : "@Alpha"
    ;; Style : Normal Bold
    ;; Border : Thin Bottom
    ;; Table : YesNo
    ;; Inactive : $$IsEmpty:$Name
    ;; Skip : Yes

[Field: LW_Field5]
    Use     : Name Field
    Set as  : $_Address1
    Width   : 20
    ;; -- Field attributes (relevant)
    ;; Type : String
    ;; Align : Left
    ;; Format : "@Alpha"
    ;; Style : Normal Bold
    ;; Border : Thin Bottom
    ;; Table : YesNo
    ;; Inactive : $$IsEmpty:$Name
    ;; Skip : Yes

[Field: LW_Field6]
    Use     : Name Field
    Set as  :$_Address2
    Width   : 20
    ;; -- Field attributes (relevant)
    ;; Type : String
    ;; Align : Left
    ;; Format : "@Alpha"
    ;; Style : Normal Bold
    ;; Border : Thin Bottom
    ;; Table : YesNo
    ;; Inactive : $$IsEmpty:$Name
    ;; Skip : Yes

[Field: LW_Field7]
    Use     : Name Field
    Set as  : $LedStateName
    Width   : 20
    ;; -- Field attributes (relevant)
    ;; Type : String
    ;; Align : Left
    ;; Format : "@Alpha"
    ;; Style : Normal Bold
    ;; Border : Thin Bottom
    ;; Table : YesNo
    ;; Inactive : $$IsEmpty:$Name
    ;; Skip : Yes

[Field: LW_Field8]
    Use     : Name Field
    Set as  : $LedgerMobile
    Width   : 20
    ;; -- Field attributes (relevant)
    ;; Type : String
    ;; Align : Left
    ;; Format : "@Alpha"
    ;; Style : Normal Bold
    ;; Border : Thin Bottom
    ;; Table : YesNo
    ;; Inactive : $$IsEmpty:$Name
    ;; Skip : Yes

[Field: LW_Field9]
    Use     : Name Field
    Set as  : $IncomeTaxNumber
    Width   : 20
    ;; -- Field attributes (relevant)
    ;; Type : String
    ;; Align : Left
    ;; Format : "@Alpha"
    ;; Style : Normal Bold
    ;; Border : Thin Bottom
    ;; Table : YesNo
    ;; Inactive : $$IsEmpty:$Name
    ;; Skip : Yes

[Field: LW_Field10]
    Use     : Name Field
    Set as  : $Ledgstregdetails[last].GSTRegistrationType
    Width   : 20
    ;; -- Field attributes (relevant)
    ;; Type : String
    ;; Align : Left
    ;; Format : "@Alpha"
    ;; Style : Normal Bold
    ;; Border : Thin Bottom
    ;; Table : YesNo
    ;; Inactive : $$IsEmpty:$Name
    ;; Skip : Yes

[Field: LW_Field11]
    Use     : Name Field
    Set as  : $Ledgstregdetails[last].GSTIN
    Width   : 20
    ;; -- Field attributes (relevant)
    ;; Type : String
    ;; Align : Left
    ;; Format : "@Alpha"
    ;; Style : Normal Bold
    ;; Border : Thin Bottom
    ;; Table : YesNo
    ;; Inactive : $$IsEmpty:$Name
    ;; Skip : Yes

[Field: LW_Field12]
    Use     : Name Field
    Set as  : $OpeningBalance
    Width   : 20
    ;; -- Field attributes (relevant)
    ;; Type : String
    ;; Align : Left
    ;; Format : "@Alpha"
    ;; Style : Normal Bold
    ;; Border : Thin Bottom
    ;; Table : YesNo
    ;; Inactive : $$IsEmpty:$Name
    ;; Skip : Yes

;; Collections
[Collection: LW_Collection1]
    Type    : Ledger
    Fetch   : Name, Parent, ClosingBalance, OpeningBalance
    ;; -- Collection attributes (relevant)
    ;; Child Of : $$GroupName
    ;; Belongs To : Yes
    ;; Filter : MyFilter
    ;; By : Name : $Name
    ;; Sort : Name
    ;; Search Key : $Name
  1. Copy the Free TDL File and Save as Text or .TDL in your computer
  2. Open Tally Prime and click on Help (F1) from the top menu.
  3. Navigate to TDLs & Add-Ons.
  4. Press F4 (Manage Local TDLs).
  5. Set the option “Load selected TDL files on startup” to YES.
  6. Paste the file path of the downloaded TDL file and save the screen.

That’s it! You can now navigate to the new Custom Report menu and view all your ledger details instantly.

Watch the Full Tutorial

Want to see this TDL in action and learn exactly how it was made? Check out our complete walkthrough video on the Learnwell YouTube channel:

https://youtu.be/Ya9fXgrj40E
TallyPrime Android App for Mobile

TallyPrime Android App for Mobile | TallyPrime in Your Pocket: Mobile Access via Learnwell App

TallyPrime Android App for Mobile free for you. In today’s fast-paced business world, being tied to your desk is no longer an option. You need your financial data at your fingertips, whether you are in a client meeting or traveling. While TallyPrime is a powerful desktop software, many users are constantly looking for a reliable TallyPrime Android App for mobile to view their reports on the go.

How to Use the TallyPrime Android App for Mobile Reporting

The good news is that you don’t need expensive cloud servers or complicated setups. You can easily access your Tally data by combining Tally’s built-in “Browser Access” feature with the Learnwell Android App.

TallyPrime Android App for Mobile

Here is a step-by-step guide on how to set this up.

Why Access Tally on Mobile?

  • Instant Updates: Check your Cash Flow, Bank Balance, and Stock Status in real-time.
  • Client Management: View outstanding bills and share invoices directly from your phone.
  • Security: Your data stays safe on your PC; you are only viewing it via a secure connection.

An Interesting interview about TallyPrime upcoming features with MD Tally Solutions Mr. Tejas Goenka sir


Step 1: Connect TallyPrime for Browser Access (Desktop)

Before using the mobile app, you must authorize your company data to be viewable online. This is a one-time setup done on your office computer.

  1. Open TallyPrime and load your company.
  2. Press F11 (Features) and look for “Online Access”.
  3. Set “Enable Browser Access for Reports” to Yes.
  4. Go to the Gateway of Tally, click on Company (Alt+K), and select Connect.
    • Note: Ensure you have a valid Tally.NET ID linked to your license.
  5. Once connected, you will see a small (c) symbol next to your company name. This means your data is now ready to be accessed remotely.

Step 2: Login via Learnwell Android App

Now that your desktop is ready, you can use the Learnwell app as your TallyPrime Android App for mobile interface.

  1. Download & Open the App: Install and launch the Learnwell Android App on your smartphone.
  2. Go to Tally Login: Navigate to the “TallyPrime / Browser Login” section in the app menu.
  3. Enter Credentials: Input your Tally.NET ID (Email) and Password.
  4. Select Your Company: You will see the company you connected in Step 1. Tap on it to open.
  5. View Reports: You can now see your Balance Sheet, Profit & Loss, Daybook, and more, formatted perfectly for your mobile screen.

Find more TDL files on our other website

https://youtu.be/4dUPOye6-YU

Conclusion

Using a TallyPrime Android App for mobile like Learnwell bridges the gap between your office desktop and your smartphone. It gives you the freedom to make informed business decisions anywhere, anytime.

TallyPrime Features

5 Best Game-Changing Upcoming TallyPrime Features That Will Change Your Working Style

These 5 Game-Changing Upcoming TallyPrime Features That Will Change Your Working Style. For decades, Tally has been the cornerstone of Indian business, an indispensable tool for accounting and compliance. But while its reputation is built on reliability and stability, the company is preparing for a monumental leap forward. The platform is undergoing a strategic shift from a trusted “system of record” to a dynamic “system of intelligence and connection.”

Game-Changing TallyPrime Features

In a recent, insightful interview, Tally’s Managing Director, Tejas Goenka, pulled back the curtain on the company’s future roadmap. This is not about minor tweaks; it’s a fundamental reimagining of what Tally can be. Powered by artificial intelligence, deep ecosystem integrations, and a relentless focus on usability, Tally is evolving into an active platform that provides intelligence, automates input, and creates a networked economy. This article breaks down the five most game-changing features from that roadmap that will forever alter how you interact with your business data.

You can buy New TallyPrime here

TallyPrime Features

You’ll Soon Be Able to ‘Talk’ to Your TallyPrime Data

The days of being chained to a desk to run specific reports are numbered. Tally is introducing a conversational AI feature that will allow users to ask direct questions about their business through an app, much like using WhatsApp or a chatbot, effectively turning Tally into a business intelligence front-end. This isn’t a distant promise; Goenka revealed that the first of these AI-powered features are expected to begin rolling out within the next three to four months.

Imagine being on the road and asking your phone: “Who is my best supplier?”, “What is my most profitable item?”, or “What is the sales comparison between last month and this month?”. Tally will provide an instant, secure answer based entirely on your company’s private data. This transforms the software from a passive data repository into an active, on-the-go business assistant. As Goenka explained, the interaction will be simple and direct.

“It’s like a student asking their teacher, ‘Sir, please explain this question to me.’ In the same way, you can ask Tally, ‘Please tell me this thing,’ and Tally will tell you.”

Say Goodbye to Manual Entry: Just Scan Invoices

If conversational AI is the intelligent output of Tally’s new strategy, the next feature is its intelligent input. Tally is set to eliminate one of accounting’s most foundational pain points—manual data entry—with an AI-powered document scanning feature. Users will be able to simply scan any document, such as a supplier invoice, and Tally’s AI will automatically create the corresponding accounting entry.

Crucially, the system will display the scanned invoice side-by-side with the generated entry for quick verification. Goenka emphasized that while Tally is embracing AI, it will do so with its signature commitment to accuracy, ensuring the system is benchmarked for perfection before release, because in accounting, “a wrong answer is never an option.” This feature represents a revolutionary leap in efficiency, freeing up countless hours for accountants to focus on analysis rather than transcription.

The Ultimate Connectivity: Sending Invoices Directly from Tally to Tally – Feature of TallyPrime 7.0

Through a landmark collaboration with NPCI (the organization behind UPI), Tally is launching “Bharat Connect” to build a truly connected business network. This is a powerful ecosystem play designed to generate a significant network effect, moving beyond single-company accounting to streamline the national B2B landscape.

The core function is simple yet profound: a registered Tally user can send a sales invoice directly from their Tally instance to another registered business’s Tally. The receiving company can then have that digital invoice accepted and automatically converted into a purchase entry, pending user verification. This digital handshake eliminates re-entry, email attachments, and potential discrepancies. While the initial focus is on invoice exchange, the roadmap includes gradually simplifying the handling of related complexities like debit notes and credit notes.

Your Data Will Be Backed Up—Even If Tally Isn’t Running – Feature of TallyPrime 7.0

Data security is paramount, and Tally is introducing a powerful new capability called “Backup 2.0” to provide unprecedented peace of mind. This feature is an incremental cloud backup solution that is designed to be both completely private and fully automated.

Users can schedule the backup to run whenever they choose, ensuring their data is consistently protected. But Goenka revealed a detail that makes this feature truly game-changing—what he called a “secret” of the new system: the backup will run at its scheduled time even if the Tally application itself isn’t running. This “set it and forget it” approach ensures that business data is always safe from loss due to hardware failure or other unforeseen events, without requiring any manual intervention.

The Ultimate Proof of Confidence: Tally Runs its Own Business on Tally

A common question from users is whether the company behind the software trusts it enough for its own critical operations: “Does Tally use Tally for its own accounting?” According to the Managing Director, the answer is an unequivocal “100% yes.”

Goenka confirmed that no feature is ever released to the public until he and his entire team have used it extensively on their own live business data. This practice, known in the tech industry as “dogfooding,” is the ultimate testament to the company’s confidence in its product’s stability, accuracy, and reliability. It assures users that the software they depend on has been battle-tested in a demanding, real-world environment before it ever reaches their computers.

TallyPrime Best Settings You Need To Change Before Working

Conclusion: More Than Just Accounting

These updates are not a random collection of features; they are the pillars of a new TallyPrime Features—one that intelligently assists, automatically captures, and natively connects. The evolution from a simple accounting software into an intelligent business management platform is clear and ambitious.

TallyPrime Features like conversational AI, direct Tally-to-Tally transactions, and fully automated workflows demonstrate a forward-thinking vision that prioritizes efficiency and connectivity. TallyPrime is not just simplifying accounting; it is fundamentally changing how businesses interact with their data and with each other. As these powerful tools become available, the real question is: how will you leverage them to not just manage your business, but to transform it?

TallyPrime Customization

5 Game-Changing TallyPrime Customization Tricks I Become a TallyPrime TDL Pro

Here are 5 Game-Changing TallyPrime Customization Tricks. Do you ever look at your Tally data and feel like you’re only seeing the surface? As a consultant, I see it all the time: businesses with years of sales, inventory, and customer information, hamstrung by standard reports that don’t answer their most pressing questions. For instance, do you know, right now, which of your products are just gathering dust on the shelf?

TallyPrime Customization with TallyPrime TDL

Most users don’t realize how incredibly customizable Tally is, and you don’t need to be a hardcore developer to make powerful, insightful changes. The key is a language called TDL (Tally Definition Language) TallyPrime TDL. This article reveals five surprisingly simple techniques, inspired by a TDL pro, that will help you unlock critical business insights and transform a standard report into a powerful tool for identifying issues like “dead stock.”

Join Full Tally TDL Course in Hindi and English

Also see this Reminder with QR code Feature of Tally Prime

TallyPrime Customization

Tally’s Built-In “Inspector”: Let the Interface Be Your Guide with TallyPrime TDL

When I first started customizing Tally, my biggest roadblock was figuring out what to modify. I’d waste hours guessing component names. Then I discovered a tool that Tally hides in plain sight, one that turns its black-box interface into a transparent blueprint.

The secret is Developer Mode. To activate it, you can’t just double-click the Tally icon. You have to launch it in a special way. Press Window + R to open the Run command, then enter the full path to your Tally application followed by the switch /SLDVMODE. It will look something like this: "[path to your Tally.exe]" /SLDVMODE.

Once Tally is running in this mode, the interface itself becomes your guide. As you move your cursor over different parts of a screen, Tally reveals the name of the underlying component. You can instantly see the name of the entire screen (Form: Stock Summary), a specific section (Part: DSP ACC Body), or even a single row (Line: DSP ACC Line). This simple feature eliminates all guesswork, allowing you to instantly identify the exact component you need to target in your code.

Now that you know how to identify any component on the screen, the next step is figuring out what data to put in it. That leads us to the most non-obvious trick in the book.

The Calculator is a Secret Database Explorer in TallyPrime Customization

Once you know where you want to add new information, the next question is: what is the exact name of the data field you need? You can’t just write “Last Sale Date” and hope it works. You need the precise field name Tally uses internally.

This is where an unbelievably powerful trick comes in: using Tally’s calculator. By pressing Control + N, you can open the calculator and use it to ask Tally a direct question about its own data structure. You can ask Tally for a list of all available data fields for a stock item by typing a simple query into the calculator:

1. In the calculator, type select star from stock item.

2. Press Enter, and Tally will display a collection of data.

3. Export this view to Excel.

The column headers in the resulting Excel file are the precise, official field names you can use in your TDL code—fields like Last Sale Date and Last Sale Party. This technique transforms a frustrating process of trial-and-error into a definitive, two-minute lookup.

And this isn’t just for inventory. This same trick works for select star from ledger or select star from voucher—it’s your universal key to Tally’s data dictionary.

“Paint” Your Target to Avoid Mistakes in TallyPrime Customization

So you’ve identified your target component and the exact data field you want to add. But before writing the final code, how can you be 100% sure you’re editing the right place? This is where a simple, brilliant technique for building with confidence comes in. Think of it like painting a wall to check the color before you hang the expensive artwork.

To confirm you’ve targeted the right component, you can temporarily “paint” it. Add a single line of code to change the background color of a section (background: Yellow) or add a border to a line (border: Thin Box). When you refresh Tally, the targeted element will instantly change its appearance. This gives you immediate, visual confirmation that your code is pointing to the right place, turning a potential point of frustration into a critical, confidence-building debugging step.

From Two Columns to Zero “Dead Stock” with TallyPrime TDL

Tricks 1, 2, and 3 give you the technical ability to modify a report. But that power is useless without a business purpose. Here’s where we translate those few lines of code into a tool that directly impacts your bottom line.

The perfect example is the one that inspired these tips: adding “Last Sale Date” and “Last Customer” columns to the Stock Summary report. This seemingly minor change instantly transforms a simple inventory list into an actionable business intelligence tool. With a single glance, you can identify products that haven’t sold in months and see who the last person to buy them was. This is actionable intelligence.

This isn’t just a technical exercise; it’s about direct, tangible business impact. As the TDL pro I learned from put it, the goal is to ruthlessly identify and act on inefficiencies:

“The benefit from this will be that you can understand which of your stock items is dead… remove all the dead stock items of yours immediately and whatever are the further stock items which are selling more. Maintain them, this will help you a lot in understanding the stock items…”

Unlock Any Screen by Mastering the Tally Hierarchy with TallyPrime Customization

Everything I’ve shown you hinges on understanding one foundational concept. If you grasp this single idea, you can customize almost anything in Tally. Every screen is built on a simple, five-layer hierarchy:

• Report: The overall container or task (e.g., the Stock Summary).

• Form: The specific screen or page you see (e.g., the main Stock Summary view).

• Part: A logical section within the form (e.g., the header, the body with the data, the footer).

• Line: A single row within a part (e.g., one stock item’s row).

• Field: A single piece of data within a line (e.g., the item name, the closing quantity).

Think of it like a document: the Report is the entire document, a Form is a page, a Part is a paragraph, a Line is a sentence, and a Field is a single word. Once you grasp this hierarchy, you have a clear roadmap for any customization. You know that to add a new Field, you must first identify the correct ReportFormPart, and Line.

Find more TDL files on our other website

Conclusion: Your Data is Talking—Are You Listening?

For years, I’ve seen businesses sit on a goldmine of data they can’t access. TallyPrime customization, and TDL in particular, often seems like a complex world reserved for seasoned developers. But these five techniques aren’t just about code; they’re about shifting your mindset. Tally isn’t a locked box. It’s a conversation, and now you know how to ask it the right questions.

A few well-placed lines of code are all it takes to transform a standard report into a powerful, custom business intelligence dashboard that answers the specific questions you have about your operations.

Tally Prime Reminder Letter with QR Code

Tally Prime 6.0’s Awesome Killer Feature: Tally Prime Reminder Letter with QR Code

This Tally Prime Reminder Letter with QR Code feature will help you lot. For any business owner or accountant, the process of collecting outstanding payments is a persistent and often frustrating task. The traditional method involves painstakingly reviewing ledgers, manually drafting reminder letters for each overdue account, and then printing and sending them out. This administrative burden consumes valuable time and resources that could be better spent on growing the business. It’s a common scene in finance departments: an accountant buried under a mountain of paperwork, knowing that “a lot of letters have to be made.”

Tally Prime Reminder Letter with QR Code

Modern accounting software is rapidly evolving to tackle outstanding fallow up core operational challenges head-on. Tally Prime’s latest version, introduces a powerful, built-in solution designed to transform the collections process from a manual chore into a streamlined, automated workflow. Now you can send outstanding Tally Prime Reminder Letter with QR Code to Customers.

Tally Prime Reminder Letter with QR Code
  1. Say Goodbye to Manual Work: Generate Reminder Letters in Seconds
    Tally Prime 6 eliminates the laborious process of creating payment reminders from scratch. The software now allows you to generate professional, detailed reminder letters directly from the outstanding reports you already use. This feature is easily accessible through two primary methods:

Now become a Tally TDL Developer Join Best Tally TDL course

  • Menu Path: Navigate to Display More Reports > Statement of Accounts > Outstanding and select the desired ledger.
  • Shortcut: Use the universal Go To command by pressing ALT + G, then simply type “Ledger Outstanding” and select the report.
    Note: For this feature to function correctly, it is essential that you maintain bill-wise accounting details for your ledgers within Tally. This setting ensures that the software can pull the specific invoice data needed to generate an accurate reminder.
    Once in the report, a few configuration clicks transform the data into a formatted letter, complete with bill numbers, pending amounts, and days overdue. This replaces hours of manual work with a process that takes seconds. This isn’t just a time-saver; it’s a reallocation of financial resources from low-value administrative work to high-value strategic analysis.

Also check Important Settings before running Tally Prime

  1. Get Paid Instantly: Embed Payment QR Codes Directly on Letters
    Perhaps the most impactful innovation in this feature is the ability to embed a payment QR code directly onto the reminder letter. Tally Prime Reminder Letter with QR Code simple addition fundamentally changes the dynamic of payment collection by making it incredibly easy for your customers to pay their dues the moment they receive the reminder.
    The setup is a straightforward, one-time process where you create a merchant profile within Tally. The system supports multiple payment types, including UPI and payment gateways like Razor Pay. During this setup, you will be asked a critical question: “Do you want to save the QR code in selected vouchers?” If you select “yes,” Tally will not only add the QR code to this reminder letter but will also embed payment QR codes on all future invoices generated for that party. This transforms the feature from a simple collections tool into a proactive, system-wide invoicing strategy that encourages prompt payment from the very start.
    This integrated QR code removes all friction from the payment process. Instead of needing to find your bank details or log into a portal, your customer can simply scan the code and pay instantly. This direct line from reminder to payment directly impacts Days Sales Outstanding (DSO) by reducing payment friction at the most critical point of communication.
  1. Streamline Your Workflow: Print, Export, or Email Directly from Tally
    Tally Prime 6.0 ensures that generating the letter is just the first step in a fully integrated workflow. Once your reminder is ready, you have multiple options for delivery, all accessible from within the same screen:
  • Print: Generate a physical hard copy for mailing or in-person delivery.
  • Export: Save the letter in various formats like PDF, JPG, or Excel. The PDF export also supports adding a digital signature for formal communications.
  • Share: Send the letter directly to your customer via integrated channels like email or WhatsApp without ever leaving Tally.

The email functionality is particularly efficient. You can input the recipient’s email address, customize the subject and body of the message, and send the reminder as an attachment directly from the software. This eliminates the cumbersome process of exporting a file, opening a separate email client, and manually attaching the document. By consolidating communication within the accounting platform, Tally further streamlines the entire collections workflow.

Find more on our other website e2t

Conclusion: Tally Prime Reminder Letter with QR Code

With the introduction of features like automated reminder letters and embedded payment QR codes, Tally Prime 6.0 is clearly evolving beyond its role as a system of record. It is becoming an active business management tool that directly helps organizations improve a critical metric: cash flow. By automating a tedious manual task and removing friction from the payment process, it empowers businesses to collect revenue more efficiently and effectively.
This shift from passive record-keeping to active revenue collection marks a significant step forward for accounting software. Now that collection reminders can be automated, what other financial processes in your business could be streamlined with modern tools?

Tally Prime Best Settings

5 Tally Prime Best Settings You Need to Change Before You Start Working

Here are 5 Tally Prime Best Settings that will help you a lot. Most of us have a common habit when we get powerful new software: we open it and start working immediately. We learn the basics needed for our tasks but often overlook the settings panel, leaving everything on its factory defaults. This means we miss out on simple customizations that could lead to significant efficiency gains.

Tally Prime Best Settings You Need to Change Before You Start Working

New Tally Prime is a perfect example of a highly customizable tool that rewards users who take a few moments to configure it. While its default setup is functional, a few strategic tweaks—settings the pros use—can transform your daily experience, making the software faster, more intuitive, and better suited to your specific workflow.

This post reveals five simple, pre-use settings that can dramatically improve your daily productivity, speed, and overall comfort with Tally Prime. By making these changes just once, you can save valuable time every single day.

Tally Prime Best Settings

1. Automate Your Startup: Load All Your Companies Instantly

Every morning, it’s the same dance: find the folder, copy the path, paste it into Tally—and repeat for every single company you manage. This daily, manual process is a frustrating waste of time. The “Load companies on startup” feature, found under Help > Settings > Startup, eliminates this repetitive task entirely.

By enabling this setting, you can specify exactly which company data files you want Tally to open automatically every time you launch the application. It doesn’t matter if the data is stored across different folders or drives; you set the paths once, and Tally Prime handles the rest. This is a significant time-saver for anyone who juggles several company accounts, allowing you to get straight to work without the tedious setup.

2. Begin Your Day with a Financial Overview: Launch the Dashboard Automatically

Instead of being greeted by a blank screen, imagine starting your day with a complete, actionable overview of your business’s financial health. The “Open Dashboard on loading company” setting makes this possible. When enabled, Tally Prime will automatically launch your customized dashboard as soon as your company data is loaded.

This simple change provides an immediate snapshot of all your key reports and MIS data. Before you make a single entry, you’ll have a clear view of the business, helping you plan your day, prepare necessary reports, and stay on top of critical financial metrics from the moment you begin working.

3. Achieve Total Clarity: Standardize How Names and Details Appear Everywhere

Have you ever found yourself searching for a ledger and thinking, “Oh man, why did I use an alias for this one? What name should I search?” This confusion wastes time and can lead to errors. Under Help > Settings > Display, you will find powerful settings that enforce consistency across your entire Tally environment.

These settings—”Display name for ledger and groups,” “Display name for stock item,” and “Display name for employee”—allow you to globally define how information is presented. You can choose to display item names along with aliases, descriptions, or part numbers in every report, voucher, and summary. For payroll users, you can standardize how employee names appear. Once set, your preferred format appears everywhere, ensuring total clarity across the platform.

This feature is a powerful solution for anyone who struggles to remember aliases or needs to see key details like part numbers at a glance. By setting it once, you ensure that information appears consistently everywhere, saving time and preventing errors.

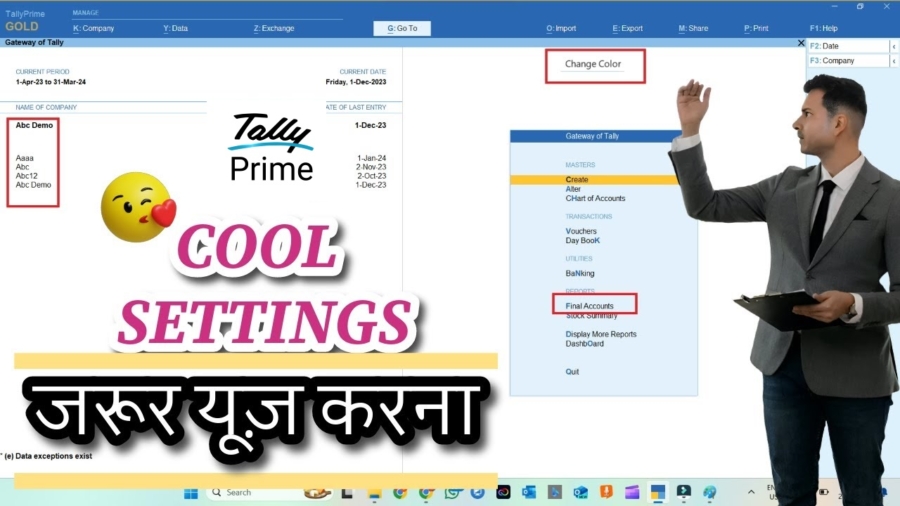
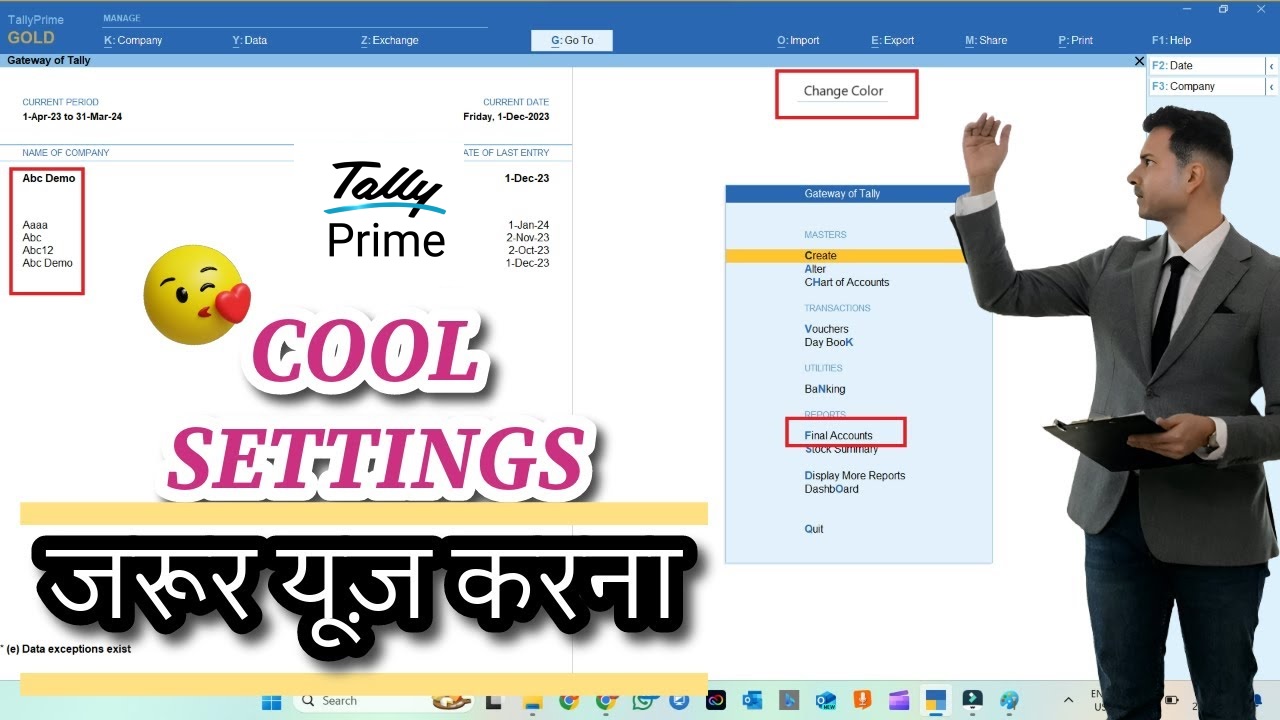
4. Declutter Your Main Screen: Organize Reports Under a “Final Accounts” Menu

The Gateway of Tally is your central navigation hub, but over time it can become cluttered with a long list of reports. The “Show Final Accounts menu in Gateway of Tally” setting helps you achieve a cleaner, more organized interface.

When enabled, this feature tidies up the main screen by grouping essential reports—Balance Sheet, Profit & Loss Account, Cash Flow, Fund Flow, and Ratio Analysis—into a single, logical “Final Accounts” folder. This declutters your primary view and creates a more intuitive navigation experience, allowing you to access your most critical financial statements from one convenient location.

Also we can customize Tally Prime With TDL files, we can add final amount separately in invoice.

If you want to learn Tally TDL, Join this 2025 Best Tally Prime TDL course

5. Personalize Your Workspace: Adjust Colors and Silence Distractions

Your digital workspace impacts your focus and comfort. If the default Tally Prime display feels like it’s “stinging in your eyes” after a long day or the repetitive “click” sound is a constant distraction, you can easily change it. Tally Prime’s Color and Sound settings allow you to tailor the application’s look and feel to your preferences.

By disabling sound, you can eliminate the click that accompanies every entry, creating a quieter and more focused environment. Furthermore, adjusting the display mode between options like “soft” and “bright” can make the screen more comfortable to view. These may seem like minor changes, but they are simple yet impactful ways to reduce fatigue and make the software more pleasant to use for extended periods.

Find more Tally Prime related post in our other website

Conclusion: Final Thought

Taking just a few minutes to configure Tally Prime before you dive into your daily tasks can yield significant long-term benefits in productivity, clarity, and user comfort. These small, one-time adjustments streamline your workflow and tailor the software to work for you, not against you. Once you’ve implemented these, you can explore even deeper customizations, such as setting a default report filter mode or showing monthly summary graphs, to further refine your environment.

What other “set-and-forget” tweaks in your daily software could be unlocking hidden productivity?