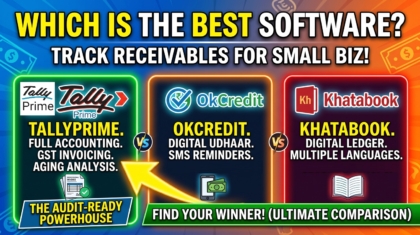
GST Number in GSTR3B

GST Number in GSTR3B – Tally Prime 3 TDL

If you use Tally Prime 3 , there is no GST number in GSTR3B report, but we required sometime. so with this TDL file we can add GST number in GSTR3B report Also.

For businesses accurate and comprehensive reporting is crucial. Tally Prime 3, a prominent accounting software, is widely utilized for its robust functionalities, yet some users encounter limitations, particularly the absence of the GST number in the GSTR-3B report. Addressing this gap by customizing the report through TDL (Tally Definition Language) can prove beneficial.

GST Number in GSTR3B:

The GSTR-3B report acts as a vital summary, encapsulating essential tax details for a specific period under GST regulations. However, the absence of the GST number within this report in Tally Prime 3 could pose challenges for businesses needing this critical information for their records or compliance obligations.

Also checkout Most Amazing Invoice Customization TDL

GST Number in GSTR3B

GST Number in GSTR3B in Tally Prime 3 TDL Code:

[#Line:GSTRSTATVCHSColTitle1]
field:LWTitleGST
[field:LWTitleGST]
Set as:"GST Number"
Background:Yellow
Color:Red
[#Line:GSTRStatVCHSDtls]
Border:Thin Box
Field:LWGSTNu
[Field:LWGSTNu]
Set as:$GSTVCHPartyGSTIN
Background:Yellow
Color:Red

GST Number in 3B Report TDL:

HOW TO USE TDL CODE:
  • Copy above TDL code and create a text file.
  • Save text file and load in Tally
  • Goto see GSTR3B report, there you will find GST Numbers of Party along with Party name (watch the below video for more details).
  • Now You can see GST Numbers in 3B report in Tally Prime 3.

This is best free TDL to have in your Tally. Must have TDL file for Tally ERP9 and Tally Prime that can use it for lifetime. This free TDL Code will perfectly work with Tally Prime.

GST Number in GSTR3B in Tally Prime 3 TDL Code Video:

See the below video to learn how to customize GST 3B report in Tally Prime:

Watch above videos to learn :

  • How to use TDL files in Tally.
  • How to add own details in Tally TDL
  • How to create TDL file.
  • How to customize GST 3B report in Tally Prime.
  • More videos related to free TDL files on youtube/learnwell
  • Get More TDL files on https://e2t.in/
FOLLOW THE BELLOW INSTRUCTIONS TO LOAD TDL FILE IN TALLY:
  1. Make a Text file of above code
  2. Save it in to your computer
  3. Copy the text file path including Name and extension (as – C:\Users\HP\Desktop\rec\3BTDL.txt)
  4. Open Tally Prime Software
  5. Click on Help and click on TDL & Addon  (for Tally Prime)
  6. Press F4 (to open a Box)
  7. Set Load TDL file on Startup – Yes
  8. Paste The path in blank space
  9. Press enter and save
  10. Now your GSTR3B TDL file for Tally Prime is ready to use.

Customized Invoice Tally Prime TDL

2023 Most Amazing Customized Invoice Tally Prime TDL | Normal & E-Invoice Format TDL

With this Customized Invoice Tally Prime TDL we can provide professional invoices to our customers, even want to create Normal Invoice or E- Invoice. In these invoice format can show your logo and company details like address and GST and QR in top of Invoice. And also change Item listing in header colors and font.

This is best and good looking invoice format for both Normal & E-Invoice. With Tally Definition Language (TDL), users can further personalize their invoices to meet specific business needs

Customized Invoice Tally Prime TDL:

Normal invoices are the standard format used for billing purposes. This Invoice TDL allows users to customize these invoices extensively. With this Normal & E-Invoice Format TDL, businesses can:

Adding Company Logo and Details:

Incorporate your company logo, address, GST details, and other pertinent information at the top of the invoice for a personalized touch.

QR Code Integration:

In normal invoices adding QR code of Bank Payment detail and and in E- Invoice, E- Invoice QR code along with Bank Payment QR code.

Invoice Details and Party Details in Horizontal form:

To save extra spaces of invoice changed invoice details like, Invoice number, Date, references etc. and Buyer and Consignee Details in Horizontal form in Invoice.

Changing Item Listing looks:

Modify the item listing section’s colors, fonts, and layout in the header to align with your brand aesthetics.

Customized Invoice Tally Prime TDL

Also checkout Manual Books TDL for Tally Prime

Customized E- Invoice and Normal Invoice TDL code:

Tally Prime’s flexibility combined with TDL empowers users to create tailored invoices that reflect their brand identity and meet regulatory requirements.

[#Part: EXPINV SaleTopLeft]
Height      : If ($$InExportMode OR $$InMailAction OR $$InUploadAction) AND ($$IsSysNameEqual:Excel:##SVExportFormat OR $$IsSysNameEqual:HTML:##SVExportFormat) THEN +
							(10 + 10 + @WithOrderVch + @WithOrderTerms + @WithBuyer + @WithCountry)  ELSE +
							(10 + 10 + @WithOrderVch + @WithOrderTerms + @WithBuyer + @WithCountry) % page
	
	Delete: Parts: EXPINV Company	
	
[#Form: Printed Invoice]
Add:Parts:LWCMPDetails,LWTaxTitle,LearnwellEQR

[Part:LWTaxTitle]
Add:Line:LwTTLine
Border:thin bottom
Space Top:.5
[Line:LwTTLine]
Add:Field:LWTTF
Border:Thin Top
[Field:LWTTF]
Set as:"Tax Invoice"
Full Width:Yes
Align:Centre
Style:Invstyle
[Style:Invstyle]
Use: Normal Bold
Height:15

[Part:LWCMPDetails]
Add:Parts:CMPLogo,CMPdtl,LWSCPay
Space Bottom:.5
Width:100% page
[Part:CMPLOGO]
Part :LearnWellLOGO
Vertical : Yes
[Part :LearnWellLOGO]
Horizontal Alignment :Left
Vertical : No
Lines :LWLG
Graph Type: ##SALogoPath
Height : 12% page
Width : 15% Page
[Line :LWLG]
Field :LWLGF
[Field :LWLGF]
Set As : ""

[Part:CMPdtl]
Lines:LWCMPName,LWCMPAdd
Repeat:LWCMPAdd:CompanyAddress
[Line:LWCMPName]
Field:LWCMPName
[Field:LWCMPName]
Use:name field
Set as:@@CMPMailNAme
Full Width:Yes
Align:Centre
Style:Cmpstyle
[Line:LWCMPAdd]
Field:LWCMPAdd
[Field:LWCMPAdd]
Set as:$address
Align:Center
Full Width:Yes
Style:ADDStyle
[Style:Cmpstyle]
Use: Normal Bold
Height:20	 
[Style:ADDStyle]
Height:10
Use:Normal  
[#Part: EXPINV Signature]
Delete:Border
[#Part: EXPINV Column]
Border:Thick Box
Delete:Line:EXPINV Column2
Local : Field : Default : Style :Normal Bold
Local : Field : Default : Print FG :White
Print BG:Black

[#line : EXPINV invdetails]
option:bg print:@@oddline
[!line:bg print]
local : field : default : print bg :Light grey
[system:formulae]
OddLine : $$IsOdd:$$Line

;---------------------------------------------
[#Part: EXPINV OpPageBreak]
Delete: Parts:EXPINV Title
Delete:Parts:EXPINV Leading
Add:Parts:Before:EXPINV Column:LearnwellInvNo1,LearnwellInvNo

[#Part : Expinv Rightsign]
Delete : Bottom Parts
Add:Bottom Part:EXPINV Signature
                        
[Part:LearnwellEQR]
Add:Part:LWEInv1,LWEInvQR,LearnwellBankQR
Border:Thin box
Invisible: NOT ##SAGSTWithQRInfo OR $$IsEmpty:@@eInvoiceQRCValue OR NOT @@IsVchGSTeInvAppl
[Part:LWEInv1]
Line: LWExpinv IRN, LWExpinv AckNo, LWExpinv AckDate
Local: Line	: LWExpinv AckNo		: Space top		: 0.10
Local: Line	: LWExpinv AckDate	: Space top		: 0.10
Space Top:.5
[Line: LWExpinv IRN]
Use	: LWeInv IRN Details Template
Local: Field: Medium Prompt	: Set as	: $$LocaleString:"IRN"
Local: Field: Name Field	: Set as	: @@GSTeInvIRN
Local: Field: Name Field	: Width		: 30% Page
Local: Field: Name Field	: Line		: 03
[Line: LWExpinv AckNo]
Use	: LWeInv IRN Details Template
Local: Field: Medium Prompt	: Set as	: $$LocaleString:"Ack No."
Local: Field: Name Field	: Set as	: If ##IseInvPSPrintAfterSave Then ##eInvPSAckNo Else $IRNAckNo
[Line: LWExpinv AckDate]
Use	: LWeInv IRN Details Template
Space Bottom: 0.25
Local: Field: Medium Prompt	: Set as	: $$LocaleString:"Ack Date"
Local: Field: Name Field	: Set as	: If ##IseInvPSPrintAfterSave Then $$String:##eInvPSAckDate Else $$String:$IRNAckDate
[Line: LWeInv IRN Details Template]
Field: Medium Prompt, Name Field
Local: Field: Medium Prompt	: Width		: 4			
Local: Field: Medium Prompt	: Style		: Small
Local: Field: Name Field	: Style		: Small Bold

[Part:LWEInvQR]
Part:LWeInvoice QRC Title2, LWeInvoice QRC Title
Vertical: Yes
[Part: LWeInvoice QRC Title]
Line: LWeInvoice QRC Title
[Line: LWeInvoice QRC Title]
Field: LWeInvoice QRC Title
Space Bottom: 0.5
[Part: LWeInvoice QRC Title2]
QRCode: @@eInvoiceQRCValue : Yes
Line: LWeInvoice QRC Title2
Width: 20% page
Height: 10% Page
[Line: LWeInvoice QRC Title2]
Field: Info Field
[Field: LWeInvoice QRC Title]
Use	: Simple Field
Set as: $$LocaleString:"e-Invoice"
Style: Small Bold
Width: Normal
	
[Part :LearnWellBankQR]
Parts :EXPINV BankDetails,LearnWellQrP
Border:Thin box
Space Top:.5
[Part :LearnWellQrP]
Part :LearnWellQRCode
Vertical : Yes
[Part :LearnWellQRCode]
Horizontal Alignment : Right
Vertical : No
Lines :LWQrL
QR code: ("upi://pay?pa=9131810293@ybl&pn=AshishKumarSingh&tn=Bill No. "+$$String:$voucherNumber) : True
Height : 12% page
Width : 15% Page
[Line :LWQrL]
Field :LWQrF
[Field :LWQrF]
Set As : ""

[Part:LWSCPay]
Part :LearnWellQRIn,qrtxt
Vertical : Yes
Invisible:NOT $$IsEmpty:@@eInvoiceQRCValue
[Part :LearnWellQRIn]
Lines :LWQrLn
QR code: ("upi://pay?pa=9131810293@ybl&pn=AshishKumarSingh&tn=Bill No."+$$String:$voucherNumber) : True
Height : 8% page
Width : 12% Page
[Line :LWQrLn]
Field :LWQrFn
[Field :LWQrFn]
Set As : ""
[Part:qrtxt]
Line:as
[Line:as]
Field:as
[Field:as]
Use:name field
Set as:"Scan to Pay"

[Part:LearnwellInvNo]
Parts:EXPINV Consignee, EXPINV ConsigneeContact, EXPINV Buyer, EXPINV Contact
Bottom Parts: EXPINV Country
Vertical    : No
Border:Thin box
[Part:LearnwellInvNo1]
Parts:LWBSLeft,LWBSMiddle,LWBSRight
Vertical:Yes
Border:thin box
[Part:LWBSLeft]
Parts       : EXPINV Number,EXPINV Date,EXPINV SupplierRef,EXPINV DelNote,EXPINV ShipDate
Vertical    : No
[Part:LWBSRight]
Parts       : EXPINV DueDate, EXPINV OtherRef, +
              JWInOutInv MotorVehicleNo, +
			  EXPINV PlaceOfRcpt, EXPINV PortDischarge, JMInOutInv ProcessingDuration
Vertical    : No
[Part:LWBSMiddle]
Parts: EXPINV OrderNumber, EXPINV OrderDate, EXPINV ShipDoc,EXPINV Destination,JWMTIn ChallanNo,EXPINV PreCarr, EXPINV Vessel, EXPINV PortLoading, JMInOutInv EmptyPart
Border:thin box

Invoice TDL:

HOW TO USE TDL CODE:
  • Copy or Download above TDL code and create a text file.
  • Save text file and load in Tally
  • Goto print and sales invoice, and enable bank details etc. (watch the below video for more details).
  • You can see changed invoice format.

This is best free TDL to have in your Tally. Must have TDL file for Tally ERP9 and Tally Prime that can use it for lifetime. This free TDL Code will perfectly work with Tally Prime.

Customized Invoice Tally Prime TDL Video:

See the below video to learn how to use Custom Invoice TDL in Tally Prime:

Watch above videos to learn :

  • How to use TDL files in Tally.
  • How to add own details in Tally TDL
  • How to create TDL file.
  • How to customize invoice with TDL.
  • More videos related to free TDL files on youtube/learnwell
  • Get More TDL files on https://e2t.in/
FOLLOW THE BELLOW INSTRUCTIONS TO LOAD TDL FILE IN TALLY:
  1. Make a Text file of above code
  2. Save it in to your computer
  3. Copy the text file path including Name and extension (as – C:\Users\HP\Desktop\rec\InvoiceTDL.txt)
  4. Open Tally Prime Software
  5. Click on Help and click on TDL & Addon  (for Tally Prime)
  6. Press F4 (to open a Box)
  7. Set Load TDL file on Startup – Yes
  8. Paste The path in blank space
  9. Press enter and save
  10. Now your Invoice TDL file for Tally Prime is ready to use.

By leveraging Tally Prime’s TDL capabilities, you can craft professional and personalized invoices for both Normal and E-Invoice formats. Incorporating your company logo, details, QR codes, and adjusting the visual aspects of the item listing allows you to present a consistent brand image while meeting the necessary invoicing standards. This level of customization not only enhances the professionalism of your invoices but also helps strengthen your brand identity with every interaction.

Manual Books TDL

2023 Most Amazing Manual Books TDL for Tally Prime

Manual Books TDL for Tally Prime will be very beneficial for our business. With this Tally Prime TDL we can customize our Tally Ledgers as old type Khata Books. This will help a lot to reconcile our Statements / Ledgers.

Also with this TDL fetch all details of ledger like, Cheque Number, Reference Number, Voucher Number etc. Additionally, it allows you to view ledgers with separate debit and credit sections. In this blog post, we’ll explore the significance of this TDL and how it can revolutionize your accounting experience.

Manual Books TDL:

The Manual Books TDL is a custom Tally TDL code designed to bridge the gap between modern accounting practices and the timeless charm of Khata Books. It empowers businesses to customize their Tally Ledgers for a more familiar and intuitive experience. The TDL simplifies the process of reconciling statements and ledgers, making it more intuitive and efficient.

Also Checkout HSN SAC code list at Entry Time TDL for Tally Prime

Manual Books TDL

Manual Books TDL Code for Tally Prime:

Customize your Tally Ledgers Statement to resemble the format of traditional Khata Books, providing a familiar and user-friendly interface.

[Button :LearnwellCashbook]
Key : CTRL+7
Title : "Manual Books"
Action :Display Collection:LearnwellMBook
[#Form :Default]
    Add:Top Button:At Beginning:LearnwellCashbook
[Collection: LearnwellMBook]
Type : Ledger
Belongs To : Yes
Variable : LedgerName
Report :LearnweLDRSt
Trigger :LearnweLDRStCll

[Report :LearnweLDRStCll]
Use : Collection Variable
Local : Line : Collection Variable : Add : Field :LearnwellSttment

[Field:LearnwellSttment]
Use : Name Field
Variable : LedgerName
Modifies : LedgerName
Table : LearnwellMBook
Show Table : Always

[Report :LearnweLDRSt]
Variable : SVFromDate, SVToDate
Set : SVfromDate:$$FinYearBeg:##StartDate:$StartingFrom:Company:##SVCurrentCompany
Set : LedgerName : ##LedgerName
Variable : IsMultiPage, InNewPages
Set : IsMultiPage : yes
Set : InNewPages : yes
Set : SVToDate : ##SVCurrentdate
Form :LearnwellSttmForm
Variable : GroupName
Set : Is Ledger Report : Yes
Set : DSPWithOpening : Yes

[Form :LearnwellSttmForm]
Height : 100% Screen
Width : 100% Screen
Space Top : If $$InPrintMode Then 0.5 Else 0 inches
Button : Change Period,ChangeLedger,Print Button,Export Button,BottomToolBarBtn6,BottomToolBarBtn7,BottomToolBarBtn8, BottomToolBarBtn9, BottomToolBarBtn10, BottomToolBarBtn11
Parts :LearnwellSttmTitle,LearnwellSttmDetl

[Part :LearnwellSttmTitle]
Space Bottom : 0.2 inch
Add:Lines:At End:LearnwellSttmPrty,LearnwellSttmPeriod


[Line:LearnwellSttmPrty]
Field:LearnwellSttmPrtyField

[Field:LearnwellSttmPrtyField]
Use :Name Field
SetAs:##LedgerName
Width:150 mms
Local:STYLE:DEFAULT:Height:12
Full Width:Yes
Align:Center

[Line:LearnwellSttmPeriod]
Field:LearnwellSttmPeriodField
Space Top:0.5
Border:thin bottom

[Field:LearnwellSttmPeriodField]
Use:name field
Set as:$$LocaleString:"From " + $$String:##SVFromDate + " to " + $$String:##SVToDate
Align : Center
Full Width : Yes
Local:Style:defualt:Height:15
Style:large bold

[Part:LearnwellSttmDetl]
Right Part:LearnwellSttmDetlRight
Left Part:LearnwellSttmDetlLeft

[Part:LearnwellSttmDetlLeft]
Line:LWTTlinfoL,LWTTlbalL,LWTTlbalLTTLf
Repeat:LWTTlbalLTTLf:LWTTlbalcollL
Bottom Line:LWTTCLGTotalL,LWTTCLGTotalLField
Bottom Line:LWTTCLGTotalL1,
Scroll:Vertical
Float:no
Common Border:Yes
Total:LWLVCHDebitAmt

[Part:LearnwellSttmDetlRight]
Line:LWTTInfoR,LWTTBALR,LWTTTitleR
Repeat:LWTTTitleR:LWTTInfoRColl
Bottom Line:LWTTInfoRTotal, LWTTCLGTotalLFieldRT
Bottom Line:LWTTInfoRTotal1,
Scroll:Vertical
Float:no
Common Border:Yes
Total:LWLVCHCreditAmt

[Line:LWTTlbalL]
Fields:LWOpBalTT
Right Fields : LWOpBalD
Border: Thin BOttom

[Field:LWOpBalTT]
info :$$localestring:"Opening Balance :"
width : 50
Inactive: If $$IsEmpty:#LWOpBalD then Yes Else No
Align:Right
Background:Light Blue

[Field:LWOpBalD]
Use : Amount Field
Set as : If $$IsDr:$Openingbalance:Ledger:##LedgerName then $Openingbalance:Ledger:##LedgerName else ""
Skip : Yes
style : Tiny Bold
Format : "Symbol,DrCr"
Width : 16
Background:Light Blue

[Line:LWTTCLGTotalL]
Fields:LWCLbalLTtot
Right Fields: LWCLbalLtot
Border: Thin Top

[Field:LWCLbalLTtot]
info :$$localestring:"Debit Total :"
width : 50
Align: Right
Widespaced: Yes
Background:Crystal Blue

[Field:LWCLbalLtot]
Use : Amount Field
Set as : $$Total:LWLVCHDebitAmt + #LWOpBalD
Skip : Yes
style : normal
Format : "Symbol,DrCr"
Width : 16
Align:Right

[Line:LWTTCLGTotalL1]
Fields:LWCLbalLTtot1
Right Fields: LWCLbalLtot1
Border: Totals

[Field:LWCLbalLTtot1]
info : $$localestring:"Current Total :"
Width : 50
Widespaced: Yes
Align: Right
Background:Crystal Blue

[Field:LWCLbalLtot1]
Use : Amount Field
Set as : #LWCLbalLtot + #LWCLbalL
Skip : Yes
style : normal bold
Width : 16
Align: Right


[Line:LWTTCLGTotalLField]
Fields:LWCLbalLT
Right Fields: LWCLbalL


[Field:LWCLbalLT]
info :$$localestring:"Closing Balance :"
width : 50
Inactive: If $$IsEmpty:#LWCLbalL then Yes Else No
Widespaced: Yes
Align: Right
Background:Light Blue

[Field:LWCLbalL]
Use : Amount Field
Set as : If $$IsDr:$ClosingBalance:Ledger:##LedgerName then 0 else $ClosingBalance:Ledger:##LedgerName
Skip : Yes
style : Normal Bold
Format : "Symbol,DrCr"
Width : 16
Align:Right

[Line:LWTTlinfoL]
Field:LWLVCHDDate,LWLVCHDParticulars,LWLVCHDType,LWLVCHDReference,LWLVCHDChqNum,LWLVCHDebitAmt
Local:Field:LWLVCHDDate:Info:"Date"
Local:Field:LWLVCHDParticulars:Info:"Particulars"
Local:Field:LWLVCHDReference:Info:"VCH No."
Local:Field:LWLVCHDChqNum:Info:"Ch./Ref. No."
Local:Field:LWLVCHDType:Info:"Vch.Type"
Local:Field:LWLVCHDebitAmt:Info:"Debit Amount"
Border:THIN TOP BOTTOM
Local:Style:Default:Height:10
Local:Field:default:Background:Crystal Blue


[Line:LWTTBALR]
Fields:LWOPebalRT
Right Fields: LWOPebalR
Border: Thin BOttom

[Field:LWOPebalRT ]
info : $$localestring:"Opening Balance :"
width : 50
Inactive: If $$IsEmpty:#LWOPebalR then Yes Else No
Align: Right
Widespaced: Yes
Background:Light Blue

[Field:LWOPebalR]
Use : Amount Field
Set as : If Not $$IsDr:$Openingbalance:Ledger:##LedgerName then $Openingbalance:Ledger:##LedgerName else ""
Skip : Yes
style : normal bold
Format : "Symbol,DrCr"
Width : 16
Align:Center
Background:Light Blue

[Line:LWTTInfoRTotal]
Fields:LWCLbalRTtot
Right Fields: LWCLbalRtot
Border: Thin Top

[Field:LWCLbalRTtot]
info :$$localestring:"Credit Total :"
width : 50
Widespaced: Yes
Align: Right
Background:Crystal Blue

[Field:LWCLbalRtot]
Use : Amount Field
Set as : $$Total:LWLVCHCreditAmt+#LWOPeBalR
Skip : Yes
style : normal
Format : "Symbol,DrCr"
Width : 16
Align:Right

[Line:LWTTInfoRTotal1]
Fields:LWCLbalRTtot1
Right Fields: LWCLbalRtot1
Border: Totals

[Field:LWCLbalRTtot1]
info :$$localestring:"Current Total :"
width : 50
Widespaced: Yes
Align: Right
Background:Crystal Blue

[Field:LWCLbalRtot1]
Use : Amount Field
Set as : #LWCLbalRtot + #LWCLbalR
Skip : Yes
style : normal bold
Width : 16
Align:Right

[Line:LWTTCLGTotalLFieldRT]
Fields:LWCLbalRT
Right Fields:LWCLbalR

[Field:LWCLbalRT]
info :$$localestring:"Closing Balance :"
width : 50
Inactive: If $$IsEmpty:#LWCLbalR then Yes Else No
Widespaced: Yes
Align: Right
Background:Light Blue

[Field:LWCLbalR]
Use : Amount Field
Set as : $ClosingBalance:Ledger:##LedgerName
Set as : If not $$IsDr:$ClosingBalance:Ledger:##LedgerName then 0 else $ClosingBalance:Ledger:##LedgerName
Skip : Yes
style : NORMAL BOLD
Format : "Symbol,DrCr"
Width : 16
Background:Light Blue


[Line:LWTTlbalLTTLf]
Field:LWLVCHDDate,LWLVCHDParticulars,LWLVCHDType,LWLVCHDReference,LWLVCHDChqNum,LWLVCHDebitAmt,DSPVCHMASTERIDNO
Option : AlterVchOnEnter : Yes

[field:LWLVCHDDate]
Use:uni date field
Set as : $Date
Format : "full Date"
Width :12
Style : tiny
Border : Thin right
Align : Left

[field:LWLVCHDParticulars]
Use : Name Field
Set as:If $$IsSales:$VoucherTypeName then $AllInventoryEntries.AccountingAllocations.LedgerName else If $$IsDebitNote:$VoucherTypeName then $AllInventoryEntries.AccountingAllocations.LedgerName else $$LocaleString:$AllLedgerEntries[1].LedgerName
Width : 37
Style : tiny
Border : Thin right

[Field:LWLVCHDReference]
Set As : $VoucherNumber
Width : 10
Align : center
Style : tiny
border : thin right

[field:LWLVCHDChqNum]
Use : Name Field
Set as : If $$IsPayment:$VoucherTypeName then $AllLedgerEntries[-1].BankAllocations.INSTRUMENTNUMBER +
else If $$IsContra:$VoucherTypeName then $AllLedgerEntries[-2].BankAllocations.INSTRUMENTNUMBER +
else If $$IsReceipt:$VoucherTypeName then $AllLedgerEntries[-1].BankAllocations.InstrumentNumber +
else If $$IsPurchase:$VoucherTypeName then $Reference +
else If $$Issales:$VoucherTypeName then $Reference +
Else $AllLedgerEntries.BankAllocations.InstrumentNumbers
Width : 8
Style : tiny
Border : Thin right


[field:LWLVCHDType]
Use : Name Field
Set as : $VoucherTypeName
Width : 10
Style : tiny
Border : Thin Right

[field:LWLVCHDebitAmt]
Use : Amount Field
Set as : $$AsDrAmt:$TotLedDrAmt
Full Width : Yes
Border : Thin right
Space Right:1
Style:tiny

[Line:LWTTInfoR]
Field:LWLVCHCDate,LWLVCHCParticulars,LWLVCHCType,LWLVCHCReference,LWLVCHCChqNum,LWLVCHCreditAmt
Local:Field:LWLVCHcDate:Info:"Date"
Local:Field:LWLVCHcParticulars:Info:"Particulars"
Local:Field:LWLVCHcReference:Info:"VCH No."
Local:Field:LWLVCHCChqNum:Info:"Ch./Ref No"
Local:Field:LWLVCHCType:Info:"Vch. Type"
Local:Field:LWLVCHCreditAmt:Info:"Credit Amount"
Border:THIN TOP BOTTOM
Local:Style:Default:Height:10
Local:Field:default:Background:Crystal Blue

[Line:LWTTTitleR]
Field:LWLVCHCDate,LWLVCHCParticulars,LWLVCHCType,LWLVCHCReference,LWLVCHDChqNum,LWLVCHCreditAmt,DSPVCHMASTERIDNO
Option : AlterVchOnEnter : Yes

[field:LWLVCHCDate]
Use:uni date field
Set as : $Date
Format : "DD/MMM/YYYY"
Width : 12
Style : tiny
Border : Thin Left Right
Align : Left

[field:LWLVCHCParticulars]
Use : Name Field
Set as:If $$IsPurchase:$VoucherTypeName then $AllInventoryEntries.AccountingAllocations.LedgerName else If $$IsCreditNote:$VoucherTypeName then $AllInventoryEntries.AccountingAllocations.LedgerName else $$LocaleString:$AllLedgerEntries[1].LedgerName
Width : 39
Style : tiny
Border : Thin right

[Field:LWLVCHCReference]
Set As : $VoucherNumber
Width : 10
Align : center
Style : tiny
border : thin right

[field:LWLVCHCChqNum]
Use : Name Field
Set as : If $$IsPayment:$VoucherTypeName then $AllLedgerEntries[-1].BankAllocations.INSTRUMENTNUMBER +
else If $$IsContra:$VoucherTypeName then $AllLedgerEntries[-2].BankAllocations.INSTRUMENTNUMBER +
else If $$IsReceipt:$VoucherTypeName then $AllLedgerEntries[-1].BankAllocations.InstrumentNumber +
else If $$IsPurchase:$VoucherTypeName then $Reference +
Else $AllLedgerEntries.BankAllocations.InstrumentNumbers +$VoucherNumber
Width : 8
Style : tiny
Border : Thin right

[field:LWLVCHCType]
Use : Name Field
Set as : $VoucherTypeName
Width : 10
Style : tiny
Border : Thin right

[field:LWLVCHCreditAmt]
Use : Amount Field
Set as : $$AsCrAmt:$TotLedCrAmt
Width : 16
Full Width : Yes
Style : tiny
Border : Thin right
Space Right:1

[Collection : LWTTlbalcollL]
Use : Total Ledger Vouchers
Aggr Compute : VchDrTotal : Sum : $$OrigVchLedDrTotal:#LedgerName
Filter : FilterDspVchDrAmt
[Collection : LWTTInfoRColl]
Use : Total Ledger Vouchers
Aggr Compute : VchCrTotal : Sum : $$OrigVchLedCrTotal:#LedgerName
Filter : FilterDspVchCrAmt
[System:formula]
FilterDspVchDrAmt: NOT $$IsEmpty:$TotLedDrAmt AND (NOT @@ShowForex OR NOT $$IsBaseCurrency:$TotLedDrAmt)
FilterDspVchCrAmt: NOT $$IsEmpty:$TotLedCrAmt AND (NOT @@ShowForex OR NOT $$IsBaseCurrency:$TotLedCrAmt)

[Collection: Total Ledger Vouchers]
Type : Vouchers : Ledger
Child of : ##pvsLedgerName
ParmVAR : pvsLedgerName : String : #LedgerName
Sort : @@InCreasing: -$TBSort,$IsForexLine, $Date

Fetch : AllLedgerEntries.LedgerName, AllLedgerEntries.Amount
Fetch : AllLedgerEntries.BankAllocations.*
Fetch : Date, VoucherTypeName, VoucherNumber,Narration,Reference


Compute : TotalLedDLWRVCHAmt : If NOT ##InNewPages Then $$OrigVchLedDrTotal:#LedgerName else $$OrigVchLedDrTotal:#LedgerName
Compute : TotalLedCLWRVCHAmt : If NOT ##InNewPages Then $$OrigVchLedCrTotal:#LedgerName else $$OrigVchLedCrTotal:#LedgerName
Compute : TotLedDrAmt : $$OrigVchLedDrTotal:#LedgerName
Compute : TotLedCrAmt : $$OrigVchLedCrTotal:#LedgerName

Manual Books TDL:

HOW TO USE TDL CODE:
  • Copy above TDL code and create a text file.
  • Save text file and load in Tally (Method provided below the code)
  • Goto the ledger statements to see Khata Type Books.
  • You can change Period and other things by provided button.

This is best free TDL to have in your Tally. Must have TDL file for Tally ERP9 and Tally Prime that can use it for lifetime. This free TDL Code will perfectly work with Tally Prime.

Manual Books TDL Video:

See the below video to learn how to use Manual Books or Khata Bahi TDL in Tally Prime:

Watch above videos to learn :

  • How to use TDL files in Tally.
  • How to add own details in Tally TDL
  • How to create TDL file.
  • How to change in Codes.
  • More videos related to free TDL files on youtube/learnwell
  • Get More TDL files on https://e2t.in/
FOLLOW THE BELLOW INSTRUCTIONS TO LOAD TDL FILE IN TALLY:
  1. Make a Text file of above code
  2. Save it in to your computer
  3. Copy the text file path including Name and extension (as – C:\Users\HP\Desktop\rec\Manual Books.txt)
  4. Open Tally Prime Software
  5. Click on Help and click on TDL & Addon  (for Tally Prime)
  6. Press F4 (to open a Box)
  7. Set Load TDL file on Startup – Yes
  8. Paste The path in blank space
  9. Press enter and save
  10. Now your Manual Books TDL file for Tally Prime is ready to use.

The Manual Books TDL for Tally Prime seamlessly marries the classic charm of Khata Books with the efficiency of modern accounting software. Its ability to customize Tally Ledgers

HSN SAC Code List at Entry Time TDL

2023 Popular HSN SAC Code List at Entry Time TDL for Tally Prime

This Popular HSN SAC Code List at Entry Time TDL for Tally Prime will provide you HSN description and HSN code List at Ledger and item Creation Time. Correctly assigning HSN (Harmonized System of Nomenclature) and SAC (Service Accounting Code) codes is a crucial aspect of GST compliance.

Now, with this Free Tally Prime TDL code can add HSN/SAC Table in Ledger and Item creation and alter screen of Tally Prime. You can add and manage HSN codes and descriptions list according to your business and integrate directly in Tally Prime.

This revolutionary tool simplifies the process, ensuring accurate classification of goods and services. In this blog post, we’ll explore the significance of this TDL and how it empowers you to take control of your HSN/SAC codes in Tally Prime.

HSN SAC Code List at Entry Time TDL:

Take full control of your HSN and SAC codes by adding, editing, and organizing them directly within Tally Prime with this HSN SAC Code List at Entry Time TDL. Access the Custom HSN/SAC Table within Tally Prime Ledger and Item Creation and Alter Screen to add, edit, or manage your HSN and SAC codes and descriptions.

Also Checkout Online GST Details Tracker Tool

HSN SAC Code List at Entry Time TDL

HSN SAC Code List at Entry Time TDL Code for Tally Prime:


[#Field:GSTMSTInfoHSNSAC]
    Table:LearnwellHSNTB,NotApplicable
    Show Table:On Empty

[Collection:LearnwellHSNCode]
    Data Source:File XML :"C:\Users\ssonu\OneDrive\Desktop\HSN\HSN.xml"
    XML Object Path:DATA:1:ROOT
    Client Only:Yes

[Collection:LearnwellHSNTB]
Title:$$LocaleString:"HSN Code List"
Source Collection:LearnwellHSNCode
Fetch :Hsn,Desc
Format:$Hsn,20
Format:$Desc,200
Unique:$HSN

HSN SAC Code List at Entry Time TDL:

HOW TO USE TDL CODE:
  • Copy above TDL code and create a text file or Click on Above Download Button.
  • Extract downloaded Zip folder and Change XML file Path in TDL Code.
  • Save text file and load in Tally (Method provided below the code)
  • Goto create Ledger or Stock item, you will find HSN filed with HSN code and Description.
  • You can search HSN or SAC details by typing HSN/SAC code or Description.

This is best free TDL to have in your Tally. Must have TDL file for Tally ERP9 and Tally Prime that can use it for lifetime. This free TDL Code will perfectly work with Tally Prime.

HSN SAC Code List at Entry Time TDL Video:

See the below video to learn how to create Tally TDL file and how to add HSN XML in Code and How to use HSN SAC TDL in Tally:

Watch above videos to learn :

  • How to use TDL files in Tally.
  • How to add own details in Tally TDL
  • How to create TDL file.
  • How to Add XML code in TDL Code.
  • More videos related to free TDL files on youtube/learnwell
  • Get More TDL files on https://e2t.in/
FOLLOW THE BELLOW INSTRUCTIONS TO LOAD TDL FILE IN TALLY:
  1. Make a Text file of above code
  2. Save it in to your computer
  3. Copy the text file path including Name and extension (as – C:\Users\HP\Desktop\rec\HSN.txt)
  4. Open Tally Prime Software
  5. Click on Help and click on TDL & Addon  (for Tally Prime)
  6. Press F4 (to open a Box)
  7. Set Load TDL file on Startup – Yes
  8. Paste The path in blank space
  9. Press enter and save
  10. Now your HSN/SAC Tracker TDL file for Tally Prime is ready to use.

The Custom HSN/SAC Table TDL for Tally Prime is a game-changer for businesses striving for seamless and accurate GST compliance. Its ability to manage HSN and SAC codes directly within Tally Prime not only ensures accuracy but also saves valuable time and resources.

Online GST Details Tracker

2023 Free Amazing Online GST Details Tracker Direct from Portal

With this Amazing Online GST Details Tracker Direct from Portal, can track Party GST Numbers and Get all details direct from GST Portal and also can track HSN details.

Managing GST details and HSN codes can be a time-consuming process, but what if there was a way to streamline it? Introducing the Online GST Details Tracker directly from the GST portal. This incredible tool empowers businesses to effortlessly track party GST numbers and access all necessary details directly from the GST portal through API. Additionally, it enables easy monitoring of HSN details, to find correct HSN.

In this blog post, we’ll delve into the significance of this tool and how it can revolutionize your GST compliance process.

Online GST Details Tracker:

Access party GST details and HSN codes directly from the GST portal in real-time, ensuring accuracy and up-to-date information.

Online GST Details Tracker

Also Checkout Extra column in Voucher TDL

How to Use Online GST Details Tracker Tool:

Download Online GST Details Tracker from above download link and follow below steps:

  1. Open Online GST Details Tracker Macro workbook.
  2. Enable Macro (How to enable Macro in Excel)
  3. In GST Details Sheet fill GST numbers in column A and Press Get Details Button
  4. In HSN Details Sheet fill HSN Codes to get HSN description

Note: If details not getting then GST Number and HSN code are incorrect. When processing data by clicking on button your internet should be connect.

Watch the below video for More Details:

How to use GST Video:

How to use HSN Video:

The Online GST Details Tracker is a game-changer for businesses striving for seamless and accurate GST compliance. Its ability to retrieve information directly from the portal not only ensures accuracy but also saves valuable time and resources.

By incorporating this powerful tool into your GST management process, you can revolutionize your compliance efforts and stay on top of your financial responsibilities.

Extra Column in Voucher TDL

2023 Free Extra Column in Voucher TDL

Extra Column in Voucher TDL will help you to add your own column, your fields in voucher.

Tally, a renowned accounting software, understands this need for adaptability. With the Extra Column in Voucher TDL (Tally Definition Language), you now have the power to incorporate additional fields directly into your vouchers.

This blog post will explore the significance of this TDL and how it can revolutionize your Tally experience.

Extra Column in Voucher TDL:

Now modify voucher yourself. Add your own extra column with total in a voucher. With this Tally Prime TDL code we can add our own extra column in voucher, that will help to add commission in voucher, brokerage in voucher or other Item related information.

Also checkout Alternate Unit Quantity Totals in Voucher and Invoice Print

Extra Column in Voucher TDL
[#Line: EI ColumnOne]
Add: Right Field: Before:VCH QtyTitle :LWCommission
[Field:LWCommission]
Use: Name Field
Set as: "Commission"
Width: 8
Skip: Yes
Invisible : @@IsPurchase

[#Part: EI InvInfo]
    Total:CommissionTotal
[#Line: EI InvInfo]
Add: Right Field: Before:VCH BilledQty:CommissionTotal
[Field:CommissionTotal]
Use:Amount Field
Storage:LearnwellCommission
Width: 10
Align: Right
Space Right: 5
Invisible : @@IsPurchase

[System:UDF]
    LearnwellCommission:Amount:5045

[#Field: EI QtyTotal]
Add: Field: Before:EI BilledQtyTotal :LWCommtotal
[Field:LWCommtotal]
Use : Amount Field
Set as : $$Total:CommissionTotal
Set Always:Yes

Extra Column in Voucher TDL with Total:

HOW TO USE TDL CODE:
  • Copy above TDL code and create a text file.
  • Save text file and load in Tally (Method provided below the code)
  • Goto voucher for invoicing.
  • You can add your own column and can see total of that field.

This is best free TDL to have in your Tally. Must have TDL file for Tally ERP9 and Tally Prime that can use it for lifetime. This free TDL Code will perfectly work with Tally Prime.

Extra Column in Voucher TDL with Total Video:

See the below video to learn how to create Tally TDL file and how to add own column in Tally Voucher :

Watch above videos to learn :

  • How to use TDL files in Tally.
  • How to add own details in Tally TDL
  • How to create TDL file.
  • How to Add Tally Column in Voucher
  • More videos related to free TDL files on youtube/learnwell
  • Get More TDL files on https://e2t.in/
FOLLOW THE BELLOW INSTRUCTIONS TO LOAD TDL FILE IN TALLY:
  1. Make a Text file of above code
  2. Save it in to your computer
  3. Copy the text file path including Name and extension (as – C:\Users\HP\Desktop\rec\column.txt)
  4. Open Tally Prime Software
  5. Click on Help and click on TDL & Addon  (for Tally Prime)
  6. Press F4 (to open a Box)
  7. Set Load TDL file on Startup – Yes
  8. Paste The path in blank space
  9. Press enter and save
  10. Now your modified voucher with extra column for Tally Prime is ready to use.

The Extra Column in Voucher TDL for Tally is a game-changer for businesses seeking to enhance their voucher customization capabilities.

Alternate Unit Quantity Total TDL

Amazing Alternate Unit Quantity Total TDL Code

Alternate Unit Quantity Total TDL will help to add Total of Alternate Unit Quantity.

Every entry, every calculation holds significance. This ingenious Tally TDL allows you to take control of your vouchers, enabling the addition of alternate unit quantity totals alongside the default quantity total.

In this blog post, with the help of Alternate Unit Quantity Total TDL Code, we will add alternate quantity total in voucher and also in invoice print.

Alternate Unit Quantity Total TDL:

Reports generated from Tally Prime will now include both default and alternate unit quantities, providing a more comprehensive overview of your business operations.

Also checkout Tally TDL to Deactivate Duplicate and Wrong Ledgers and Stock Items

Alternate Unit Quantity Total TDL
[#Field: EI QtyTotal]
Add: Field: After:EI BilledQtyTotal :AltTotal

[Field:AltTotal]
Use : Name Field
Align : Right
Width : @@VCHQtyWidth
Style : Small Italic
Set as : "( " + $$String:$LearnwellTotal:Symbol,ShortForm,Secondary + " )"
Set always : Yes
Skip : Yes
Inactive : $$IsEnd:$StockItemName OR @@NoAltUnits
Border : Totals

[ System : Formula ]
LearnwellTotal: $$Owner:$$CollQtyTotal:InventoryEntries:$BilledQty

Alternate Unit Quantity Total TDL:

HOW TO USE TDL CODE:
  • Copy above TDL code and create a text file.
  • Save text file and load in Tally (Method provided below the code)
  • Goto voucher for invoicing.
  • You can see total of Alternate quantity and also can see in Invoice Print.

This is best free TDL to have in your Tally. Must have TDL file for Tally ERP9 and Tally Prime that can use it for lifetime. This free TDL Code will perfectly work with Tally Prime.

Alternate Unit Quantity Total TDL Video:

See the below video to learn how to create Tally TDL file and how to Get Total Value of Column in Tally :

Watch above videos to learn :

  • How to use TDL files in Tally.
  • How to add own details in Tally TDL
  • How to create TDL file.
  • How to Add total in Tally Column
  • More videos related to free TDL files on youtube/learnwell
  • Get More TDL files on https://e2t.in/
FOLLOW THE BELLOW INSTRUCTIONS TO LOAD TDL FILE IN TALLY:
  1. Make a Text file of above code
  2. Save it in to your computer
  3. Copy the text file path including Name and extension (as – C:\Users\HP\Desktop\rec\Totals.txt)
  4. Open Tally Prime Software
  5. Click on Help and click on TDL & Addon  (for Tally Prime)
  6. Press F4 (to open a Box)
  7. Set Load TDL file on Startup – Yes
  8. Paste The path in blank space
  9. Press enter and save
  10. Now your Quantity Total Column added for Tally Prime is ready to use.

The Alternate Unit Quantity Total TDL for Tally Prime is a game-changer for businesses seeking to enhance their voucher customization capabilities.

Tally TDL to Deactivate Wrong Ledger and Stock Items

2023 Best Free Tally TDL to Deactivate Wrong Ledger and Stock Items

Tally TDL to Deactivate Wrong Ledger and Stock Items can save your wrong entry possibility.

In accounting, accuracy is paramount. Mistakes in ledger and stock entries can have significant financial implications. Fortunately, Tally, the trusted accounting software, offers a powerful solution from TDL files. In this the “Deactivate Wrong Ledger and Stock Items” TDL (Tally Definition Language) will help a lot.

In this blog post, we’ll explore the importance of this TDL and how it can safeguard your financial records from costly errors.

Tally TDL to Deactivate Wrong Ledger and Stock Items:

Tally TDL to Deactivate Wrong Ledger and Stock Items is a custom TDL file designed to add an extra layer of protection to your Tally data by deactivating facility of wrong ledgers and items. With this we can deactivate unused, duplicates, wrong Ledgers and Stock Items.

Also checkout Voucher Modification TDL to add own header in TallyPrime 3.0 Voucher

Tally TDL to Deactivate Wrong Ledger and Stock Items

Deactivate Duplicate Ledger and Stock Items TDL code:

Accidental entries of incorrect ledgers or stock items can be prevented, safeguarding Vouchers and your financial records.


[#Line: MSTKI BalanceTitles]
Add:Field:DeactivateTitle
[Field:DeactivateTitle]
Use:name field
Set as:"Deactivate Item?"
Align:Right
Skip:Yes
[#Line: MSTKI BodyA]
Add:Field:After:MST Parent:Deactivate
[Field:Deactivate]
Use : Logical Field
Storage :LearnWellDeactivateItem
Set As : Yes
Set Always : Yes

[System:udf]
LearnWellDeactivateItem:Logical:3015

[System:Formula]
USEDStockitem:Not $LearnWellDeactivateItem

[#Collection: Vch Stock Item Extract]
Filter :usedstockitem


[#Line: MLED Titles]
Add:Field:after:Multi Master Name Title:DeactivateLDTitle
[Field:DeactivateLDTitle]
Use:name field
Set as:"Deactivate Ledger?"
Align:Center
Skip:Yes
[#Line: MLED Body]
Add:Field:After:Multi MST Name:DeactivateLD
[Field:DeactivateLD]
Use : Logical Field
Storage :LearnWellDeactivateLedger
Set As : Yes
Set Always : Yes
Align:Right

[System:udf]
LearnWellDeactivateLedger:Logical:3016

[System:Formula]
UsedLedger:Not $LearnWellDeactivateLedger

[#Collection: Party Ledgers]
	Filter:UsedLedger

Deactivate Duplicate Ledger and Stock Items TDL:

HOW TO USE TDL CODE:
  • Copy above TDL code and create a text file.
  • Save text file and load in Tally (Method provided below the code)
  • Goto Chart of Accounts and Multi Alter
  • Here you can enable disable ledgers and stock items.

This is best free TDL to have in your Tally. Must have TDL file for Tally ERP9 and Tally Prime that can use it for lifetime. This free TDL Code will perfectly work with Tally Prime.

Tally TDL to Deactivate Wrong Ledger and Stock Items Video:

See the below video to learn how to TDL and Multi Alter option in Tally Prime 3.0:

Watch above videos to learn :

  • How to use TDL files in Tally.
  • How to add own details in Tally TDL
  • How to create TDL file.
  • How to Deactivate Duplicate Ledgers and Stock items
  • More videos related to free TDL files on youtube/learnwell
  • Get More TDL files on https://e2t.in/
FOLLOW THE BELLOW INSTRUCTIONS TO LOAD TDL FILE IN TALLY:
  1. Make a Text file of above code
  2. Save it in to your computer
  3. Copy the text file path including Name and extension (as – C:\Users\HP\Desktop\rec\Duplicate.txt)
  4. Open Tally Prime Software
  5. Click on Help and click on TDL & Addon  (for Tally Prime)
  6. Press F4 (to open a Box)
  7. Set Load TDL file on Startup – Yes
  8. Paste The path in blank space
  9. Press enter and save
  10. Now your Deactivate Duplicate Ledger and Stock Items TDL for Tally Prime is ready to use.

By implementing this Tally Prime TDL, businesses can take a proactive approach to safeguarding their vouchers to select wrong ledgers and stock items. Embrace this powerful TDL file and experience the transformative impact it can have on your accounting practices with Tally.

Own Voucher Header Tally Prime 3.0 TDL

Amazing Own Voucher Header Tally Prime 3.0 TDL | Voucher Modification TDL for Tally Prime 3.0

With this Own Voucher Header Tally Prime 3.0 TDL we can modify voucher as per our need.

Tally Prime 3.0, is the latest version of Tally Software, offers customization options with the help of TDL. Own Voucher Header TDL allows businesses to brand their vouchers with a unique header.

In this blog post, we’ll see this Voucher Modification TDL and how it can add a professional touch to your Tally Prime 3.0 experience.

Own Voucher Header Tally Prime 3.0 TDL:

With this Tally Prime 3.0 TDL we can add image or own texts in voucher heading. We can add Voucher Name, God prayer, or any other image asper requirement.

Also checkout daily task reminder tdl

Own Voucher Header Tally Prime 3.0 TDL

Own Voucher Header Tally Prime 3.0 TDL Code:

Use the voucher header to convey specific messages, promotions, reminders, or announcements.

[#Part:VCH Registration]
	Add:Part:Before:VCH Registration Details:OmNamah
[Part:OmNamah]
Line:om
;Graph Type:"C:\Users\ssonu\Downloads\omnamah.jpg"
[Line:om]
Field:om

[Field:om]
Set as:"Om Namah Shivay                 : "
Style:LWStyle
Skip:Yes

[Style:LWStyle]
Font:"Eras Bold ITC"

Voucher Modification TDL:

HOW TO USE TDL CODE:
  • Copy above TDL code and create a text file.
  • Save text file and load in Tally (Method provided below the code)
  • Change message in TDL file .
  • Also can add image (watch the video for more understanding).

This is best free TDL to have in your Tally. Must have TDL file for Tally ERP9 and Tally Prime that can use it for lifetime. This free TDL Code will perfectly work with Tally Prime.

Voucher Modification TDL for Tally Prime Video:

See the below video to learn how to add message and image in Tally Prime 3.0:

Watch above videos to learn :

  • How to use TDL files in Tally.
  • How to add message and Image in Tally Prime 3.0 Voucher.
  • How to create TDL file.
  • How to add own fields in Tally Prime 3.0.
  • More videos related to free TDL files on youtube/learnwell
  • Get More TDL files on https://e2t.in/
FOLLOW THE BELLOW INSTRUCTIONS TO LOAD TDL FILE IN TALLY:
  1. Make a Text file of above code
  2. Save it in to your computer
  3. Copy the text file path including Name and extension (as – C:\Users\HP\Desktop\rec\Voucher.txt)
  4. Open Tally Prime Software
  5. Click on Help and click on TDL & Addon  (for Tally Prime)
  6. Press F4 (to open a Box)
  7. Set Load TDL file on Startup – Yes
  8. Paste The path in blank space
  9. Press enter and save
  10. Now your Voucher Modification TDL for Tally Prime is ready to use.

By using this invaluable Tally Prime TDL, businesses can elevate their brand identity in their financial communications. Embrace this powerful TDL and experience the impactful difference it can make in your Tally Prime 3.0 experience.

Item Sales Summary TDL

Tally Prime 3.0 Free TDL : Item Sales Summary | Item Sales Summary TDL

This Item Sales Summary TDL will help you a lot to see Items summary with there GST details, HSN, Quantity, Average Rates, Closing etc.

Tally Prime 3.0, the latest iteration of the Tally Business software, brings a host of powerful features to streamline business operations. One standout addition is the Item Sales Summary TDL – a free Tally Prime TDL File that empowers users to gain deeper insights into their sales performance.

In this blog post, we’ll explore the significance of this Item Sales Summary TDL and how it can revolutionize your Tally Prime experience.

Item Sales Summary TDL:

The Item Sales Summary TDL is a custom Tally TDL file designed specifically for Tally Prime 3.0 users. It provides a comprehensive overview of item-wise sales, enabling businesses to make informed decisions based on detailed sales data.

Item Sales Summary TDL

Item Sales Summary TDL Code:

The TDL seamlessly integrates with Tally Prime 3.0, ensuring a smooth transition into your existing workflow.

Also checkout Daily Auto Reminder TDL with Image

[#Menu : Gateway of Tally]
Item : Item Sales Summary : Display :LearnwellItemSumm
[Report :LearnwellItemSumm]
Form :LearnwellItemSumm
Variable : SVFromDate,SVToDate
Set : SVFromDate : $$MonthStart:##SVFromdate
Set : SVToDate : $$MonthEnd:##SVFromdate
[Form :LearnwellItemSumm]
Part : LWSummTitle,LWSummItemTitle,LWSummItemDetail
Button : Change Period,Print Button,Export Button
Bottom Part : LWSummItemDetailBTM
Background :White
[Part : LWSummTitle]
Line :LWSummTitle
[Line :LWSummTitle]
Field : Simple Field
Local : Field : Simple Field : Set As : "Item Sales Summary for" + $$String:##SVFromDate +" to " + $$String:##SVToDate
Local : Field : Simple Field : Style : Normal Bold
[Part : LWSummItemTitle]
Use : LWSummItemDetail
Delete : Repeat
Delete : Scroll
Border : ColumnTitles
Local : Field : Default : Type : string
Local : Field : LWSummItemDetailItem : Set As : "Particulars"
Local : Field : LWHsn : Set As : "HSN Code"
Local : Field : LWGstperc : Set As : "GST Rate"
Local : Field : LWQtyTTl: Set As : "Sales Qty"
Local : Field : LWItmRate : Set As : "Avg. Rate"
Local : Field : LWAmtTTl : Set As : "Sales Value"
Local :Field : Default : Style : Small Bold
[Part :LWSummItemDetail]
Line : LWSummItemDetail
Repeat : LWSummItemDetail :LWCollSalesItems
Scroll : Vertical
Total : LWQtyTTl,LWAmtTTl
[Line :LWSummItemDetail]
Field : LWSummItemDetailItem,LWHsn,LWGstperc
Right Field : LWQtyTTl,LWItmRate,LWAmtTTl
Border : Thin bottom
[Field : LWSummItemDetailItem]
Set As : $Stockitem
Style : Small
Display : Item Monthly Summary
Variable : StockitemName
[Field : LWHsn]
Use: Name Field
Set as:$(Stockitem,$stockitem).GstDetails[Last].hsncode
Width:10
Align: Center
Set Always: Yes
Skip: Yes
[Field : LWGstperc]
Use: Number Field
Set as:$(Stockitem,$stockitem).GSTDetails[First].StatewiseDetails[1, @@IsAnyState].RateDetails[1, @@IsIGST].GSTRate
Format: Percentage
Width:10
Align: Center
Set Always: Yes
Skip: Yes
[Field : LWQtyTTl]
Use : Qty Primary Field
Style : Small
Set As : $BilledQtyToT
[Field : LWItmRate]
Use : Rate Price Field
Set as : $AmountToT / $BilledQtyToT
Style : Small
[Field : LWAmtTTl]
Use : Amount Field
Set As : $AmountToT
Style : Small
[Part : LWSummItemDetailBTM]
Use : LWSummItemDetail
Delete : Repeat
Delete : Scroll
Delete : Total
Border : Totals
Local : Field : LWSummItemDetailItem : Set As : "Total"
Local : Field : LWQtyTTl: Set As : $$Total:LWQtyTTl
Local : Field : LWAmtTTl : Set As : $$Total:LWAmtTTl
Local :Field : Default : Style : Small Bold
[Collection : LearnwellItemSummcoll]
Type : Vouchers : VoucherType
Child of : $$VchTypeSales
Belongs to : yes
Fetch : Date,Inventory Entries
[Collection : LWCollSalesItems]
Source Collection : LearnwellItemSummcoll
Walk : Inventory Entries
By : Stockitem : $StockitemName
Aggr Compute : BilledQtyToT : Sum : $BilledQty
Aggr Compute : AmountToT : Sum : $Amount

Item Sales Summary TDL:

HOW TO USE TDL CODE:
  • Copy above TDL code and create a text file.
  • Save text file and load in Tally (Method provided below the code)
  • Go to Tally Main Screen and in Gateway of Tally find Item Sales Summary Tab .
  • From item Sales Summary Tab you can see Item summary with there GST details.

This is best free TDL to have in your Tally. Must have TDL file for Tally ERP9 and Tally Prime that can use it for lifetime. This free TDL Code will perfectly work with Tally Prime.

Item Sales Summary TDL Video:

See the below video to learn how to use Item sales summary TDL in Tally Prime 3.0:

Watch above videos to learn :

  • How to use TDL files in Tally.
  • How to see item wise sales summary report.
  • How to use item sales summary tdl in tally prime 3.0
  • More videos related to free TDL files on youtube/learnwell
  • Get More TDL files on https://e2t.in/
FOLLOW THE BELLOW INSTRUCTIONS TO LOAD TDL FILE IN TALLY:
  1. Make a Text file of above code
  2. Save it in to your computer
  3. Copy the text file path including Name and extension (as – C:\Users\HP\Desktop\rec\salesummary.txt)
  4. Open Tally Prime Software
  5. Click on Help and click on TDL & Addon  (for Tally Prime)
  6. Press F4 (to open a Box)
  7. Set Load TDL file on Startup – Yes
  8. Paste The path in blank space
  9. Press enter and save
  10. Now your item sales summary TDL for Tally Prime is ready to use.

The Item Sales Summary TDL for Tally Prime 3.0 is a game-changer for businesses seeking to gain a deeper understanding of their sales performance. Its ability to provide detailed item-wise sales data not only facilitates informed decision-making but also enhances inventory management strategies.