5 Best Game-Changing Upcoming TallyPrime Features That Will Change Your Working Style
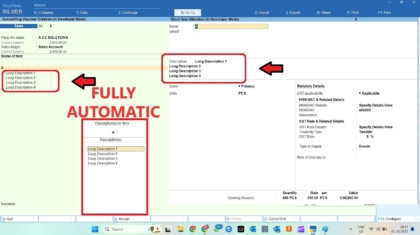
These 5 Game-Changing Upcoming TallyPrime Features That Will Change Your Working Style. For decades, Tally has been the cornerstone of Indian business, an indispensable tool for accounting and compliance. But while its reputation is built on reliabi ...