Tally Prime Best Settings

5 Tally Prime Best Settings You Need to Change Before You Start Working

Here are 5 Tally Prime Best Settings that will help you a lot. Most of us have a common habit when we get powerful new software: we open it and start working immediately. We learn the basics needed for our tasks but often overlook the settings panel, leaving everything on its factory defaults. This means we miss out on simple customizations that could lead to significant efficiency gains.

Tally Prime Best Settings You Need to Change Before You Start Working

New Tally Prime is a perfect example of a highly customizable tool that rewards users who take a few moments to configure it. While its default setup is functional, a few strategic tweaks—settings the pros use—can transform your daily experience, making the software faster, more intuitive, and better suited to your specific workflow.

This post reveals five simple, pre-use settings that can dramatically improve your daily productivity, speed, and overall comfort with Tally Prime. By making these changes just once, you can save valuable time every single day.

Tally Prime Best Settings

1. Automate Your Startup: Load All Your Companies Instantly

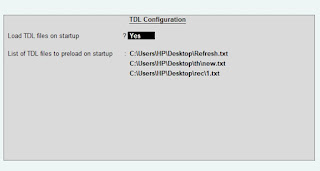
Every morning, it’s the same dance: find the folder, copy the path, paste it into Tally—and repeat for every single company you manage. This daily, manual process is a frustrating waste of time. The “Load companies on startup” feature, found under Help > Settings > Startup, eliminates this repetitive task entirely.

By enabling this setting, you can specify exactly which company data files you want Tally to open automatically every time you launch the application. It doesn’t matter if the data is stored across different folders or drives; you set the paths once, and Tally Prime handles the rest. This is a significant time-saver for anyone who juggles several company accounts, allowing you to get straight to work without the tedious setup.

2. Begin Your Day with a Financial Overview: Launch the Dashboard Automatically

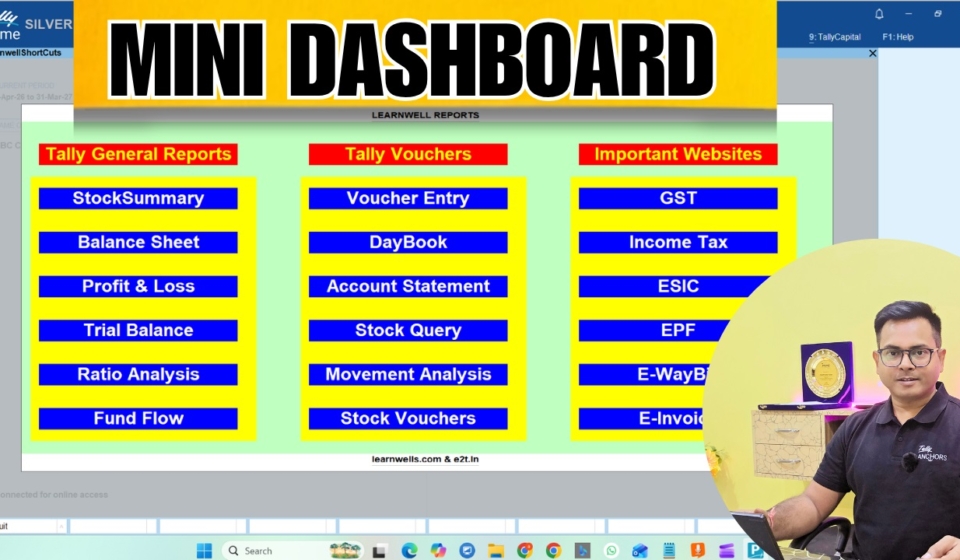
Instead of being greeted by a blank screen, imagine starting your day with a complete, actionable overview of your business’s financial health. The “Open Dashboard on loading company” setting makes this possible. When enabled, Tally Prime will automatically launch your customized dashboard as soon as your company data is loaded.

This simple change provides an immediate snapshot of all your key reports and MIS data. Before you make a single entry, you’ll have a clear view of the business, helping you plan your day, prepare necessary reports, and stay on top of critical financial metrics from the moment you begin working.

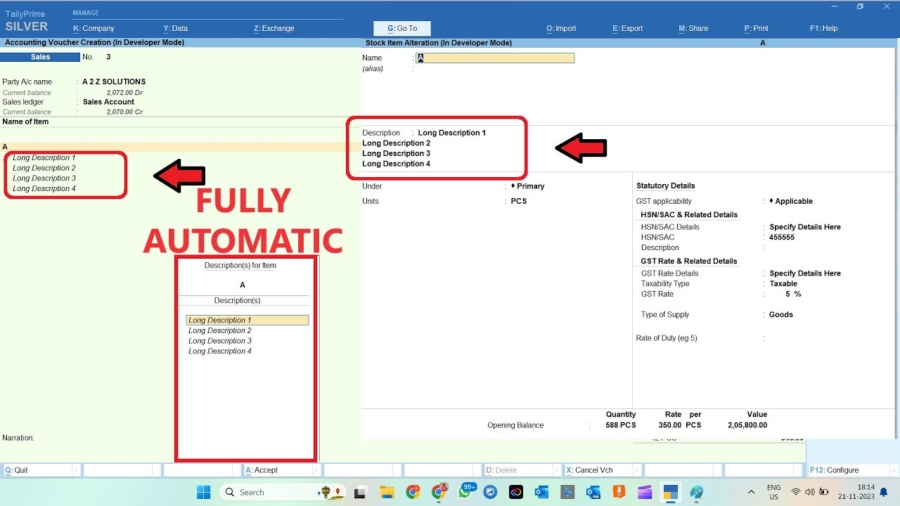
3. Achieve Total Clarity: Standardize How Names and Details Appear Everywhere

Have you ever found yourself searching for a ledger and thinking, “Oh man, why did I use an alias for this one? What name should I search?” This confusion wastes time and can lead to errors. Under Help > Settings > Display, you will find powerful settings that enforce consistency across your entire Tally environment.

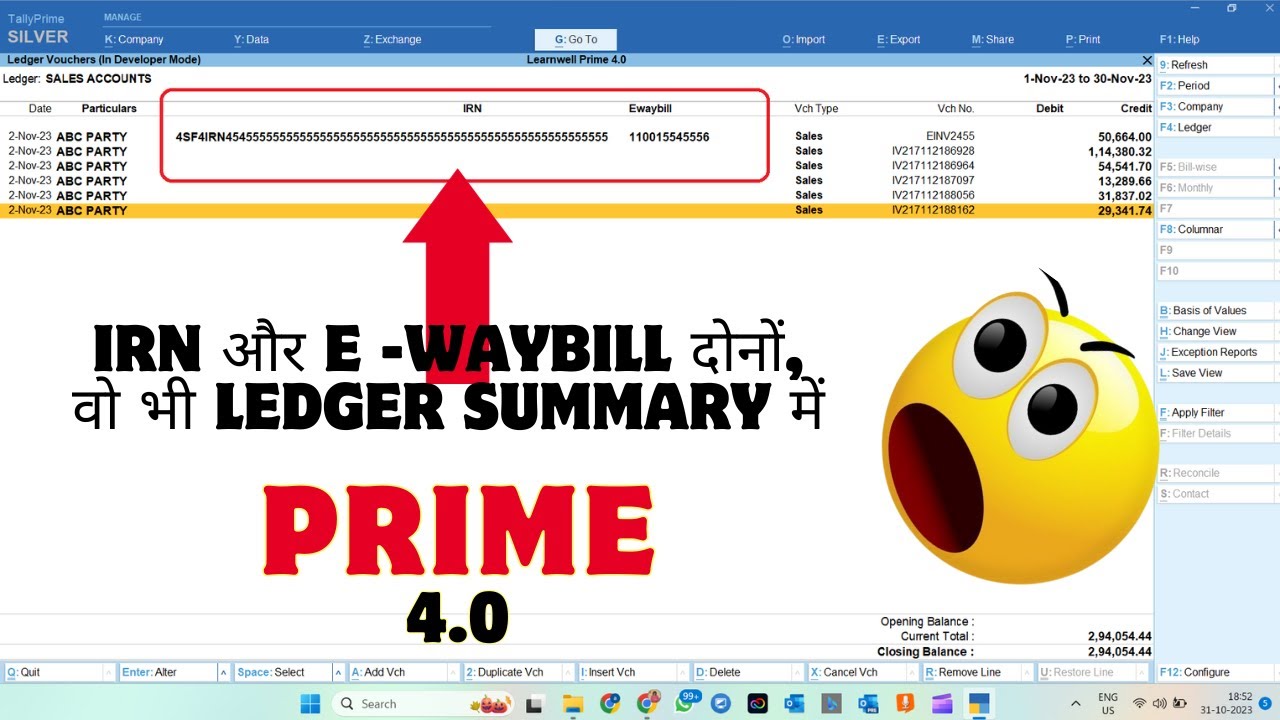
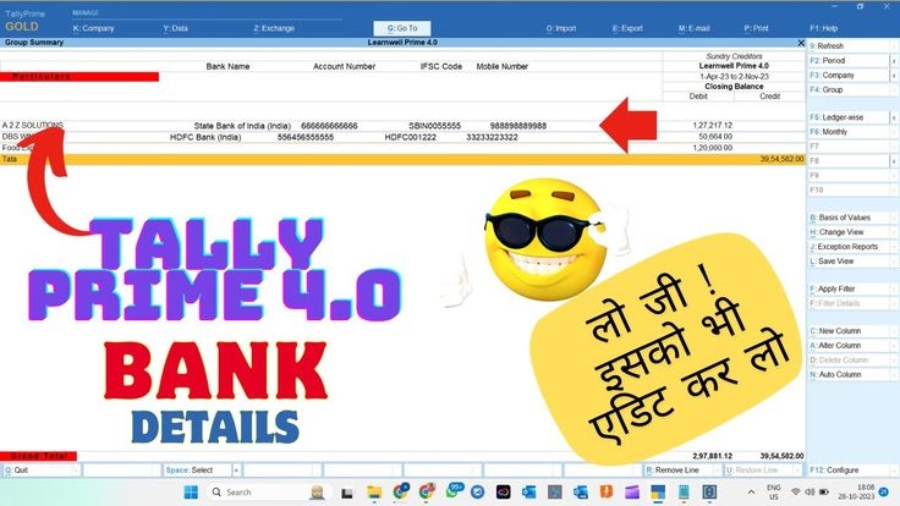
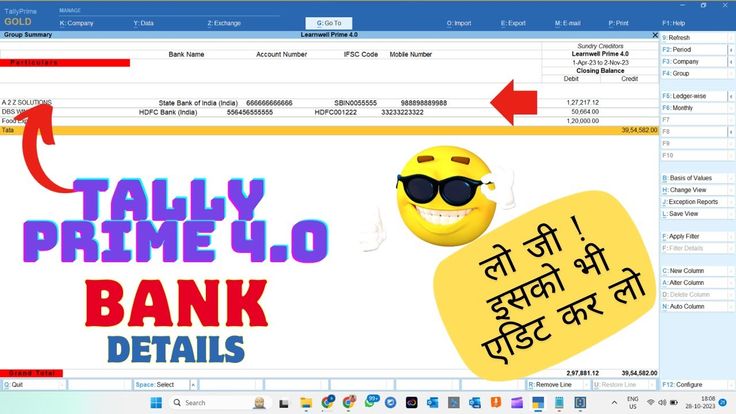
These settings—”Display name for ledger and groups,” “Display name for stock item,” and “Display name for employee”—allow you to globally define how information is presented. You can choose to display item names along with aliases, descriptions, or part numbers in every report, voucher, and summary. For payroll users, you can standardize how employee names appear. Once set, your preferred format appears everywhere, ensuring total clarity across the platform.

This feature is a powerful solution for anyone who struggles to remember aliases or needs to see key details like part numbers at a glance. By setting it once, you ensure that information appears consistently everywhere, saving time and preventing errors.

4. Declutter Your Main Screen: Organize Reports Under a “Final Accounts” Menu

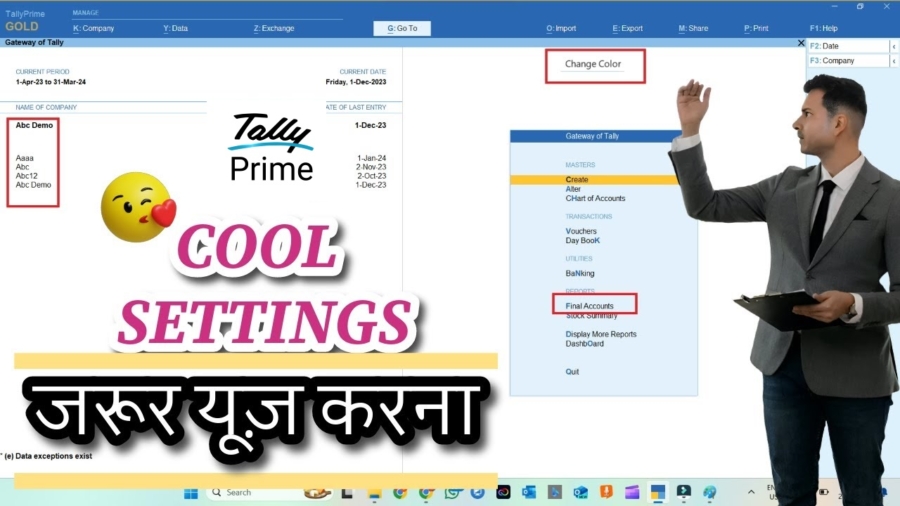
The Gateway of Tally is your central navigation hub, but over time it can become cluttered with a long list of reports. The “Show Final Accounts menu in Gateway of Tally” setting helps you achieve a cleaner, more organized interface.

When enabled, this feature tidies up the main screen by grouping essential reports—Balance Sheet, Profit & Loss Account, Cash Flow, Fund Flow, and Ratio Analysis—into a single, logical “Final Accounts” folder. This declutters your primary view and creates a more intuitive navigation experience, allowing you to access your most critical financial statements from one convenient location.

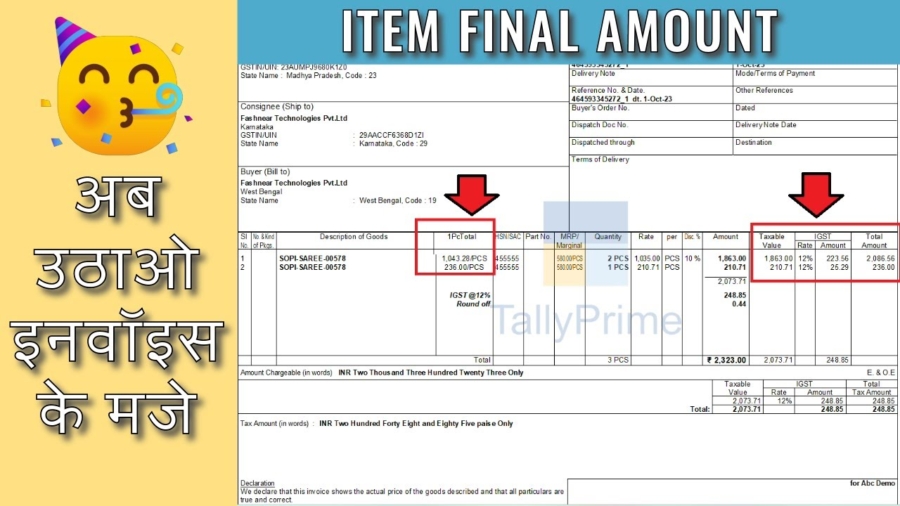
Also we can customize Tally Prime With TDL files, we can add final amount separately in invoice.

If you want to learn Tally TDL, Join this 2025 Best Tally Prime TDL course

5. Personalize Your Workspace: Adjust Colors and Silence Distractions

Your digital workspace impacts your focus and comfort. If the default Tally Prime display feels like it’s “stinging in your eyes” after a long day or the repetitive “click” sound is a constant distraction, you can easily change it. Tally Prime’s Color and Sound settings allow you to tailor the application’s look and feel to your preferences.

By disabling sound, you can eliminate the click that accompanies every entry, creating a quieter and more focused environment. Furthermore, adjusting the display mode between options like “soft” and “bright” can make the screen more comfortable to view. These may seem like minor changes, but they are simple yet impactful ways to reduce fatigue and make the software more pleasant to use for extended periods.

Find more Tally Prime related post in our other website

Conclusion: Final Thought

Taking just a few minutes to configure Tally Prime before you dive into your daily tasks can yield significant long-term benefits in productivity, clarity, and user comfort. These small, one-time adjustments streamline your workflow and tailor the software to work for you, not against you. Once you’ve implemented these, you can explore even deeper customizations, such as setting a default report filter mode or showing monthly summary graphs, to further refine your environment.

What other “set-and-forget” tweaks in your daily software could be unlocking hidden productivity?

Tally Prime Voucher Numbering

4 New Tally Prime Voucher Numbering Secrets will Make you a Successful Accountant

Have you ever scrolled through your sales vouchers and noticed a strange gap in the New Tally Prime Voucher Numbering? You see voucher #24, then #26, but #25 is nowhere to be found. Or perhaps you’ve pulled a report only to find different numbering series running within the same voucher type, leaving you to manually fix the entire sequence.

Tally Prime Voucher Numbering

Tally Prime Voucher Numbering a common mystery that leaves many Tally users confused and frustrated. The good news is that it’s not a bug, and you don’t need to resort to manual corrections. Tally Prime has powerful, often-overlooked features designed to give you complete control over your voucher numbering. This article will reveal four of the most impactful secrets that will end your voucher headaches for good.

Tally Prime Voucher Numbering

1. Why Tally Prime Voucher Numbering Don’t Re-sequence Anymore (And Why That’s a Good Thing)

Understanding the Default New Tally Prime Voucher Numbering Secrets: Why Gaps Are Now a Feature, Not a Bug

In Tally Prime, the default behavior for automatic Tally Prime Voucher Numbering is governed by an option called Retain Original Voucher Number. This is a significant change from Tally ERP 9, which would automatically re-sequence all subsequent vouchers if you deleted one from the middle of a series.

With Tally Prime’s default Retain setting, if you delete voucher #25, the system leaves a gap between #24 and #26. The numbers for vouchers #26, #27, and so on do not shift up to fill the space.

Protecting Your Audit Trail: The Power of Retain

While in Tally Prime Voucher Numbering a gap might seem messy, the Retain Original Voucher Number behavior is crucial for data integrity and auditing. It ensures that a voucher, once created, keeps its original number for life. This prevents accidental changes to historical data and maintains a clean, unambiguous audit trail.

The alternative, Renumber Vouchers, will shift all subsequent voucher numbers upon a single deletion, altering the entire series. The Renumber Vouchers option should be used with extreme caution, but it can be suitable for internal, non-statutory voucher types where maintaining a perfectly gapless sequence for reporting is more important than preserving the original entry number.

A word of caution: Before ever switching a voucher type to Renumber Vouchers, be absolutely certain you understand the consequences. Altering historical voucher numbers can create significant reconciliation challenges during an audit. Always back up your data first.

2. How to Resurrect and Reuse a ‘Lost’ Voucher Number

So, a gap has been created by deleting voucher #25. What do you do with it? When you go to create a new voucher, Tally will logically suggest the next number in the sequence (e.g., #30 if #29 was the last one entered), not the missing one.

Filling the Gaps Intelligently

To fill the gap and reuse the “lost” Tally Prime Voucher Numbering, you can access a hidden list of available numbers.

1. While on the new voucher creation screen, navigate to the More Details button on the right-hand side panel.

2. From the list that appears, select Select Unused Voucher Numbers.

3. Tally will now display a list of all unused numbers in that voucher series (for example, #19 and #25).

4. Simply select the number you wish to use (e.g., #25), and Tally will apply it to your new voucher, perfectly filling the gap in your sequence.

Think of this not just as fixing a deletion, but as a way to strategically manage your numbering. You could intentionally delete a provisional voucher and reuse its number for the final version later.

Pro-Tip: This gap-filling feature is exclusively tied to the Retain Original Voucher Number method. To enable it, you must also set Show Unused Voucher Numbers to ‘Yes’ in the voucher type alteration screen. If you use the Renumber method, this option will be unavailable as gaps are never created.

There is some TDL files also available to change voucher numbers, can check here.

And if you want to create your own TDL files, you can join Best Tally Prime TDL Course.

3. The “Best of Both Worlds”: Combining Automatic and Manual Tally Prime Voucher Numbering

While a pure Manual mode offers total control, it sacrifices the speed of automation. For situations demanding both, Tally created the Automatic (Manual Override) method.

The Ultimate Flexibility: Automatic (Manual Override)

This powerful mode works by giving you the best of both worlds:

• Automatic by Default: When you create a new voucher, the system automatically provides the next sequential number. If your last voucher was #1, it will suggest #2.

• Manual Power: Unlike the standard ‘Automatic’ mode, you can simply type over the suggested number. You can change the suggested #2 to #12, for example, and proceed with your entry.

• Intelligent Sequencing: The system is smart enough to continue the sequence from your last entry. After you manually create voucher #12, the next voucher you create will automatically be numbered #13.

This method is ideal for businesses that follow a standard daily sequence but need to occasionally insert a back-dated invoice or assign a specific number requested by a client, all without disrupting the primary workflow.

4. The Simple Fix for Multi-User Voucher Conflicts

The Teamwork Bottleneck: Simultaneous Entry Errors

In a networked environment where multiple users create entries simultaneously, a common point of friction arises. Imagine two accountants are creating sales invoices at the same time. Both of their screens show the next available voucher number is #10. The first user saves their invoice successfully. When the second user tries to save theirs, they receive a “voucher number already used” error, forcing them to re-enter or accept a new number.

The Conflict-Free Solution: Multi-User Auto

Tally Prime has a specific numbering method designed to completely eliminate this problem: Multi-User Auto.

When this mode is active, Tally displays a placeholder number like “3 auto” on the screens of all users creating a new voucher. The system intelligently manages the final numbering behind the scenes.

• User 1 sees “3 auto” and saves their voucher. Tally assigns it the final, unique number #3.

• At the same time, User 2 also sees “3 auto” and saves their voucher. Instead of showing an error, Tally seamlessly assigns it the next unique number, #4.

The process is instant and error-free. Tally Prime is intelligent enough to find any instance of the ‘3 auto’ placeholder text—whether in the Bill-wise reference field or the Narration—and automatically replaces it with the final, unique voucher number (e.g., #4) upon saving.

Implement this immediately if you have two or more people entering the same voucher type. It will eliminate a constant source of errors, save time on corrections, and significantly reduce team friction during peak business hours.

Also checkout our other website

——————————————————————————–

Conclusion: Take Control of Your Data

You now have the keys to unlock complete control over your voucher numbering. The default settings in Tally Prime are designed for safety and audit compliance, but as you’ve seen, the flexibility is immense. Your task now is to audit your own processes. Are you fighting with multi-user errors? Is your team confused by gaps? Choose the right method from this guide, implement it, and turn one of Tally’s most common headaches into a streamlined asset for your business.

Tally TDL course

Learn Tally TDL Course From Scratch – Step-by-Step Guide | Tally TDL Course

I introduce here to Learn Tally TDL From Scratch – Step-by-Step Tally TDL Course. Tally is one of the most popular and powerful accounting software used by businesses worldwide. However, the true strength of Tally lies in its ability to be customized and extended using Tally Definition Language (TDL). TDL allows you to create custom reports, automate data processing, design vouchers, and modify the Tally interface to suit your business needs.

If you’ve ever wished to modify Tally reports or automate business processes directly in Tally, learning TDL Programming is the key! This blog introduces you to our Complete Tally TDL Course – a step-by-step program designed to take you from a beginner to an expert in TDL.

Tally TDL course

Table of Contents

What is Tally TDL?

Tally Definition Language (TDL) is the proprietary language used to customize and extend the functionality of Tally. With TDL, you can:

  • Create custom reports (e.g., Trial Balance, Ledger Report, Stock Summary)
  • Add new fields and buttons in the Tally interface
  • Automate data entry and processing
  • Modify voucher formats
  • Create customized dashboards and reports
  • Integrate Tally with other systems (e.g., Excel, SQL databases)

TDL is easy to learn and powerful enough to handle complex business scenarios. By learning TDL, you can adapt Tally to your business requirements and increase efficiency.

Why Tally TDL Course?

Many businesses rely on Tally for accounting and financial management. However, the default features of Tally may not always align with the unique needs of every business. That’s where TDL comes in:

✔️ Customization: Modify reports, vouchers, and ledgers to match your business requirements.
✔️ Automation: Reduce manual work by automating data entry and processing.
✔️ Enhanced Reporting: Create detailed financial and inventory reports.
✔️ Integration: Integrate Tally with external systems like Excel, SQL, and other platforms.
✔️ Business Efficiency: Improve accuracy and save time with automated processes.

What You’ll Learn in This Course

Our Complete Tally TDL Course is designed to take you step-by-step from the basics to advanced TDL coding. The course is structured over 13 detailed chapters with real-world examples, practical exercises, and coding projects.

Key Topics Covered:

1. Introduction to TDL Programming

  • What is TDL?
  • Setting up the TDL development environment
  • Creating your first TDL file
  • How to load and test TDL files in Tally

2. TDL Syntax and Structure

  • TDL file structure
  • Keywords and syntax rules
  • Using [#Form], [#Report], [#Field]
  • Commenting and debugging TDL code

3. Working with Variables, Functions & User Inputs

  • Defining variables in TDL
  • Creating and using functions
  • Capturing user input
  • Conditional statements in TDL

4. Report Customization

  • Creating new reports
  • Customizing existing reports
  • Adding fields and filters
  • Handling hierarchical data in reports

5. Collections – The Core of TDL

  • What are Collections in TDL?
  • Creating Master Collections and Voucher Collections
  • Using Fetch, Filter, Compute, and Aggr Compute
  • Creating recursive collections for dynamic reports

6. Advanced Collection Handling

  • Dynamic and Source Collections
  • Walk through parent-child data
  • Combining multiple data sources
  • Handling complex report structures

7. Customizing Vouchers and Masters

  • Modifying Sales, Purchase, and Payment Vouchers
  • Adding new fields to Masters and Vouchers
  • Handling voucher numbering
  • Creating automatic posting vouchers

8. Form Customization

  • Designing new Forms
  • Adding buttons and fields
  • Handling form submission events
  • Designing multi-tab forms

9. Data Handling and Processing

  • Reading and Writing data using Collections
  • Handling date, time, and numeric fields
  • Using aggregations in reports
  • Handling complex calculations

10. Integration with External Systems

  • Importing and exporting data to Excel
  • Connecting to SQL databases
  • Using ODBC connections
  • HTTP POST and API integration

11. GST and Tax Automation

  • Creating GST reports
  • Automating tax calculation
  • Customizing invoice formats
  • Handling tax adjustments

12. Error Handling and Debugging

  • Common TDL errors
  • Using logs and debug windows
  • Handling unexpected data values

13. Final Project – Create a Complete Business Dashboard

  • Create a Trial Balance, Profit & Loss, and Balance Sheet
  • Create a customized Stock Summary Report
  • Build a multi-company data report
  • Automate financial calculations

Who is This Tally TDL Course For?

This course is designed for:

  • Business Owners – Customize Tally to suit business needs.
  • Accountants – Generate custom financial reports.
  • Tally Users – Automate repetitive tasks in Tally.
  • Software Developers – Integrate Tally with other platforms.
  • Tally Consultants – Offer customization services to clients.

What You Need Before Starting

  • Basic understanding of Tally operations.
  • Tally Prime installed on your system.
  • Basic knowledge of accounting concepts.
  • Willingness to learn coding (no prior programming knowledge required).

Why This TDL Course is the Best Choice

👉 Complete and Structured: The course is structured to take you from beginner to expert.
👉 Hands-On Learning: Every lesson includes practical exercises and projects.
👉 Real-World Examples: Learn how to create actual business reports and automations.
👉 Expert Guidance: Created by a Tally and TDL expert with years of industry experience.
👉 Lifetime Access: Get access to the course and updates forever.

How to Get Started

  • Enroll in the course from Courses.Learnwells.com
  • Download the Tally TDL Book and Tally Prime Developer Provided in the Course.
  • Start learning step-by-step from Lesson 1.
  • Practice the exercises and projects provided.
  • Complete the final project to become a certified TDL expert.

Ready to Master Tally TDL?

If you’re ready to unlock the full potential of Tally and become a TDL expert, this course is the perfect solution! Join today and start creating custom reports, automating financial processes, and enhancing Tally’s performance like a pro!

👉 ENROLL NOW and start your TDL journey today!

FAQ:

What is Tally TDL?

Tally TDL (Tally Definition Language) is the proprietary programming language of Tally. It allows users to customize and extend the functionality of Tally. Using TDL, you can create custom reports, modify voucher formats, automate data entry, and integrate with external systems.

Who should learn Tally TDL course?

This course is ideal for:

  • Business owners who want to customize Tally for their business needs.
  • Accountants who want to automate data processing and reporting.
  • Software developers who wish to integrate Tally with other platforms.
  • Tally users who want to modify reports and vouchers.
  • Tally consultants looking to offer advanced solutions to clients.

Do I need programming experience to learn Tally TDL?

No prior programming experience is required. The course starts from the basics and gradually moves to advanced concepts. Even if you’re new to coding, you can follow along with the step-by-step tutorials.

What are the benefits of learning Tally TDL Course?

By learning TDL, you will be able to:
✔️ Create customized reports and invoices.
✔️ Automate repetitive tasks in Tally.
✔️ Handle complex data using Collections.
✔️ Generate detailed financial reports.
✔️ Integrate Tally with external systems (like Excel, SQL).

What are TDL Collections and why are they important?

Collections in TDL are used to fetch, organize, and process data in Tally. They allow you to:

  • Create dynamic reports.
  • Handle hierarchical data (like parent-child relationships).
  • Aggregate and compute data for financial summaries.
  • Improve report performance by reducing data load time.

How long does it take to complete the Tally TDL course?

The course is designed to be completed in 2 to 4 weeks depending on your learning pace. It covers over 15 hours of content, including theory, coding examples, and practical exercises.

What are some real-world applications of TDL?

You can use TDL to:
✔️ Create customized financial reports.
✔️ Automate invoice and voucher creation.
✔️ Develop a real-time sales dashboard.
✔️ Modify stock summary and inventory reports.
✔️ Integrate Tally data with Excel and SQL databases.

Can I modify existing Tally reports using TDL?

Yes! TDL allows you to modify any existing report in Tally. You can add new fields, change the report format, and apply filters to customize the output.

What kind of support is available during the course?

You will have access to:
✔️ Step-by-step tutorials.
✔️ Coding examples and downloadable files.
✔️ Community forum for asking questions.
✔️ Whatsapp support from the instructor

Will the course cover GST and tax automation using TDL?

Yes! The course includes a dedicated section on GST and tax automation. You will learn to create GST reports, automate tax calculations, and modify invoice formats to comply with tax rules.

How is this course different from other Tally TDL courses?

This course is unique because:
✔️ It’s structured step-by-step from basics to advanced concepts.
✔️ It includes real-world projects and practical exercises.
✔️ It covers advanced topics like API integration, collections, and dashboard creation.
✔️ It provides detailed explanations and sample codes for easy understanding.

How will I practice the coding examples?

Each coding example comes with sample files and step-by-step instructions. You can test them directly in Tally Prime using the Developer Mode.

Can I access the course material after completion?

Yes, you will have lifetime access to all the course material, including future updates.

What software do I need to install to start the course?

You will need:

  • Tally Prime (latest version)
  • Tally Developer (for writing and testing TDL code)
  • A text editor (like Notepad++ or Notepad)

How can I enroll in the course?

You can enroll directly from our website courses.learnwells.com. Once enrolled, you can access course material.

What payment methods are accepted for enrolling?

We accept major payment methods including:
✔️ Credit Card/Debit Card
✔️ UPI
✔️ PayPal/Razorpay/Instamojo
✔️ Net Banking

Will this course help me get a job as a TDL developer?

Yes! The skills you learn in this course are highly valuable for Tally customization and automation jobs. Many businesses are looking for TDL experts to improve their Tally performance and reporting.

Add Customer Photo in Ledger

2024 Best TallyPrime TDL to Add Customer Photo in Ledger

If you want to maintain customer’s details in proper way then you can use this TallyPrime TDL to Add Customer Photo in Ledger. Adding customer photo in Tally ledger will help to collect outstanding and maintain customer relation also.

Add Customer Photo in Ledger:

By adding a customer photo to the ledger, which can be particularly useful for businesses that require a visual identification of their clients. This post will guide you through the process of adding a customer photo in the ledger using TDL in TallyPrime.

Why Add Customer Photos?

  1. Enhanced Identification: Quickly identify customers, especially useful in retail and membership-based services.
  2. Personalization: Adds a personal touch to customer records.
  3. Security: Helps in verifying the identity of the customer during transactions

Also checkout Each Item Total Value in Invoice TDL

Add Customer Photo in Ledger

Add Customer Photo in Ledger TallyPrime TDL Code:

Below TallyPrime TDL code will help you to add customers photo in Ledger:

[#Part:MSTLed Initial]
Add:Right Part:Before:Mstled OpAmts:LWPartyImageLink, LWPartyImage

[Part:LWPartyImageLink]
Line:LinkLineLW
[Line:LinkLineLW]
Field:Short Prompt,LEdImageLinkLW
Local:Field:ShortPrompt:Info:"ImageLink:"

[field:LEdImageLinkLW]
use:name field
Storage:LedgerImage

[System:UDF]
LedgerImage:String:1221

[Part:LWPartyImage]
Line:Empty
Image:LearnwellImage
Width:20% screen
Height:20%screen

[Resource:LearnwellImage]
Source:$LedgerImage
Resource Type:Jpeg

Customer Photo in Ledger TDL:

HOW TO USE TDL CODE:
  • Copy above TDL code and create a text file.
  • Save text file and load in Tally
  • Now goto Create a Ledger ther, you will find a blank space to add photo link.
  • Add/Paste an Image link and press enter and create ledger (Image should be in JPEG format).

This is best free TDL to have in your Tally. Must have TDL file for Tally ERP9 and Tally Prime that can use it for lifetime. This free TDL Code will perfectly work with Tally Prime.

Customer Image Tally Prime TDL Video:

See the below video to learn how to add own fields in a Ledger to add image Links:

Watch above videos to learn :

  • How to use TDL files in Tally.
  • How to Modify ledgers of Tally.
  • How to add Image Link in Tally.
  • More videos related to free TDL files on youtube/learnwell
  • Get More TDL files on https://e2t.in/
FOLLOW THE BELLOW INSTRUCTIONS TO LOAD TDL FILE IN TALLY:
  1. Make a Text file of above code
  2. Save it in to your computer
  3. Copy the text file path including Name and extension (as – C:\Users\HP\Desktop\PartyImage.txt)
  4. Open Tally Prime Software
  5. Click on Help and click on TDL & Addon  (for Tally Prime)
  6. Press F4 (to open a Box)
  7. Set Load TDL file on Startup – Yes
  8. Paste The path in blank space
  9. Press enter and save
  10. Now your TDL to Add Party Image in Ledger is ready to use.

Adding a customer photo to the ledger in TallyPrime using TDL enhances the functionality and personalization of your accounting software. This customization is particularly beneficial for businesses that interact directly with customers and need a quick way to verify identities.

Item Final Amount in Invoice

2024 Best Tally Prime TDL to Add Item Final Amount in Invoice

This is the best free Tally Prime TDL to Add Item Final Amount in Invoice. In a Tally Invoice if you want to see total amounts of every stock item including GST and Discount then this Tally TDL file will help you a lot. Tally also have a feature to see Item Total amount in same row in invoice, that will be discussed in below video of this blog post.

Item Final Amount in Invoice:

When managing invoices in Tally Prime, calculating the final amount for each item, including discounts and GST, is a crucial task for ensuring accurate billing and financial records. The total amount payable for each item will be show in invoice in front of every item.

Also check fully automatic item multiple description TDL

Item Final Amount in Invoice

Item Final Amount in Invoice Tally Prime TDL code:


[#Line: ExpInv Column1]
Add : Left Field : After :EXPINV DescTitle :ItemTotalT
[Field:ItemTotalT]
Set As:"1PCTotal"
Set Always : Yes
Width : 10
Align : Center
Border : Thin Left

[#Line :ExpInv InvDetails]
add : left Fields : after : EXPINVDesc :ItemTotal
[Field : ItemTotal]
use : Name Field
Set as :#EXPINVTotalTaxAmt/#EXPINVQty
Set Always : Yes
Width : 10
Align : Center
Border : Thin Left

Total Amount of Items in Invoice :

HOW TO USE TDL CODE:
  • Copy above TDL code and create a text file.
  • Save text file and load in Tally
  • Create a Sales Voucher with Stock Item and Print It.
  • Now in Print you can see Stock Items Total Amount including gst in front of Items name.

This is best free TDL to have in your Tally. Must have TDL file for Tally ERP9 and Tally Prime that can use it for lifetime. This free TDL Code will perfectly work with Tally Prime.

Stock Item Total in Invoice Tally Prime TDL Video:

See the below video to learn how to add own fields in a invoice to add own details and how to use Tally Default Invoice Total feature:

Watch above videos to learn :

  • How to use TDL files in Tally.
  • How to Modify Invoice of Tally.
  • How to use Item Total feature of Tally.
  • More videos related to free TDL files on youtube/learnwell
  • Get More TDL files on https://e2t.in/
FOLLOW THE BELLOW INSTRUCTIONS TO LOAD TDL FILE IN TALLY:
  1. Make a Text file of above code
  2. Save it in to your computer
  3. Copy the text file path including Name and extension (as – C:\Users\HP\Desktop\ItemTotal.txt)
  4. Open Tally Prime Software
  5. Click on Help and click on TDL & Addon  (for Tally Prime)
  6. Press F4 (to open a Box)
  7. Set Load TDL file on Startup – Yes
  8. Paste The path in blank space
  9. Press enter and save
  10. Now your Item Total in Invoice TDL for Tally Prime is ready to use.

By customizing Tally Prime with TDL, you can accurately calculate and display the final amount for each item in an invoice, including discounts and GST.

Download Tally Prime TALLY PRIME LIFETIME LICENSE

Download TallyPrime | Buy and Renew TallyPrime

Now you can Download TallyPrime, Buy and Renew TallyPrime. If you have a business and want to maintain your books then you can download Tally Prime business software.

If you looking to optimize your Tally software experience. Whether you need to purchase a new license, renew your existing Tally TSS, or explore flexible subscription options like Lifetime Tally Prime License or Monthly Rental License, then go through below links:

Download TallyPrime:

If you’re new to Tally and looking to get started, purchasing the software is your first step. Tally is renowned for its robust features that streamline accounting, inventory management, and compliance processes.

Buy Tally and unlock the potential of seamless business operations.

Buy Download Tally Prime

Renew Tally TSS: Keep Your Software Updated:

For existing Tally users, it’s crucial to keep your Tally Software Services (TSS) up-to-date. TSS ensures you receive the latest updates, enhancements, and support to keep your software running smoothly.

🛠️ Renew your TSS today to continue enjoying uninterrupted services and new features. 🛠️

Tally Prime TSS Renewal Buy and Renew TallyPrime

Lifetime TallyPrime License: One-Time Investment for Long-Term Benefits:

If you prefer a long-term solution without the need for frequent renewals, the Lifetime License option is perfect for you. This one-time investment provides you with perpetual access to TallyPrime, ensuring you never have to worry about renewals again.

🔑 Get a Lifetime License and enjoy uninterrupted access to Tally forever. 🔑

TALLY PRIME LIFETIME LICENSE

Tally Prime Monthly License: Flexibility for Your Business:

For businesses that prefer flexibility, Tally offers a monthly subscription model. This option is ideal for startups or businesses with dynamic needs, allowing you to manage your expenses effectively.

💳 Subscribe to Tally on a monthly basis and enjoy the flexibility you need. 💳

TALLY PRIME MONTHLY LISENCE

No matter your business needs, Tally Solutions provides a variety of options to ensure your accounting software is always up-to-date and suited to your requirements. Whether you’re buying Tally for the first time, renewing your TSS, opting for a lifetime license, or subscribing monthly, each choice is designed to enhance your user experience and streamline your business operations.

Don’t wait—take the next step in optimizing your Tally software today!

Also checkout Excel to Tally Ecommerce Data Import in One Click

Multi Automatic Item Description TDL

2024 Best Multi Automatic Item Description TDL

If you run Tally for your business and maintain stock items then this Multi Automatic Item Description TDL will help you a lot. With this Tally Prime TDL we can add Item description multiple times in stock item that also will show in voucher.

Multi Automatic Item Description TDL:

With this TDL, you can add multiple descriptions for each stock item. Whether it’s technical specifications, usage instructions, or promotional information, you can capture every detail necessary for better inventory management and customer communication.

Also checkout IRN and Ewaybill TDL

Multi Automatic Item Description TDL

Multi Automatic Item Description TDL Code:

Add Stock Item description in Multiple Lines with Below code:

[#Part: STKI Desc]
	Add:Line:After:STKI Desc:LearnwellDesc1,LearnwellDesc2,LearnwellDesc3
[Line:LearnwellDesc1]
	Add:Field:LWDesc1,LWDesc2,LWDesc3
[Field:LWDesc1]
Use         : Name Field
Use			: First Upper Case Field
Storage     : LWDesc1Storage
Max         : @@MaxNameWidth
Width		: 55
Modifies    : DEFStockDesc
Set as      : ""
Full Width	: Yes
Key         : PrevSTKDesc
[Line:LearnwellDesc2]
	Add:Field:LWDesc2
[Field:LWDesc2]
Use         : Name Field
Use			: First Upper Case Field
Storage     : LWDesc2Storage
Max         : @@MaxNameWidth
Width		: 55
Modifies    : DEFStockDesc
Set as      : ""
Full Width	: Yes
Key         : PrevSTKDesc
[Line:LearnwellDesc3]
	Add:Field:LWDesc3
[Field:LWDesc3]
Use         : Name Field
Use			: First Upper Case Field
Storage     : LWDesc3Storage
Max         : @@MaxNameWidth
Width		: 55
Modifies    : DEFStockDesc
Set as      : ""
Full Width	: Yes
Key         : PrevSTKDesc

[System:UDF]
    LWDesc1Storage:String:3033
	LWDesc2Storage:String:3035
	LWDesc3Storage:String:3036
	LWVDesc1Storage:String:3034
	LWVDesc2Storage:String:3037
	LWVDesc3Storage:String:3038

[#Part: EI DescExplosion]
	Line:EI DescExplosion,LWVDescLine1,LWVDescLine2,LWVDescLine3
[Line: LWVDescLine1]
	Field:LWVDesc1
	Indent  : If ($$InPrintMode AND NOT (@@IsStockJrnl OR @@IsPhysStock)) Then 6 Else 2
	Remove if	: #EIDesc = $$String:0
[Field:LWVDesc1]
	Use     : Name Field
    Style   : Small Italic
	Storage:LWVDesc1Storage
	Set as: $LWDesc1Storage:STOCKITEM:$STOCKITEMNAME
[Line: LWVDescLine2]
	Field:LWVDesc2
	Indent  : If ($$InPrintMode AND NOT (@@IsStockJrnl OR @@IsPhysStock)) Then 6 Else 2
	Remove if	: #EIDesc = $$String:0
[Field:LWVDesc2]
	Use     : Name Field
    Style   : Small Italic
	Storage:LWVDesc2Storage
	Set as: $LWDesc2Storage:STOCKITEM:$STOCKITEMNAME
[Line: LWVDescLine3]
	Field:LWVDesc3
	Indent  : If ($$InPrintMode AND NOT (@@IsStockJrnl OR @@IsPhysStock)) Then 6 Else 2
	Remove if	: #EIDesc = $$String:0
[Field:LWVDesc3]
	Use     : Name Field
    Style   : Small Italic
	Storage:LWVDesc3Storage
	Set as: $LWDesc3Storage:STOCKITEM:$STOCKITEMNAME
	

Multiple Item Description in Item Master and Voucher :

HOW TO USE TDL CODE:
  • Copy above TDL code and create a text file.
  • Save text file and load in Tally
  • Go to create stock items and fill multiple line description.
  • Also in Voucher will find multiple line description of items.

This is best free TDL to have in your Tally. Must have TDL file for Tally ERP9 and Tally Prime that can use it for lifetime. This free TDL Code will perfectly work with Tally Prime.

Multi Automatic Item Description TDL Video:

See the below video to learn how to add multiple description in Item master and in voucher:

Watch above videos to learn :

  • How to use TDL files in Tally.
  • How to Modify item Master in Tally.
  • How to use master details in Voucher.
  • More videos related to free TDL files on youtube/learnwell
  • Get More TDL files on https://e2t.in/
FOLLOW THE BELLOW INSTRUCTIONS TO LOAD TDL FILE IN TALLY:
  1. Make a Text file of above code
  2. Save it in to your computer
  3. Copy the text file path including Name and extension (as – C:\Users\HP\Desktop\ItemDescription.txt)
  4. Open Tally Prime Software
  5. Click on Help and click on TDL & Addon  (for Tally Prime)
  6. Press F4 (to open a Box)
  7. Set Load TDL file on Startup – Yes
  8. Paste The path in blank space
  9. Press enter and save
  10. Now your Item Description TDL for Tally Prime is ready to use.

Multi Automatic Item Description TDL will be useful for multiple Line extra details of Tally stock Items.

IRN and Ewaybill Number TDL

2024 Popular IRN and Ewaybill Number TDL

Now with this IRN and Ewaybill Number TDL we can add IRN number and EWaybill Number in Customers Ledger Account Summary. This will help customers who create invoices with IRN and Ewaybill Number and want to track records, which invoices are created with IRN and Ewaybill.

IRN and Ewaybill Number TDL:

This Tally Definition Language (TDL) can be use to summarized IRN (Invoice Reference Number) and eWaybill number functionalities into Tally Prime party ledger summary. That will help to track records of IRN and Ewaybill Numbers.

IRN and Ewaybill Number TDL

Also Checkout TDL to add Bank Details in Sundry Debtors Group

IRN and Ewaybill Number TDL Code:

Use Below Tally Prime TDL code to see IRN and Ewaybill Number in Party Ledger Summary:

[#Line:DSP VCHAccTitles]
Add:Right Field:Before:DSP VchTypeTitle:LWIrnTitle,LWEwaybillTitle
[Field:LWIrnTitle]
Use:Name Field
Set as:"IRN"
Style:Normal
[Field:LWEwaybillTitle]
Use:Name Field
Set as:"EWAYBILL"
Style:Normal
Width:12

[#Line:DSP VCHAccDetail]
Add:Field:After:DSP VchLedAccount:LWIrn,LWEwaybill
Border:thin box
[Field:LWIrn]
Use:Name Field
Set as:$IRN
Width:64
[Field:LWEwaybill]
Use:Name Field
Set as:$EWAYBILLDETAILS.BILLNUMBER
Width:12

[#Collection:Vouchers of Ledger]
Fetch:IRN,Ewaybill,EWAYBILLDETAILS.BILLNUMBER

IRN and Ewaybill Number in Party ledger TDL:

HOW TO USE TDL CODE:
  • Copy above TDL code and create a text file.
  • Save text file and load in Tally
  • Create Vouchers with IRN and Ewaybill Number.
  • Now go to Customer Ledger.
  • There You will find Party IRN and Ewaybill Number.

This is best free TDL to have in your Tally. Must have TDL file for Tally ERP9 and Tally Prime that can use it for lifetime. This free TDL Code will perfectly work with Tally Prime.

IRN and Ewaybill Number in Ledger Summary Video:

See the below video to learn how to add Irn number and Ewaybill number in Tally Party ledger Through Tally Prime TDL:

Watch above videos to learn :

  • How to use TDL files in Tally.
  • How to Irn and Ewaybill number Details in Party Ledger.
  • How to modify fields in Tally Prime.
  • More videos related to free TDL files on youtube/learnwell
  • Get More TDL files on https://e2t.in/
FOLLOW THE BELLOW INSTRUCTIONS TO LOAD TDL FILE IN TALLY:
  1. Make a Text file of above code
  2. Save it in to your computer
  3. Copy the text file path including Name and extension (as – C:\Users\HP\Desktop\IRN and Ewaybill.txt)
  4. Open Tally Prime Software
  5. Click on Help and click on TDL & Addon  (for Tally Prime)
  6. Press F4 (to open a Box)
  7. Set Load TDL file on Startup – Yes
  8. Paste The path in blank space
  9. Press enter and save
  10. Now your IRN and Ewaybill TDL for Tally Prime is ready to use.

Use IRN and Ewaybill TdL file to add extra details in Party Ledger.

TDL to add Bank Details in Group Summary

2024 Best TDL to add Bank Details in Group Summary

With this Tally TDL we can customize our group summary and can use this TDL to add Bank Details in Group Summary. Adding bank details in group summary will help you to make payments to customers in simple way. You can find customers bank details on outstanding list to create payments in simple way.

TDL to add Bank Details in Group Summary:

Using Tally Definition Language (TDL) to add bank details in the Group Summary is a valuable customization for businesses using Tally Prime software. By integrating bank details such as account numbers, IFSC codes, and bank names within the group summary reports, companies can streamline financial operations and enhance transparency.

Also checkout Automatic Voucher Save TDL

TDL to add Bank Details in Group Summary

TDL to add Bank Details in Group Summary TDL Code:

To add bank details like, Account Number, IFSC Code etc, in Customer Outstanding Group summary use below Code:


[#Line: DSP CmpTitle]
Add: Field:After:DSP NameTitle:AccName,BankNumber,IFSC,Mobile
Border:Thin box
[Field:AccName]
	Space Left:40
	Set as:"Bank Name"
	Width:20
	Invisible:##DSPShowTrans
[Field:BankNumber]
	Set as:"Account Number"
	Width:20
	Invisible:##DSPShowTrans
[Field:IFSC]
	Set as:"IFSC Code"
	Width:10
	Invisible:##DSPShowTrans
[Field:Mobile]
	Set as:"Mobile Number"
	Width:10
	Invisible:##DSPShowTrans


[#Line: DSP AccLine]
Add: Field:After:DSP AccName:AccNameD,BankNumberD,IFSCD,MobileD
Border:Thin box

[Field:AccNameD]
	Space Left:25
	Set as:$PaymentDetails.BankName
	Width:20
	Invisible:##DSPShowTrans
[Field:BankNumberD]
	Set as:$PaymentDetails.AccountNumber
	Width:20
	Invisible:##DSPShowTrans
[Field:IFSCD]
	Set as:$PaymentDetails.IFSCode
	Width:15
	Invisible:##DSPShowTrans
[Field:MobileD]
	Set as:$LedgerMobile
	Width:15
	Invisible:##DSPShowTrans

[#Field: DSP NameTitle]	
	Background:red

Tally Prime TDL to Add Bank Details in Sundry Creditors List:

HOW TO USE TDL CODE:
  • Copy above TDL code and create a text file.
  • Save text file and load in Tally
  • Add Bank Details in Sundry Creditors Party Ledgers.
  • Now go in Group summary of Sundry Creditors.
  • You will find Party’s Bank Details in Group summary.

This is best free TDL to have in your Tally. Must have TDL file for Tally ERP9 and Tally Prime that can use it for lifetime. This free TDL Code will perfectly work with Tally Prime.

Tally TDL to Add Bank Details in Group Summary Video:

See the below video to learn how to add Bank details in Ledger and How to add bank Details in Group Summary through this Tally Prime TDL:

Watch above videos to learn :

  • How to use TDL files in Tally.
  • How to add Bank Details in Party Ledger.
  • How to add Bank Details in Sundry Creditors Group summary.
  • More videos related to free TDL files on youtube/learnwell
  • Get More TDL files on https://e2t.in/
FOLLOW THE BELLOW INSTRUCTIONS TO LOAD TDL FILE IN TALLY:
  1. Make a Text file of above code
  2. Save it in to your computer
  3. Copy the text file path including Name and extension (as – C:\Users\HP\Desktop\Bank Details.txt)
  4. Open Tally Prime Software
  5. Click on Help and click on TDL & Addon  (for Tally Prime)
  6. Press F4 (to open a Box)
  7. Set Load TDL file on Startup – Yes
  8. Paste The path in blank space
  9. Press enter and save
  10. Now your Bank Details in Group summary TDL for Tally Prime is ready to use.

Add Bank Details in Sundry Creditors Group summary to make payments timely.

Tally TDL to Automatic Save Invoices and Vouchers

2024 Best Tally TDL to Automatic Save Invoices and Vouchers

If you use Tally and create lots of Invoices and print every time, then this Tally TDL to Automatic Save Invoices and Vouchers can help you. This Tally Prime TDL will help you to save Invoices and Vouchers immediately on your computer after creating in Tally.

Tally TDL to Automatic Save Invoices and Vouchers:

Tally TDL (Tally Definition Language) enables businesses to customize and extend the functionality of Tally. This Tally Prime TDL allows invoices and vouchers to be automatically saved upon creation, eliminating the need for manual saving and reducing the risk of errors or omissions. This TDL will save vouchers and Invoices in PDF format on your computer.

Also checkout Letter Head Invoice TDL

Tally TDL to Automatic Save Invoices and Vouchers

Tally TDL to Automatic Save Invoices and Vouchers Code:

Below code will help you to save Invoices automatically on computer after creation:

[#Form:Sales Color]
On:Form Accept:Yes:Call:LearnwellPDF

[#Form:Purchase Color]
On:Form Accept:Yes:Call:LearnwellPDF

[#Form:Receipt Color]
On:Form Accept:Yes:Call:LearnwellPDF

[#Form:Payment Color]
On:Form Accept:Yes:Call:LearnwellPDF

[#Form:Purc Order Color]
On:Form Accept:Yes:Call:LearnwellPDF

[#Form:Sales Order Color]
On:Form Accept:Yes:Call:LearnwellPDF

[Function:LearnwellPDF]
Variable:SavePDF:String
Local Formula:LWINVNo:$$StringFindandReplace:$VoucherNumber:"/":"_"
Local Formula:LWLedger:$$StringFindandReplace:$PartyLedgerName:"\":"_"
Local Formula:LWDate:$$String:$Date
10:set:SavePDF:$$String:"C:\Users\ssonu\Downloads\inv" + "\" + @LWINVNo + "_" + @LWLedger + "_" + @LWDate
20:set:SVExportFormat:$$SysName:PDF
30:Set:SVPrinterName:"Adobe PDF"
40:Set:SVPrintFileName:$$makeExportname:##SavePDF:##SVExportFormat
50:set:SVOpenFileAfterExport:No
60:Export Report:.:True

Tally Prime TDL to Save Invoices and Vouchers on Computer:

HOW TO USE TDL CODE:
  • Copy above TDL code and create a text file.
  • Save text file and load in Tally
  • Now go to Create a voucher or Alter a Voucher.
  • Now Vouchers will save in your computer (Change Folder path in code as per your computer).

This is best free TDL to have in your Tally. Must have TDL file for Tally ERP9 and Tally Prime that can use it for lifetime. This free TDL Code will perfectly work with Tally Prime.

Tally TDL to Automatic Save Invoices and Vouchers Video:

See the below video to learn how to save invoices and vouchers in computer through Tally Prime TDL:

Watch above videos to learn :

  • How to use TDL files in Tally.
  • How to add computer path in TDL Code.
  • How to save invoices and vouchers in computer folder from tally.
  • More videos related to free TDL files on youtube/learnwell
  • Get More TDL files on https://e2t.in/
FOLLOW THE BELLOW INSTRUCTIONS TO LOAD TDL FILE IN TALLY:
  1. Make a Text file of above code
  2. Save it in to your computer
  3. Copy the text file path including Name and extension (as – C:\Users\HP\Desktop\Save Voucher.txt)
  4. Open Tally Prime Software
  5. Click on Help and click on TDL & Addon  (for Tally Prime)
  6. Press F4 (to open a Box)
  7. Set Load TDL file on Startup – Yes
  8. Paste The path in blank space
  9. Press enter and save
  10. Now your Voucher Saving TDL for Tally Prime is ready to use.

Always save vouchers and Invoices in computer after creation, use this Best Tally TDL to Automatic Save Invoices and Vouchers.