Logo TDL for Tally

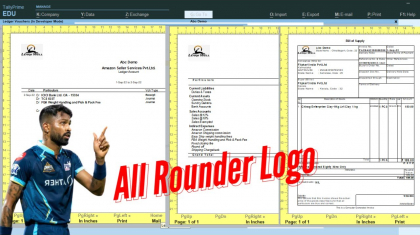
2023 Best Logo TDL for Tally | Add Logo Everywhere in Tally

Today I have best logo TDL for Tally, that can change your company value and authenticity. In today’s digital age, creating a strong brand identity and standing out in the market is more important than ever. One key aspect of building a successful brand is having a recognizable logo that represents the company’s authenticity and values.

And if you maintain your business books and accounting in Tally, then it is most important to provide statements, invoices and other prints with logo.

With this Tally TDL code we can add company logo everywhere. We can add logo in ledgers statement, group statement, in trial balance, profit loss account and also in Balance sheet.

This is a very useful logo TDL for Tally Prime and Tally ERP9 to add Logo everywhere in Tally.

Logo TDL for Tally

Logo TDL for Tally Code:

This code can add logo in ledgers statement, group statement, in trial balance, profit loss account and also in Balance sheet etc.

Before using this code load a logo in Tally. For more details watch below video:

Also get TDL to increase size of voucher fields in Tally

[#Form:Normal Ledger]
Add:Part:At Beginning:LearnwellLogo

[#Form:Group Summary]
Add:Part:At Beginning:LearnwellLogo

[#Form:Profit and Loss]
Add:Part:At Beginning:LearnwellLogo

[#Form:Balance Sheet]
Add:Part:At Beginning:LearnwellLogo


[Part:LearnwellLogo]
Line:Empty
Invisible:Not $$InPrintMode
Graph Type:$LogoPath:Company:##SVCurrentCompany
Width:10% Page
Height:10% Page

How to use Logo TDL for Tally:

HOW TO USE TDL CODE:
  • Copy above TDL code and create a text file.
  • Save text file then load in Tally Prime (Method provided below the code)
  • Load a Company logo in Tally.
  • Now go to print statements or invoices.
  • You will find Logo of company with statements and invoices.

This is best free TDL to have in your Tally. Must have TDL file for Tally ERP9 and Tally Prime that can use it for lifetime. This free TDL Code will perfectly work with Tally Prime.

Tally TDL to add Logo in Invoice and Statements Video:

See the below video for more details:

Watch above video to learn :

  • How to Create TDL files for Tally.
  • How to Load TDL files in Tally.
  • How to modify Voucher fields through TDL code.
  • How to add Logo in Tally.
  • How to See the effect of this TDL.
  • More videos related TDL files on youtube/learnwell
  • Get More TDL files on https://e2t.in/
FOLLOW THE BELLOW INSTRUCTIONS TO LOAD TDL FILE IN TALLY:
  1. Make a Text file of above code
  2. Save it in to your computer
  3. Copy the text file path including Name and extension (as – C:\Users\HP\Desktop\rec\Logo.txt)
  4. Open Tally Prime Software
  5. Click on Help and click on TDL & Addon  (for Tally Prime)
  6. Press F4 (to open a Box)
  7. Set Load TDL file on Startup – Yes
  8. Paste The path in blank space
  9. Press enter and save
  10. Now your Logo TDL for Tally is ready to use.

Overall, Logo TDL for Tally is a valuable TDL file for businesses that use Tally accounting software. By harnessing the full potential of Logo TDL and Tally, businesses can print invoices and statements with company logo that meets their unique needs and helps to establish a strong, authentic brand identity.

FAQ:

How do I print invoices with logo in Tally using Logo TDL for Tally?

To print invoices in Tally with logo using Logo TDL, you will first need to load a company logo in Tally and then load above TDL code in Tally. Once the Logo and TDL loaded in Tally, you can use it to print invoices with company logo.

Can I customize the layout of my invoices in Tally using Logo TDL?

Yes, you can customize the layout of your invoices in Tally using Logo TDL. This can include modifying the placement of logo, adding custom logos or images.

Is it possible to print statements with logo in Tally using Logo TDL?

Yes, it is possible to print statements with company logo in Tally using Logo TDL for Tally. Similar to invoices, you can create a custom statement template with logo and use it to print.

Can I export my invoices and statements with logo as PDFs in Tally using Logo TDL?

Yes, you can export your invoices and statements as PDFs with logo in Tally using Logo TDL. Once the template is created, you can select the “Export” option from the invoice or statement screen in Tally and choose to save the document as a PDF.

What are the advantages of printing invoices and statements with logo in Tally using Logo TDL for Tally?

The advantages of printing invoices and statements in Tally using Logo TDL include the ability to add company logo in format, and export the documents with logo in PDF. This will help maintain authenticity of company.

Tally TDL to Increase Voucher Fields Size

2023 Best Tally TDL to Increase Voucher Fields Size

This Tally TDL to increase voucher fields size will help you to increase voucher different fields sizes to see it properly. If you are a Tally user, you may have noticed that the size of the voucher fields like ledger, items, narration, description etc. is fixed and cannot be changed. This can be a problem if you want to enter longer descriptions or make the voucher more readable.

In this blog post, we will show you how to increase the size of the voucher fields in Tally using TDL (Tally Definition Language). We will increase size by modifying the layout of the voucher.

This is a very useful for Tally Prime and Tally ERP9 Tally TDL to increase voucher fields size.

Code of Tally TDL to Increase Voucher Fields Size:

This code will modify the layout of the voucher fields for the voucher type Sales, Purchase, etc.. The fields will be increased in size, and will have the specified width.

Also get the TDL to change header names of vouchers

[#Field:EI Consignee]
Width:70
Max:250

[#Field:EI CommonLed]
Width:70
Max:250

[#Field:EI Desc]
Width:70
Max:250

[#Field:VCH Narration]
Fullwidth:Yes
Width:70
Max:250

How to use Voucher Fields Size Increasing TDL:

HOW TO USE TDL CODE:
  • Copy above TDL code and create a text file.
  • Save text file then load in Tally Prime (Method provided below the code)
  • You can change width size and max in TDL code.
  • Now go to create voucher.
  • You will find that sizes of Party Ledger name, Sales or Purchase Ledger Name, Item Description, Narration are changed.

This is best free TDL to have in your Tally. Must have TDL file for Tally ERP9 and Tally Prime that can use it for lifetime. This free TDL Code will perfectly work with Tally Prime.

Tally TDL to Increase Voucher Fields Size video:

See the below video for more details:

Watch above video to learn :

  • How to Create TDL files for Tally.
  • How to Load TDL files in Tally.
  • How to modify Voucher fields through TDL code.
  • How to See the effect of this TDL.
  • More videos related TDL files on youtube/learnwell
  • Get More TDL files on https://e2t.in/
FOLLOW THE BELLOW INSTRUCTIONS TO LOAD TDL FILE IN TALLY:
  1. Make a Text file of above code
  2. Save it in to your computer
  3. Copy the text file path including Name and extension (as – C:\Users\HP\Desktop\rec\HeaderName.txt)
  4. Open Tally Prime Software
  5. Click on Help and click on TDL & Addon  (for Tally Prime)
  6. Press F4 (to open a Box)
  7. Set Load TDL file on Startup – Yes
  8. Paste The path in blank space
  9. Press enter and save
  10. Now your voucher fields size increasing TDL is ready to use.

Overall, voucher size increasing TDL for Tally is a valuable free TDL file for businesses that want to change sizes of ledger fields, item fields and narration etc.

FAQ:

What is a voucher in Tally?

A voucher in Tally is a document that records a financial transaction in a company’s books of accounts. It serves as proof of the transaction and can be in the form of a Sales, Purchase, receipt, payment voucher, etc.

Why would I need to increase the voucher fields size in Tally?

You may need to increase the voucher fields size in Tally if you have long name of items or Ledgers (accounts) or long Narration, and the default voucher size is not sufficient to accommodate all of them. Increasing the voucher field size will allow you to see proper details of ledgers, items or narration.

How do I increase the voucher size in Tally using a TDL (Tally Definition Language)?

Follow these steps to increase the voucher size in Tally using a TDL:

  1. Get the code of Tally TDL to Increase Voucher Fields Size and make a text file
  2. Save text file then load in Tally Prime.
  3. You can change width size and max in TDL code.
  4. Now go to create voucher.
  5. You will find that sizes of Party Ledger name, Sales or Purchase Ledger Name, Item Description, Narration are changed.

What is a TDL in Tally?

TDL stands for Tally Definition Language. It is a programming language used to customize Tally software according to the specific needs of a business. Using TDL, you can create new reports, vouchers, screens, etc. or modify the existing ones.

TDL to change header names of voucher

2023 Best Tally Prime and Tally ERP9 TDL to Change Header Names of Voucher

This is the free TDL to change header names of voucher in Tally. Tally is a popular accounting software that is widely used by businesses and individuals for maintaining financial records and generating reports. By using TDL Code in Tally we can customize the voucher headers to better reflect the nature of the transactions being recorded.

In this, we will see the steps to change the header names of vouchers or invoice in Tally. We will also discuss some best practices and considerations to keep in mind when renaming voucher headers.

This is a very useful for Tally Prime and Tally ERP9 TDL to change header names of Voucher.

TDL to change header names of voucher

TDL to Change Header Names of Voucher:

This TDL code may be changed to suit our needs. Perfectly working with Tally Erp9 and Tally Prime, and we may add or delete other fields as needed. The best simple TDL code to change vouchers or invoices name heads:

Also get Seal sign TDL

In below code change Learnwell names as per your requirement:

[#Line:EI ShipDetails]
Local:Field:Medium Prompt:info:"Learnwell1"

[#Line:EI PreCarriage]
Local:Field:Medium Prompt:info:"Learnwell2"

[#Line:EI PortDestination]
Local:Field:Medium Prompt:info:"Learnwell3"

[#Line:EI Vessel]
Local:Field:Medium Prompt:info:"Learnwell4"

[#Line:EI BillorLRRno]
Local:Field:Medium Prompt:info:"Learnwell5"

[#Line:KRLVAT ChekcPostname]
Local:Field:Medium Prompt:info:"Learnwell6"

[#Line:EI Buyer]
Local:Field:Medium Prompt:info:"Learnwell7"

How to use Head names changing TDL:

HOW TO USE TDL CODE:
  • Copy above TDL code and create a text file.
  • Save text file then load in Tally Prime (Method provided below the code)
  • Change Learnwell names in code as required heads.
  • Now go to create voucher.
  • You will find that dispatch details heads are changed.

This is best free TDL to have in your Tally. Must have TDL file for Tally ERP9 and Tally Prime that can use for lifetime. This free TDL Code will perfectly work with Tally Prime.

TDL to Change Header Names of Voucher video:

See the below video for more details:

Watch above video to learn :

  • How to Create TDL files for Tally.
  • How to Load TDL files in Tally.
  • How to See the effect of this TDL.
  • More videos related TDL files on youtube/learnwell
  • Get More TDL files on https://e2t.in/
FOLLOW THE BELLOW INSTRUCTIONS TO LOAD TDL FILE IN TALLY:
  1. Make a Text file of above code
  2. Save it in to your computer
  3. Copy the text file path including Name and extension (as – C:\Users\HP\Desktop\rec\HeaderName.txt)
  4. Open Tally Prime Software
  5. Click on Help and click on TDL & Addon  (for Tally Prime)
  6. Press F4 (to open a Box)
  7. Set Load TDL file on Startup – Yes
  8. Paste The path in blank space
  9. Press enter and save
  10. Now your Head Name changing TDL is ready to use.

Overall, Head Name changing TDL is a valuable free TDL file for businesses that want to change Tally voucher heads according to their business.

Stock item Image TDL

2022 Best Stock Item Image TDL | Create Item with Image TDL

Tally Prime is the latest version of the tally software and it is equipped with various new features and enhancements. And Tally is best software for accounting and all business purpose work, because it has lots of features with this software. And if some features not own in Tally, then we can create it with TDL ( Tally Definition Language ). Same if you want to add images in stock item of Tally to track and identify stocks easily.

This is a very useful Stock Item Image TDL as it helps in keeping track of the inventory and also helps in identifying the items easily. This is the best Tally Prime and Tally ERP9 TDL to Create Item with Image.

Stock item Image TDL

Stock Item Image TDL Code:

This TDL code may be changed to suit our needs. Perfectly working with Tally Erp9 and Tally Prime, and we may add or delete other fields as needed. The best simple TDL code to Create Item with Image:

Also checkout detailed sale summary with GST

[#Part: STKI Basic]           
 Add  : Right Part: At End :LWStkImageLink,LearnwellSTKImage
 
[Part:LWStkImageLink]
	Line:linkline
[Line:linkline]
Field:Short Prompt, StockimageLink
Local: Field: Short Prompt: Info:$$LocaleString:"Image Link:"

[Field:StockimageLink]
Use:Name Field
Storage:Stockimagelink

[System:UDF]
Stockimagelink:String:12100

 [Part:LearnwellSTKImage] 
 Line            : Empty                                                                
 Image:LearnwellImageSource
 Width     : 20% screen
 Height    : 20% screen
[Resource:LearnwellImageSource]
Source:$Stockimagelink
Resource Type :jpeg

How to use Stock Item Image TDL to add Images in Item:

HOW TO USE TDL CODE:
  • Copy above TDL code and create a text file.
  • Save text file then load in Tally Prime (Method provided below the code)
  • Now go to Item creation field in Tally
  • Provide image path to see item image.

This is best free TDL to have in your Tally. Must have TDL file for Tally ERP9 and Tally Prime that can use for lifetime. This free TDL Code will perfectly work with Tally Prime.

Create Item with Image TDL video:

See the below video for more details:

Watch above video to learn :

  • How Load TDL in and Tally and See image of Item.
  • How to create TDL file for Tally.
  • More TDL files on youtube/learnwell
FOLLOW THE BELLOW INSTRUCTIONS TO LOAD TDL FILE IN TALLY:
  1. Make a Text file of above code
  2. Save it in to your computer
  3. Copy the text file path including Name and extension (as – C:\Users\HP\Desktop\rec\item image.txt)
  4. Open Tally Prime Software
  5. Click on Help and click on TDL & Addon  (for Tally Prime)
  6. Press F4 (to open a Box)
  7. Set Load TDL file on Startup – Yes
  8. Paste The path in blank space
  9. Press enter and save
  10. Now your item image TDL is ready to use.
Automate Excel Macro

4 steps Instantly Automate Excel Macro | How to Automate Excel Work

Excel is a powerful tool that allows you to automate many tasks. With a little creativity, you can use Excel Macros to save a lot of time.

A macro is a set of instructions that you can record and then play back. When you record a macro, you tell Excel what you want it to do, step-by-step. Excel then converts your actions into VBA code, which is a programming language that it can understand.

Once you have recorded a macro, you can play it back as many times as you want. This can save you a lot of time, because you don’t have to do the same thing over and over again.

How to Use Excel Macro:

Excel Macro can be extremely useful in automating various tasks in Excel. By recording a macro, you can automate repetitive tasks by creating a set of instructions that can be played back to perform the task automatically.

Quick Start guide to create a macro

To record a macro:

  1. On the Developer tab, click Record Macro. (How to enable developer Tab?)
  2. In the Record Macro dialog box, do one or more of the following:

a. To use a keyboard shortcut to start the macro, click Keyboard in the Shortcut key box.

b. To use a button to start the macro, click Button in the Store macro in box, and then click OK.

c. To include a description of the macro, click the Description box, and then type the description.

  1. To use the default settings for the macro, click Use Relative References.
  2. To stop recording the macro, click Stop Recording.

You can also create a macro by using the Visual Basic for Applications (VBA) programming language.

to record a Excel Macro

To run a macro via VBA Programming:

  1. On the Developer tab, click Macros.
  2. In the Macro dialog box, do one of the following:

a. To run a macro from a module in the current workbook, click the macro in the Macro name list.

b. To run a macro from a different workbook, click the macro in the Library list.

c. To run a macro that is not in either list, click Browse, and then double-click the workbook that contains the macro.

  1. To use the default settings for the macro, click Run.
  2. To use different settings for the macro, click Options, and then make the changes that you want.

You can also run a macro by using a button or a keyboard shortcut.

Excel Macro through Excel VBA

To assign a macro to a button:

  1. On the Developer tab, click Insert.
  2. Under Form Controls, click Button.
  3. Click the worksheet location where you want the upper-left corner of the button to appear.
  4. To assign a macro to the button, click Macro in the Assign Macro dialog box, and then click the macro that you want to assign.
  5. To display a custom button image, click Button Image, and then select the image that you want to display.
  6. To add text to the button, click Label, and then type the text.
  7. To change the button color, click Fill Color, and then select the color that you want.
Excel Macro assign a macro

To assign a macro to a keyboard shortcut:

  1. On the Developer tab, click Macros.
  2. In the Macro dialog box, click the macro that you want to assign a keyboard shortcut to.
  3. Click Options.
  4. In the Shortcut key box, type the keyboard shortcut that you want to use.
  5. To use the default shortcut key, click Use Relative References.
  6. To stop recording the macro, click Stop Recording.

Benefits of Excel Macro:

There are many benefits to using Excel Macros, including:

  • They can save you a lot of time by automating repetitive tasks
  • They can help improve your accuracy by reducing the chances of error
  • They can help you to standardize your work
  • They can be used to automate complex tasks
  • They can be used to generate reports
  • They can be used to create custom user interfaces
  • They can be used to link to other applications

Disadvantage of Excel Macro:

  • Excel macros can be difficult to debug and troubleshoot.
  • They can be difficult to understand and follow, especially for complex macros.
  • They can be time-consuming to create, especially for complex macros.
  • There is a potential for security risks when using macros, since they can be used to automate malicious tasks.

Conclusion:

An Excel macro is a set of programming instructions that can be executed on a computer to perform a task or set of tasks. Macros are written in a programming language called Visual Basic for Applications (VBA).

Macros can be used to automate repetitive tasks, or to perform complex tasks that would be difficult or impossible to do manually. For example, a macro could be used to automatically generate a report based on data in a spreadsheet.

Macros can be used to improve the efficiency of Excel users, or to allow non-programmers to use Excel’s powerful features.

FAQ:

What is a macro in Excel?

A macro is a set of instructions that can be used to automate a task or series of tasks. Macros are written in a programming language called Visual Basic for Applications (VBA).

How can macros be used in Excel?

Macros can be used to automate tasks such as data entry, data analysis, and report generation.

What are the benefits of using macros in Excel?

Macros can save you time and effort by automating repetitive tasks. They can also improve the accuracy of your work by eliminating errors that can occur when tasks are performed manually.

How do I create a macro in Excel?

You can create a macro in Excel by using the Visual Basic Editor (VBE). The VBE is a tool that allows you to write and edit code in a Visual Basic programming language.

What are some things to keep in mind when creating macros?

When creating macros, you should consider how the macro will be used, how often it will be used, and what tasks it will automate. You should also test the macro thoroughly to ensure that it works correctly.

Detailed Sale Summary with GST TDL

2022 Best Detailed Sale Summary with GST TDL | Tally Sales Report TDL for Pivot Table

A Detailed sale summary with GST TDL report is a great way to see your sales totals for a specific period of time. This report can be generated for any date range, and can be customized to include any number of columns.

To generate a Detailed sale summary report in Tally Prime, simply download this Tally Sales Report TDL for Pivot Table TDL file and load in tally then go to the main menu of Tally and select Learnwell Sale report TDL. Then, select the date range you wish to see sales totals for and press enter.

Your Detailed sale summary report will now be generated and will display your sales details with GST for the selected date range. And also create Pivot table in Excel with this Detailed Sale Summary with GST TDL. This report is a great way to see how your business is performing and to track your sales progress over time.

This is the best Tally Prime and Tally ERP9 TDL to see Tally sales reports with full details.

Detailed Sale Summary with GST TDL

Detailed Sale Summary with GST TDL Code:

This TDL code may be changed to suit our needs. Perfectly working with Tally Erp9 and Tally Prime, and we may add or delete other fields as needed. The best simple TDL code to generate sales reports for pivot table MIS reports. You can download this free sales reports tdl from below download button:

Also see Tally Prime Chart of Accounts useful features

How to use Tally Sales Report TDL for Pivot Table:

HOW TO USE TDL CODE:
  • Download above TDL code.
  • Save text file then load in Tally Prime (Method provided below the code)
  • Now go to Tally main screen (Gateway of Tally), here you will find extra Tab in the name of Learnwell Sale report
  • After clicking on it you can see full sale report and can export in Excel for Pivot.

This is best free TDL to have in your Tally. Must have TDL file for Tally ERP9 and Tally Prime that can use for lifetime. This free TDL Code will perfectly work with Tally Prime.

How to use sales reports with GST video:

See the below video for more details. And how to see reports of Purchase and other vouchers also:

Watch above video to learn :

  • How Load TDL in and Tally and See reports.
  • How to use sale reports and create pivot table.
  • More TDL files on youtube/learnwell
FOLLOW THE BELLOW INSTRUCTIONS TO LOAD TDL FILE IN TALLY:
  1. Make a Text file of above code
  2. Save it in to your computer
  3. Copy the text file path including Name and extension (as – C:\Users\HP\Desktop\rec\Sales report.txt)
  4. Open Tally Prime Software
  5. Click on Help and click on TDL & Addon  (for Tally Prime)
  6. Press F4 (to open a Box)
  7. Set Load TDL file on Startup – Yes
  8. Paste The path in blank space
  9. Press enter and save
  10. Now your detailed sale report TDL is ready to use.
Tally Prime Chart of Accounts

5 best Usability of Tally Prime Chart of Accounts | Used and Unused Masters, Zero Opening Balance, Change Group, Update GST details – All things at once

The Tally Prime Chart of Accounts gives us an index or a list of all accounting masters established in the Company, along with details about those masters. The report, for instance, offers important details like Group, GST Registration Type, GSTIN/UIN, and Opening Balance for Ledgers prepared in Tally Prime.

Additionally, we need to keep up with the pertinent details regarding the party, the initial balance in the masters, the number and cost of stock items, and other masters. Tally Prime Chart of Accounts provides a central location to find data particular to each master. All ledgers, stock items, stock groupings, and really any accounting or inventory master can view it.

Tally Prime Chart of Accounts Usability:

Tally Prime Chart of Accounts
  1. We have the option to peruse and audit masters using the report as necessary.
  2. Additionally, We can view masters that were changed or deleted from your Company if Edit Log is enabled.
  3. In addition, we can inspect and instantly delete any unused masters.
  4. We can build numerous masters in Tally Prime Chart of Accounts, which expedites the data entering process.
  5. Additionally, the ability to change several masters saves us from having to open each masters in order to enter the data, and Chart of Accounts is available to make our job simpler.

Also get Tally Prime best TDL for Paid and Pending Bills detail

Chart of Accounts for Financial Accounts view:

In Tally Prime, we may view the chart of accounts for any master type, including ledgers, stock items, stock groups, and others. We can also adjust the view as necessary.

For example, you can view ledgers’ Chart of Accounts.

Press Alt+G (Go To) > type or select Chart of Accounts > select Ledgers and press Enter.
Alternatively, Gateway of Tally > Chart of Accounts > Ledgers and press Enter.

  • Press F2 (Period) to change the Period, if needed.
  • View the report, as needed.
  • Press F12 (Configure) and view with Name Only, Alias Only, Name (Alias), and Alias (Name), as needed.
  • Press F10 (Other Master) > select the master for which you want to view the report and press Enter.
  • Press F5 (Ledger or Group View).
  • Alternatively, press Ctrl+H (Change View) > Ledger or Group View and press Enter.
  • This helps you get information such as accounting groups of the respective ledgers, State Name, GST Registration Type, GSTIN/UIN, and Opening Balance.

Multiple Masters can be created or altered on one screen:

We might need to generate a list of ledgers or stock items for a company. Chart of Accounts gives you the option to build several masters on a single screen, simplifying data entry and allowing for significant time savings. Additionally, it gives you the freedom to build masters of various categories in accordance with the parent group.

  • Press Alt+G (Go To) > Chart of Accounts > Ledgers/Stock Items > press Enter.
  • Alternatively, Gateway of Tally > Chart of Accounts > Ledgers/Stock Items and press Enter.
  • Press Alt+H (Multi-Masters) > Multi Create and press Enter.
  • In the Multi Ledger or Item Creation screen, provide the required ledger or Item details.

View and Remove Several Inactive Masters:

We can delete specific masters, such as party ledgers, if there have been no recorded transactions or if there are no plans for future business transactions.

We do not need to search for such masters outside of Tally Prime. All of these masters are shown in the Tally Prime Chart of Accounts so we can delete them all at once.

  • In Chart of Accounts, press Ctrl+J (Exception Reports) > Show Unused and press Enter.
  • The List of Ledgers and Stock items (Unused) appears.
  • That can delete by selecting and pressing Alt+D

Tally Prime Chart of Accounts Masters in Accounting:

The pre-defined masters for your accounting information system are called accounting masters. For instance, in the report, a ledger is a pre-defined master, and the groups are the pre-defined masters that ledgers are categorised under. For recording transactions, Tally Prime provides a number of accounting masters like groups, ledgers, voucher types etc.

For More details watch the below video and also can log on to Tally Prime Chart of Accounts sections:

Paid and Pending Bill details

2022 best Paid and Pending Bill Details in One Sheet : Tally Prime TDL | Best Tally TDL for Bill Outstanding Detail

In business, it is often necessary to keep track of outstanding payments in order to manage cash flow. An outstanding payments report shows all of the money that a company owes to its suppliers, employees, and other creditors.

When we use Tally for accounting and want to create separate reports with Paid and Pending Bill Details, then without TDL file it is not possible in Tally. With this best Tally TDL for Bill Outstanding Detail TDL we can create outstanding payments or receipt report separately, that can be customized to show the information as per our need.

This is the best Tally Prime and Tally ERP9 TDL to see paid bills and pending bills details at one place.

Paid and Pending Bill details

Also get TDL to modify Bill wise details

Tally TDL to add Paid and Pending Bill Details – Code:

This TDL code may be changed to suit our needs. Perfectly working with Tally Erp9 and Tally Prime, and we may add or delete other fields as needed. The best simple TDL code to modify bill billwise details of Tally.

[Collection:LearnwellBillsColl]
	Type:Bill
	Child Of:$$GroupSundryDebtors or $$GroupSundryCreditors
	Belongs To:Yes	
	Cleared:Yes
[Collection:LearnwellBillsColl2]
	Type:Bill
	Child Of:$$GroupSundryDebtors or $$GroupSundryCreditors
	Belongs To:Yes	
	Cleared:No

[#Form:Bills Outstanding]
	Add:Button:LearnwellBills
	
[Button:LearnwellBills]
	Title:$$LocaleString:"Paid Pending Bills"
	Key:CTRL+W
	Action:Display:LearnwellPaidBills
	
[Report:LearnwellPaidBills]
	Variable:SVfromDate,SvToDate
	Set:SVfromDate:##SVdate
	Set:SVtoDate:##SVCurrentDate
	Form:LwBILLS
	
[Form:LwBILLS]
	Button:PrintButton,ExportButton,ChangePeriod
	Height:100 % page
	Width:100 % page
	Background:White
	Part:LWBills
[Part:LWBills]
	Part:PaidBills,PendingBills
	
[Part:PaidBills]
	Line:LWBillsTitle,LWBillsDetail
	Repeat:LWBillsDetail:LearnwellBillsColl
	Border:Thin box
	Scroll:Both
	Float:Yes
[Line:LWBillsTitle]
	Field:LWBillDate,LWBillRef,LWBillLedger,LWBillAmt
	
[Field:LWBillDate]
	Use:Name Field
	Set as:"Date"
	Style:Normal bold

[Field:LWBillRef]
	Use:Name Field
	Set as:"References"
[Field:LWBillLedger]
	Use:Name Field
	Set as:"Party Ledger"
	Style:Normal bold
[Field:LWBillAmt]
	Use:Name Field
	Set as:"Paid Amount"
	Style:Normal bold
	
[Line:LWBillsDetail]
	Field:LWBillD,LWRefD,LWPartyD,LWAmtD
[Field:LWBillD]
	Use:UniDateField
	Set as:$BillDate
	Style:Normal Bold
	Border:Thin right
[Field:LWRefD]
	Use:ShortName Field
	Set as:$Name
	Style:Normal
	Border:Thin right
[Field:LWPartyD]
	Use:Name Field
	Set as:$DSPACCName:Ledger:$Parent
	Style:Normal Bold
	Border:Thin right
[Field:LWAmtD]
	Use:Amount Field
	Set as:$OpeningBalance
	Style:Normal Bold
	Border:Thin right


[Part:PendingBills]
	Line:LWBillsTitle2,LWBillsDetail2
	Repeat:LWBillsDetail2:LearnwellBillsColl2
	Border:Thin box
	Scroll:Both
	Float:Yes
[Line:LWBillsTitle2]
	Field:LWBillDate2,LWBillRef2,LWBillLedger2,LWBillAmt2,LWBillAmt3
	
[Field:LWBillDate2]
	Use:Name Field
	Set as:"Date"
	Style:Normal bold

[Field:LWBillRef2]
	Use:Name Field
	Set as:"References"
[Field:LWBillLedger2]
	Use:Name Field
	Set as:"Party Ledger"
	Style:Normal bold
[Field:LWBillAmt2]
	Use:Name Field
	Set as:"Opening Amount"
	Style:Normal bold
[Field:LWBillAmt3]
	Use:Name Field
	Set as:"Closing Amount"
	Style:Normal bold
[Line:LWBillsDetail2]
	Field:LWBillD2,LWRefD2,LWPartyD2,LWAmtD2,LWAmtD3
[Field:LWBillD2]
	Use:UniDateField
	Set as:$BillDate
	Style:Normal Bold
	Border:Thin right
[Field:LWRefD2]
	Use:ShortName Field
	Set as:$Name
	Style:Normal
	Border:Thin right
[Field:LWPartyD2]
	Use:Name Field
	Set as:$DSPACCName:Ledger:$Parent
	Style:Normal Bold
	Border:Thin right
[Field:LWAmtD2]
	Use:Amount Field
	Set as:$OpeningBalance
	Style:Normal Bold
	Border:Thin right
[Field:LWAmtD3]
	Use:Amount Field
	Set as:$ClosingBalance
	Style:Normal Bold
	Border:Thin right

How to use Best Tally TDL for Bill Outstanding Detail TDL code:

HOW TO USE TDL CODE:
  • Copy above TDL code and make a text file.
  • Save text file then load in Tally Prime (Method provided below the code)
  • Now go in billwise details section of ledger, Here you will find Paid and Pending Bills button.
  • After clicking on Paid and Pending Bills button you can see paid bill and pending bills details.

This is best free TDL to have in your Tally . Must have TDL file for Tally ERP9 and Tally Prime that can use for lifetime. This free TDL Code will perfectly work with Tally Prime.

How to see paid bill details and pending bill details in Tally video:

Watch above video to learn :

  • How to create TDL file.
  • How to modify bill details section of Tally prime.
  • More TDL files on youtube/learnwell
FOLLOW THE BELLOW INSTRUCTIONS TO LOAD TDL FILE IN TALLY:
  1. Make a Text file of above code
  2. Save it in to your computer
  3. Copy the text file path including Name and extension (as – C:\Users\HP\Desktop\rec\Paid Pending Bill details.txt)
  4. Open Tally Prime Software
  5. Click on Help and click on TDL & Addon  (for Tally Prime)
  6. Press F4 (to open a Box)
  7. Set Load TDL file on Startup – Yes
  8. Paste The path in blank space
  9. Press enter and save
  10. Now your paid bill details and pending bill details TDL is ready to use.
Costco tires

5 Best Benefits of Purchasing Costco Tires | Costco Tire Centre Benefits

If you’re like most people, you probably don’t think much about your car’s tires. But, if you’ve ever had a flat tire or a blowout, you know how important they are. That’s why it’s important to take care of your tires and make sure they’re in good condition.

One of the best ways to do this is to bring them to Costco Tire Centre. Costco Tires Centre is a tire retailer that offers a wide range of services, including tire installation, balancing, and rotation.

They offers a variety of tires for all types of vehicles, including cars, trucks, SUVs, and RVs. They also offer a wide range of brands, including Michelin, BFGoodrich, and Goodyear. If you’re not sure which tires are right for your vehicle, the experts at Costco Tires can help you choose the perfect tires for your needs.

How useful are better tires for vehicle:

Better tires for vehicle

Also read best way to merge multiple file into one

It’s no secret that tires are a vital part of your vehicle – after all, they’re the only part of your car that actually touches the road. That’s why it’s important to make sure you have the best tires for your car, truck or SUV.

Good tires can improve your gas mileage, give you better traction in slippery conditions and make your car ride smoother. Not to mention, they can also help extend the life of your vehicle.

If you’re not sure if it’s time to replace your tires, there are a few things you can look for. First, check the tread depth. If the tread is worn down to 4/32 of an inch, it’s time to replace your tires. You can also do the “penny test” – if you insert a penny into the tread and Lincoln’s head is visible, you need new tires.

When you’re ready to buy new tires, be sure to do your research. You’ll want to find a tire that’s the right size, type and price for your vehicle. You can talk to a tire expert at a reputable dealership or auto parts store to find the best tires for your car.

Investing in good tires is an important part of being a responsible vehicle owner. With the right tires, you can keep your car running safely and efficiently for years to come.

What is Costco Tire Centre:

Castco offers a wide range of tire brands and services, including tires for cars, trucks, SUVs, and more. It also provides batteries services.

If you are in need of new tires or wheels, or if you just need a tune-up, Castco Tire Centre is the place to go. They offer a wide variety of services to help keep your vehicle in good shape.

Benefits of Purchasing Costco Tires:

Costco Tire Centre

Costco is one of the leading retailers for tires in the United States. They offer a variety of services and benefits that other tire retailers simply cannot match. Here are the top 10 reasons to buy your tires from Costco:

  1. Convenient Locations: Costco has over 580 locations across the country, making it easy to find a store near you.
  2. Installation Services: Costco offers professional installation services at all of their locations. This means that you can get your new tires installed quickly and easily, without having to do it yourself.
  3. Competitive Pricing: Costco offers some of the most competitive pricing on tires in the industry. They regularly run sales and promotions, so you can be sure to get a great deal on your next set of tires.
  4. Tire Warranty: All of the tires sold at Costco come with a manufacturer’s warranty. This means that if you have any problems with your tires, you can simply take them back to Costco and they will take care of it for you.
  5. Road Hazard Protection: In addition to the manufacturer’s warranty, Costco also offers road hazard protection on all of their tires. This means that if you have a problem with your tires while you are driving, Costco will pay to have them repaired or replaced.
Costco tires

Pros and Const : Costco tires:

Are you considering using the Costco Tire Centre for your next tire purchase? Here are some things to consider before making your decision.

PROS

  • Costco offers a wide selection of tire brands and sizes
  • Costco Tire Centre offers competitive pricing
  • Installation is quick and easy
  • Costco offers a satisfaction guarantee

CONS

  • You need to be a Costco member to purchase tires

Whether you’re looking for a new set of tires for your car or truck, Costco Tire Centre is a great option to consider.

FAQ:

What are the benefits of purchasing tires from the Costco Tire Centre?

Some benefits of purchasing tires from the Costco Tire Centre include getting access to exclusive tire brands, getting professional installation services, and receiving a warranty on your tires. You also have the option to purchase a tire protection plan, which provides coverage for unexpected repairs and replacement.

What types of tires does the Costco Tire Centre carry?

The Costco Tire Centre carries a wide variety of tire brands and types, including all-season tires, winter tires, and performance tires. You can also find tires for different vehicle types, such as cars, trucks, SUVs, and vans.

How can I get my tires installed at the Costco Tire Centre?

When you purchase tires from the Costco Tire Centre, you can also schedule an appointment for professional installation. Tire installation is quick and easy, and experts will make sure your new tires are properly inflated and installed.

What is the Costco Tire Centre warranty?

The Costco Tires offers a warranty on all tires. This warranty covers defective materials and workmanship, and it also provides coverage for road hazards. If you experience any problems with your tires, simply bring them back to Costco and they will make things right.

What is the Costco Tire Centre Tire Protection Plan?

The Costco Tire Centre Tire Protection Plan is an optional service that provides coverage for unexpected repairs and replacement. This plan includes tire protection, roadside assistance, and towing. For an additional fee, you can also add coverage for rental cars and travel expenses.