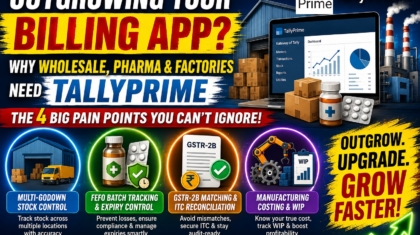
Manual Books TDL

2023 Most Amazing Manual Books TDL for Tally Prime

Manual Books TDL for Tally Prime will be very beneficial for our business. With this Tally Prime TDL we can customize our Tally Ledgers as old type Khata Books. This will help a lot to reconcile our Statements / Ledgers.

Also with this TDL fetch all details of ledger like, Cheque Number, Reference Number, Voucher Number etc. Additionally, it allows you to view ledgers with separate debit and credit sections. In this blog post, we’ll explore the significance of this TDL and how it can revolutionize your accounting experience.

Manual Books TDL:

The Manual Books TDL is a custom Tally TDL code designed to bridge the gap between modern accounting practices and the timeless charm of Khata Books. It empowers businesses to customize their Tally Ledgers for a more familiar and intuitive experience. The TDL simplifies the process of reconciling statements and ledgers, making it more intuitive and efficient.

Also Checkout HSN SAC code list at Entry Time TDL for Tally Prime

Manual Books TDL

Manual Books TDL Code for Tally Prime:

Customize your Tally Ledgers Statement to resemble the format of traditional Khata Books, providing a familiar and user-friendly interface.

[Button :LearnwellCashbook]
Key : CTRL+7
Title : "Manual Books"
Action :Display Collection:LearnwellMBook
[#Form :Default]
    Add:Top Button:At Beginning:LearnwellCashbook
[Collection: LearnwellMBook]
Type : Ledger
Belongs To : Yes
Variable : LedgerName
Report :LearnweLDRSt
Trigger :LearnweLDRStCll

[Report :LearnweLDRStCll]
Use : Collection Variable
Local : Line : Collection Variable : Add : Field :LearnwellSttment

[Field:LearnwellSttment]
Use : Name Field
Variable : LedgerName
Modifies : LedgerName
Table : LearnwellMBook
Show Table : Always

[Report :LearnweLDRSt]
Variable : SVFromDate, SVToDate
Set : SVfromDate:$$FinYearBeg:##StartDate:$StartingFrom:Company:##SVCurrentCompany
Set : LedgerName : ##LedgerName
Variable : IsMultiPage, InNewPages
Set : IsMultiPage : yes
Set : InNewPages : yes
Set : SVToDate : ##SVCurrentdate
Form :LearnwellSttmForm
Variable : GroupName
Set : Is Ledger Report : Yes
Set : DSPWithOpening : Yes

[Form :LearnwellSttmForm]
Height : 100% Screen
Width : 100% Screen
Space Top : If $$InPrintMode Then 0.5 Else 0 inches
Button : Change Period,ChangeLedger,Print Button,Export Button,BottomToolBarBtn6,BottomToolBarBtn7,BottomToolBarBtn8, BottomToolBarBtn9, BottomToolBarBtn10, BottomToolBarBtn11
Parts :LearnwellSttmTitle,LearnwellSttmDetl

[Part :LearnwellSttmTitle]
Space Bottom : 0.2 inch
Add:Lines:At End:LearnwellSttmPrty,LearnwellSttmPeriod


[Line:LearnwellSttmPrty]
Field:LearnwellSttmPrtyField

[Field:LearnwellSttmPrtyField]
Use :Name Field
SetAs:##LedgerName
Width:150 mms
Local:STYLE:DEFAULT:Height:12
Full Width:Yes
Align:Center

[Line:LearnwellSttmPeriod]
Field:LearnwellSttmPeriodField
Space Top:0.5
Border:thin bottom

[Field:LearnwellSttmPeriodField]
Use:name field
Set as:$$LocaleString:"From " + $$String:##SVFromDate + " to " + $$String:##SVToDate
Align : Center
Full Width : Yes
Local:Style:defualt:Height:15
Style:large bold

[Part:LearnwellSttmDetl]
Right Part:LearnwellSttmDetlRight
Left Part:LearnwellSttmDetlLeft

[Part:LearnwellSttmDetlLeft]
Line:LWTTlinfoL,LWTTlbalL,LWTTlbalLTTLf
Repeat:LWTTlbalLTTLf:LWTTlbalcollL
Bottom Line:LWTTCLGTotalL,LWTTCLGTotalLField
Bottom Line:LWTTCLGTotalL1,
Scroll:Vertical
Float:no
Common Border:Yes
Total:LWLVCHDebitAmt

[Part:LearnwellSttmDetlRight]
Line:LWTTInfoR,LWTTBALR,LWTTTitleR
Repeat:LWTTTitleR:LWTTInfoRColl
Bottom Line:LWTTInfoRTotal, LWTTCLGTotalLFieldRT
Bottom Line:LWTTInfoRTotal1,
Scroll:Vertical
Float:no
Common Border:Yes
Total:LWLVCHCreditAmt

[Line:LWTTlbalL]
Fields:LWOpBalTT
Right Fields : LWOpBalD
Border: Thin BOttom

[Field:LWOpBalTT]
info :$$localestring:"Opening Balance :"
width : 50
Inactive: If $$IsEmpty:#LWOpBalD then Yes Else No
Align:Right
Background:Light Blue

[Field:LWOpBalD]
Use : Amount Field
Set as : If $$IsDr:$Openingbalance:Ledger:##LedgerName then $Openingbalance:Ledger:##LedgerName else ""
Skip : Yes
style : Tiny Bold
Format : "Symbol,DrCr"
Width : 16
Background:Light Blue

[Line:LWTTCLGTotalL]
Fields:LWCLbalLTtot
Right Fields: LWCLbalLtot
Border: Thin Top

[Field:LWCLbalLTtot]
info :$$localestring:"Debit Total :"
width : 50
Align: Right
Widespaced: Yes
Background:Crystal Blue

[Field:LWCLbalLtot]
Use : Amount Field
Set as : $$Total:LWLVCHDebitAmt + #LWOpBalD
Skip : Yes
style : normal
Format : "Symbol,DrCr"
Width : 16
Align:Right

[Line:LWTTCLGTotalL1]
Fields:LWCLbalLTtot1
Right Fields: LWCLbalLtot1
Border: Totals

[Field:LWCLbalLTtot1]
info : $$localestring:"Current Total :"
Width : 50
Widespaced: Yes
Align: Right
Background:Crystal Blue

[Field:LWCLbalLtot1]
Use : Amount Field
Set as : #LWCLbalLtot + #LWCLbalL
Skip : Yes
style : normal bold
Width : 16
Align: Right


[Line:LWTTCLGTotalLField]
Fields:LWCLbalLT
Right Fields: LWCLbalL


[Field:LWCLbalLT]
info :$$localestring:"Closing Balance :"
width : 50
Inactive: If $$IsEmpty:#LWCLbalL then Yes Else No
Widespaced: Yes
Align: Right
Background:Light Blue

[Field:LWCLbalL]
Use : Amount Field
Set as : If $$IsDr:$ClosingBalance:Ledger:##LedgerName then 0 else $ClosingBalance:Ledger:##LedgerName
Skip : Yes
style : Normal Bold
Format : "Symbol,DrCr"
Width : 16
Align:Right

[Line:LWTTlinfoL]
Field:LWLVCHDDate,LWLVCHDParticulars,LWLVCHDType,LWLVCHDReference,LWLVCHDChqNum,LWLVCHDebitAmt
Local:Field:LWLVCHDDate:Info:"Date"
Local:Field:LWLVCHDParticulars:Info:"Particulars"
Local:Field:LWLVCHDReference:Info:"VCH No."
Local:Field:LWLVCHDChqNum:Info:"Ch./Ref. No."
Local:Field:LWLVCHDType:Info:"Vch.Type"
Local:Field:LWLVCHDebitAmt:Info:"Debit Amount"
Border:THIN TOP BOTTOM
Local:Style:Default:Height:10
Local:Field:default:Background:Crystal Blue


[Line:LWTTBALR]
Fields:LWOPebalRT
Right Fields: LWOPebalR
Border: Thin BOttom

[Field:LWOPebalRT ]
info : $$localestring:"Opening Balance :"
width : 50
Inactive: If $$IsEmpty:#LWOPebalR then Yes Else No
Align: Right
Widespaced: Yes
Background:Light Blue

[Field:LWOPebalR]
Use : Amount Field
Set as : If Not $$IsDr:$Openingbalance:Ledger:##LedgerName then $Openingbalance:Ledger:##LedgerName else ""
Skip : Yes
style : normal bold
Format : "Symbol,DrCr"
Width : 16
Align:Center
Background:Light Blue

[Line:LWTTInfoRTotal]
Fields:LWCLbalRTtot
Right Fields: LWCLbalRtot
Border: Thin Top

[Field:LWCLbalRTtot]
info :$$localestring:"Credit Total :"
width : 50
Widespaced: Yes
Align: Right
Background:Crystal Blue

[Field:LWCLbalRtot]
Use : Amount Field
Set as : $$Total:LWLVCHCreditAmt+#LWOPeBalR
Skip : Yes
style : normal
Format : "Symbol,DrCr"
Width : 16
Align:Right

[Line:LWTTInfoRTotal1]
Fields:LWCLbalRTtot1
Right Fields: LWCLbalRtot1
Border: Totals

[Field:LWCLbalRTtot1]
info :$$localestring:"Current Total :"
width : 50
Widespaced: Yes
Align: Right
Background:Crystal Blue

[Field:LWCLbalRtot1]
Use : Amount Field
Set as : #LWCLbalRtot + #LWCLbalR
Skip : Yes
style : normal bold
Width : 16
Align:Right

[Line:LWTTCLGTotalLFieldRT]
Fields:LWCLbalRT
Right Fields:LWCLbalR

[Field:LWCLbalRT]
info :$$localestring:"Closing Balance :"
width : 50
Inactive: If $$IsEmpty:#LWCLbalR then Yes Else No
Widespaced: Yes
Align: Right
Background:Light Blue

[Field:LWCLbalR]
Use : Amount Field
Set as : $ClosingBalance:Ledger:##LedgerName
Set as : If not $$IsDr:$ClosingBalance:Ledger:##LedgerName then 0 else $ClosingBalance:Ledger:##LedgerName
Skip : Yes
style : NORMAL BOLD
Format : "Symbol,DrCr"
Width : 16
Background:Light Blue


[Line:LWTTlbalLTTLf]
Field:LWLVCHDDate,LWLVCHDParticulars,LWLVCHDType,LWLVCHDReference,LWLVCHDChqNum,LWLVCHDebitAmt,DSPVCHMASTERIDNO
Option : AlterVchOnEnter : Yes

[field:LWLVCHDDate]
Use:uni date field
Set as : $Date
Format : "full Date"
Width :12
Style : tiny
Border : Thin right
Align : Left

[field:LWLVCHDParticulars]
Use : Name Field
Set as:If $$IsSales:$VoucherTypeName then $AllInventoryEntries.AccountingAllocations.LedgerName else If $$IsDebitNote:$VoucherTypeName then $AllInventoryEntries.AccountingAllocations.LedgerName else $$LocaleString:$AllLedgerEntries[1].LedgerName
Width : 37
Style : tiny
Border : Thin right

[Field:LWLVCHDReference]
Set As : $VoucherNumber
Width : 10
Align : center
Style : tiny
border : thin right

[field:LWLVCHDChqNum]
Use : Name Field
Set as : If $$IsPayment:$VoucherTypeName then $AllLedgerEntries[-1].BankAllocations.INSTRUMENTNUMBER +
else If $$IsContra:$VoucherTypeName then $AllLedgerEntries[-2].BankAllocations.INSTRUMENTNUMBER +
else If $$IsReceipt:$VoucherTypeName then $AllLedgerEntries[-1].BankAllocations.InstrumentNumber +
else If $$IsPurchase:$VoucherTypeName then $Reference +
else If $$Issales:$VoucherTypeName then $Reference +
Else $AllLedgerEntries.BankAllocations.InstrumentNumbers
Width : 8
Style : tiny
Border : Thin right


[field:LWLVCHDType]
Use : Name Field
Set as : $VoucherTypeName
Width : 10
Style : tiny
Border : Thin Right

[field:LWLVCHDebitAmt]
Use : Amount Field
Set as : $$AsDrAmt:$TotLedDrAmt
Full Width : Yes
Border : Thin right
Space Right:1
Style:tiny

[Line:LWTTInfoR]
Field:LWLVCHCDate,LWLVCHCParticulars,LWLVCHCType,LWLVCHCReference,LWLVCHCChqNum,LWLVCHCreditAmt
Local:Field:LWLVCHcDate:Info:"Date"
Local:Field:LWLVCHcParticulars:Info:"Particulars"
Local:Field:LWLVCHcReference:Info:"VCH No."
Local:Field:LWLVCHCChqNum:Info:"Ch./Ref No"
Local:Field:LWLVCHCType:Info:"Vch. Type"
Local:Field:LWLVCHCreditAmt:Info:"Credit Amount"
Border:THIN TOP BOTTOM
Local:Style:Default:Height:10
Local:Field:default:Background:Crystal Blue

[Line:LWTTTitleR]
Field:LWLVCHCDate,LWLVCHCParticulars,LWLVCHCType,LWLVCHCReference,LWLVCHDChqNum,LWLVCHCreditAmt,DSPVCHMASTERIDNO
Option : AlterVchOnEnter : Yes

[field:LWLVCHCDate]
Use:uni date field
Set as : $Date
Format : "DD/MMM/YYYY"
Width : 12
Style : tiny
Border : Thin Left Right
Align : Left

[field:LWLVCHCParticulars]
Use : Name Field
Set as:If $$IsPurchase:$VoucherTypeName then $AllInventoryEntries.AccountingAllocations.LedgerName else If $$IsCreditNote:$VoucherTypeName then $AllInventoryEntries.AccountingAllocations.LedgerName else $$LocaleString:$AllLedgerEntries[1].LedgerName
Width : 39
Style : tiny
Border : Thin right

[Field:LWLVCHCReference]
Set As : $VoucherNumber
Width : 10
Align : center
Style : tiny
border : thin right

[field:LWLVCHCChqNum]
Use : Name Field
Set as : If $$IsPayment:$VoucherTypeName then $AllLedgerEntries[-1].BankAllocations.INSTRUMENTNUMBER +
else If $$IsContra:$VoucherTypeName then $AllLedgerEntries[-2].BankAllocations.INSTRUMENTNUMBER +
else If $$IsReceipt:$VoucherTypeName then $AllLedgerEntries[-1].BankAllocations.InstrumentNumber +
else If $$IsPurchase:$VoucherTypeName then $Reference +
Else $AllLedgerEntries.BankAllocations.InstrumentNumbers +$VoucherNumber
Width : 8
Style : tiny
Border : Thin right

[field:LWLVCHCType]
Use : Name Field
Set as : $VoucherTypeName
Width : 10
Style : tiny
Border : Thin right

[field:LWLVCHCreditAmt]
Use : Amount Field
Set as : $$AsCrAmt:$TotLedCrAmt
Width : 16
Full Width : Yes
Style : tiny
Border : Thin right
Space Right:1

[Collection : LWTTlbalcollL]
Use : Total Ledger Vouchers
Aggr Compute : VchDrTotal : Sum : $$OrigVchLedDrTotal:#LedgerName
Filter : FilterDspVchDrAmt
[Collection : LWTTInfoRColl]
Use : Total Ledger Vouchers
Aggr Compute : VchCrTotal : Sum : $$OrigVchLedCrTotal:#LedgerName
Filter : FilterDspVchCrAmt
[System:formula]
FilterDspVchDrAmt: NOT $$IsEmpty:$TotLedDrAmt AND (NOT @@ShowForex OR NOT $$IsBaseCurrency:$TotLedDrAmt)
FilterDspVchCrAmt: NOT $$IsEmpty:$TotLedCrAmt AND (NOT @@ShowForex OR NOT $$IsBaseCurrency:$TotLedCrAmt)

[Collection: Total Ledger Vouchers]
Type : Vouchers : Ledger
Child of : ##pvsLedgerName
ParmVAR : pvsLedgerName : String : #LedgerName
Sort : @@InCreasing: -$TBSort,$IsForexLine, $Date

Fetch : AllLedgerEntries.LedgerName, AllLedgerEntries.Amount
Fetch : AllLedgerEntries.BankAllocations.*
Fetch : Date, VoucherTypeName, VoucherNumber,Narration,Reference


Compute : TotalLedDLWRVCHAmt : If NOT ##InNewPages Then $$OrigVchLedDrTotal:#LedgerName else $$OrigVchLedDrTotal:#LedgerName
Compute : TotalLedCLWRVCHAmt : If NOT ##InNewPages Then $$OrigVchLedCrTotal:#LedgerName else $$OrigVchLedCrTotal:#LedgerName
Compute : TotLedDrAmt : $$OrigVchLedDrTotal:#LedgerName
Compute : TotLedCrAmt : $$OrigVchLedCrTotal:#LedgerName

Manual Books TDL:

HOW TO USE TDL CODE:
  • Copy above TDL code and create a text file.
  • Save text file and load in Tally (Method provided below the code)
  • Goto the ledger statements to see Khata Type Books.
  • You can change Period and other things by provided button.

This is best free TDL to have in your Tally. Must have TDL file for Tally ERP9 and Tally Prime that can use it for lifetime. This free TDL Code will perfectly work with Tally Prime.

Manual Books TDL Video:

See the below video to learn how to use Manual Books or Khata Bahi TDL in Tally Prime:

Watch above videos to learn :

  • How to use TDL files in Tally.
  • How to add own details in Tally TDL
  • How to create TDL file.
  • How to change in Codes.
  • More videos related to free TDL files on youtube/learnwell
  • Get More TDL files on https://e2t.in/
FOLLOW THE BELLOW INSTRUCTIONS TO LOAD TDL FILE IN TALLY:
  1. Make a Text file of above code
  2. Save it in to your computer
  3. Copy the text file path including Name and extension (as – C:\Users\HP\Desktop\rec\Manual Books.txt)
  4. Open Tally Prime Software
  5. Click on Help and click on TDL & Addon  (for Tally Prime)
  6. Press F4 (to open a Box)
  7. Set Load TDL file on Startup – Yes
  8. Paste The path in blank space
  9. Press enter and save
  10. Now your Manual Books TDL file for Tally Prime is ready to use.

The Manual Books TDL for Tally Prime seamlessly marries the classic charm of Khata Books with the efficiency of modern accounting software. Its ability to customize Tally Ledgers

HSN SAC Code List at Entry Time TDL

2023 Popular HSN SAC Code List at Entry Time TDL for Tally Prime

This Popular HSN SAC Code List at Entry Time TDL for Tally Prime will provide you HSN description and HSN code List at Ledger and item Creation Time. Correctly assigning HSN (Harmonized System of Nomenclature) and SAC (Service Accounting Code) codes is a crucial aspect of GST compliance.

Now, with this Free Tally Prime TDL code can add HSN/SAC Table in Ledger and Item creation and alter screen of Tally Prime. You can add and manage HSN codes and descriptions list according to your business and integrate directly in Tally Prime.

This revolutionary tool simplifies the process, ensuring accurate classification of goods and services. In this blog post, we’ll explore the significance of this TDL and how it empowers you to take control of your HSN/SAC codes in Tally Prime.

HSN SAC Code List at Entry Time TDL:

Take full control of your HSN and SAC codes by adding, editing, and organizing them directly within Tally Prime with this HSN SAC Code List at Entry Time TDL. Access the Custom HSN/SAC Table within Tally Prime Ledger and Item Creation and Alter Screen to add, edit, or manage your HSN and SAC codes and descriptions.

Also Checkout Online GST Details Tracker Tool

HSN SAC Code List at Entry Time TDL

HSN SAC Code List at Entry Time TDL Code for Tally Prime:


[#Field:GSTMSTInfoHSNSAC]
    Table:LearnwellHSNTB,NotApplicable
    Show Table:On Empty

[Collection:LearnwellHSNCode]
    Data Source:File XML :"C:\Users\ssonu\OneDrive\Desktop\HSN\HSN.xml"
    XML Object Path:DATA:1:ROOT
    Client Only:Yes

[Collection:LearnwellHSNTB]
Title:$$LocaleString:"HSN Code List"
Source Collection:LearnwellHSNCode
Fetch :Hsn,Desc
Format:$Hsn,20
Format:$Desc,200
Unique:$HSN

HSN SAC Code List at Entry Time TDL:

HOW TO USE TDL CODE:
  • Copy above TDL code and create a text file or Click on Above Download Button.
  • Extract downloaded Zip folder and Change XML file Path in TDL Code.
  • Save text file and load in Tally (Method provided below the code)
  • Goto create Ledger or Stock item, you will find HSN filed with HSN code and Description.
  • You can search HSN or SAC details by typing HSN/SAC code or Description.

This is best free TDL to have in your Tally. Must have TDL file for Tally ERP9 and Tally Prime that can use it for lifetime. This free TDL Code will perfectly work with Tally Prime.

HSN SAC Code List at Entry Time TDL Video:

See the below video to learn how to create Tally TDL file and how to add HSN XML in Code and How to use HSN SAC TDL in Tally:

Watch above videos to learn :

  • How to use TDL files in Tally.
  • How to add own details in Tally TDL
  • How to create TDL file.
  • How to Add XML code in TDL Code.
  • More videos related to free TDL files on youtube/learnwell
  • Get More TDL files on https://e2t.in/
FOLLOW THE BELLOW INSTRUCTIONS TO LOAD TDL FILE IN TALLY:
  1. Make a Text file of above code
  2. Save it in to your computer
  3. Copy the text file path including Name and extension (as – C:\Users\HP\Desktop\rec\HSN.txt)
  4. Open Tally Prime Software
  5. Click on Help and click on TDL & Addon  (for Tally Prime)
  6. Press F4 (to open a Box)
  7. Set Load TDL file on Startup – Yes
  8. Paste The path in blank space
  9. Press enter and save
  10. Now your HSN/SAC Tracker TDL file for Tally Prime is ready to use.

The Custom HSN/SAC Table TDL for Tally Prime is a game-changer for businesses striving for seamless and accurate GST compliance. Its ability to manage HSN and SAC codes directly within Tally Prime not only ensures accuracy but also saves valuable time and resources.

Online GST Details Tracker

2023 Free Amazing Online GST Details Tracker Direct from Portal

With this Amazing Online GST Details Tracker Direct from Portal, can track Party GST Numbers and Get all details direct from GST Portal and also can track HSN details.

Managing GST details and HSN codes can be a time-consuming process, but what if there was a way to streamline it? Introducing the Online GST Details Tracker directly from the GST portal. This incredible tool empowers businesses to effortlessly track party GST numbers and access all necessary details directly from the GST portal through API. Additionally, it enables easy monitoring of HSN details, to find correct HSN.

In this blog post, we’ll delve into the significance of this tool and how it can revolutionize your GST compliance process.

Online GST Details Tracker:

Access party GST details and HSN codes directly from the GST portal in real-time, ensuring accuracy and up-to-date information.

Online GST Details Tracker

Also Checkout Extra column in Voucher TDL

How to Use Online GST Details Tracker Tool:

Download Online GST Details Tracker from above download link and follow below steps:

  1. Open Online GST Details Tracker Macro workbook.
  2. Enable Macro (How to enable Macro in Excel)
  3. In GST Details Sheet fill GST numbers in column A and Press Get Details Button
  4. In HSN Details Sheet fill HSN Codes to get HSN description

Note: If details not getting then GST Number and HSN code are incorrect. When processing data by clicking on button your internet should be connect.

Watch the below video for More Details:

How to use GST Video:

How to use HSN Video:

The Online GST Details Tracker is a game-changer for businesses striving for seamless and accurate GST compliance. Its ability to retrieve information directly from the portal not only ensures accuracy but also saves valuable time and resources.

By incorporating this powerful tool into your GST management process, you can revolutionize your compliance efforts and stay on top of your financial responsibilities.

Extra Column in Voucher TDL

2023 Free Extra Column in Voucher TDL

Extra Column in Voucher TDL will help you to add your own column, your fields in voucher.

Tally, a renowned accounting software, understands this need for adaptability. With the Extra Column in Voucher TDL (Tally Definition Language), you now have the power to incorporate additional fields directly into your vouchers.

This blog post will explore the significance of this TDL and how it can revolutionize your Tally experience.

Extra Column in Voucher TDL:

Now modify voucher yourself. Add your own extra column with total in a voucher. With this Tally Prime TDL code we can add our own extra column in voucher, that will help to add commission in voucher, brokerage in voucher or other Item related information.

Also checkout Alternate Unit Quantity Totals in Voucher and Invoice Print

Extra Column in Voucher TDL
[#Line: EI ColumnOne]
Add: Right Field: Before:VCH QtyTitle :LWCommission
[Field:LWCommission]
Use: Name Field
Set as: "Commission"
Width: 8
Skip: Yes
Invisible : @@IsPurchase

[#Part: EI InvInfo]
    Total:CommissionTotal
[#Line: EI InvInfo]
Add: Right Field: Before:VCH BilledQty:CommissionTotal
[Field:CommissionTotal]
Use:Amount Field
Storage:LearnwellCommission
Width: 10
Align: Right
Space Right: 5
Invisible : @@IsPurchase

[System:UDF]
    LearnwellCommission:Amount:5045

[#Field: EI QtyTotal]
Add: Field: Before:EI BilledQtyTotal :LWCommtotal
[Field:LWCommtotal]
Use : Amount Field
Set as : $$Total:CommissionTotal
Set Always:Yes

Extra Column in Voucher TDL with Total:

HOW TO USE TDL CODE:
  • Copy above TDL code and create a text file.
  • Save text file and load in Tally (Method provided below the code)
  • Goto voucher for invoicing.
  • You can add your own column and can see total of that field.

This is best free TDL to have in your Tally. Must have TDL file for Tally ERP9 and Tally Prime that can use it for lifetime. This free TDL Code will perfectly work with Tally Prime.

Extra Column in Voucher TDL with Total Video:

See the below video to learn how to create Tally TDL file and how to add own column in Tally Voucher :

Watch above videos to learn :

  • How to use TDL files in Tally.
  • How to add own details in Tally TDL
  • How to create TDL file.
  • How to Add Tally Column in Voucher
  • More videos related to free TDL files on youtube/learnwell
  • Get More TDL files on https://e2t.in/
FOLLOW THE BELLOW INSTRUCTIONS TO LOAD TDL FILE IN TALLY:
  1. Make a Text file of above code
  2. Save it in to your computer
  3. Copy the text file path including Name and extension (as – C:\Users\HP\Desktop\rec\column.txt)
  4. Open Tally Prime Software
  5. Click on Help and click on TDL & Addon  (for Tally Prime)
  6. Press F4 (to open a Box)
  7. Set Load TDL file on Startup – Yes
  8. Paste The path in blank space
  9. Press enter and save
  10. Now your modified voucher with extra column for Tally Prime is ready to use.

The Extra Column in Voucher TDL for Tally is a game-changer for businesses seeking to enhance their voucher customization capabilities.

Alternate Unit Quantity Total TDL

Amazing Alternate Unit Quantity Total TDL Code

Alternate Unit Quantity Total TDL will help to add Total of Alternate Unit Quantity.

Every entry, every calculation holds significance. This ingenious Tally TDL allows you to take control of your vouchers, enabling the addition of alternate unit quantity totals alongside the default quantity total.

In this blog post, with the help of Alternate Unit Quantity Total TDL Code, we will add alternate quantity total in voucher and also in invoice print.

Alternate Unit Quantity Total TDL:

Reports generated from Tally Prime will now include both default and alternate unit quantities, providing a more comprehensive overview of your business operations.

Also checkout Tally TDL to Deactivate Duplicate and Wrong Ledgers and Stock Items

Alternate Unit Quantity Total TDL
[#Field: EI QtyTotal]
Add: Field: After:EI BilledQtyTotal :AltTotal

[Field:AltTotal]
Use : Name Field
Align : Right
Width : @@VCHQtyWidth
Style : Small Italic
Set as : "( " + $$String:$LearnwellTotal:Symbol,ShortForm,Secondary + " )"
Set always : Yes
Skip : Yes
Inactive : $$IsEnd:$StockItemName OR @@NoAltUnits
Border : Totals

[ System : Formula ]
LearnwellTotal: $$Owner:$$CollQtyTotal:InventoryEntries:$BilledQty

Alternate Unit Quantity Total TDL:

HOW TO USE TDL CODE:
  • Copy above TDL code and create a text file.
  • Save text file and load in Tally (Method provided below the code)
  • Goto voucher for invoicing.
  • You can see total of Alternate quantity and also can see in Invoice Print.

This is best free TDL to have in your Tally. Must have TDL file for Tally ERP9 and Tally Prime that can use it for lifetime. This free TDL Code will perfectly work with Tally Prime.

Alternate Unit Quantity Total TDL Video:

See the below video to learn how to create Tally TDL file and how to Get Total Value of Column in Tally :

Watch above videos to learn :

  • How to use TDL files in Tally.
  • How to add own details in Tally TDL
  • How to create TDL file.
  • How to Add total in Tally Column
  • More videos related to free TDL files on youtube/learnwell
  • Get More TDL files on https://e2t.in/
FOLLOW THE BELLOW INSTRUCTIONS TO LOAD TDL FILE IN TALLY:
  1. Make a Text file of above code
  2. Save it in to your computer
  3. Copy the text file path including Name and extension (as – C:\Users\HP\Desktop\rec\Totals.txt)
  4. Open Tally Prime Software
  5. Click on Help and click on TDL & Addon  (for Tally Prime)
  6. Press F4 (to open a Box)
  7. Set Load TDL file on Startup – Yes
  8. Paste The path in blank space
  9. Press enter and save
  10. Now your Quantity Total Column added for Tally Prime is ready to use.

The Alternate Unit Quantity Total TDL for Tally Prime is a game-changer for businesses seeking to enhance their voucher customization capabilities.

Tally TDL to Deactivate Wrong Ledger and Stock Items

2023 Best Free Tally TDL to Deactivate Wrong Ledger and Stock Items

Tally TDL to Deactivate Wrong Ledger and Stock Items can save your wrong entry possibility.

In accounting, accuracy is paramount. Mistakes in ledger and stock entries can have significant financial implications. Fortunately, Tally, the trusted accounting software, offers a powerful solution from TDL files. In this the “Deactivate Wrong Ledger and Stock Items” TDL (Tally Definition Language) will help a lot.

In this blog post, we’ll explore the importance of this TDL and how it can safeguard your financial records from costly errors.

Tally TDL to Deactivate Wrong Ledger and Stock Items:

Tally TDL to Deactivate Wrong Ledger and Stock Items is a custom TDL file designed to add an extra layer of protection to your Tally data by deactivating facility of wrong ledgers and items. With this we can deactivate unused, duplicates, wrong Ledgers and Stock Items.

Also checkout Voucher Modification TDL to add own header in TallyPrime 3.0 Voucher

Tally TDL to Deactivate Wrong Ledger and Stock Items

Deactivate Duplicate Ledger and Stock Items TDL code:

Accidental entries of incorrect ledgers or stock items can be prevented, safeguarding Vouchers and your financial records.


[#Line: MSTKI BalanceTitles]
Add:Field:DeactivateTitle
[Field:DeactivateTitle]
Use:name field
Set as:"Deactivate Item?"
Align:Right
Skip:Yes
[#Line: MSTKI BodyA]
Add:Field:After:MST Parent:Deactivate
[Field:Deactivate]
Use : Logical Field
Storage :LearnWellDeactivateItem
Set As : Yes
Set Always : Yes

[System:udf]
LearnWellDeactivateItem:Logical:3015

[System:Formula]
USEDStockitem:Not $LearnWellDeactivateItem

[#Collection: Vch Stock Item Extract]
Filter :usedstockitem


[#Line: MLED Titles]
Add:Field:after:Multi Master Name Title:DeactivateLDTitle
[Field:DeactivateLDTitle]
Use:name field
Set as:"Deactivate Ledger?"
Align:Center
Skip:Yes
[#Line: MLED Body]
Add:Field:After:Multi MST Name:DeactivateLD
[Field:DeactivateLD]
Use : Logical Field
Storage :LearnWellDeactivateLedger
Set As : Yes
Set Always : Yes
Align:Right

[System:udf]
LearnWellDeactivateLedger:Logical:3016

[System:Formula]
UsedLedger:Not $LearnWellDeactivateLedger

[#Collection: Party Ledgers]
	Filter:UsedLedger

Deactivate Duplicate Ledger and Stock Items TDL:

HOW TO USE TDL CODE:
  • Copy above TDL code and create a text file.
  • Save text file and load in Tally (Method provided below the code)
  • Goto Chart of Accounts and Multi Alter
  • Here you can enable disable ledgers and stock items.

This is best free TDL to have in your Tally. Must have TDL file for Tally ERP9 and Tally Prime that can use it for lifetime. This free TDL Code will perfectly work with Tally Prime.

Tally TDL to Deactivate Wrong Ledger and Stock Items Video:

See the below video to learn how to TDL and Multi Alter option in Tally Prime 3.0:

Watch above videos to learn :

  • How to use TDL files in Tally.
  • How to add own details in Tally TDL
  • How to create TDL file.
  • How to Deactivate Duplicate Ledgers and Stock items
  • More videos related to free TDL files on youtube/learnwell
  • Get More TDL files on https://e2t.in/
FOLLOW THE BELLOW INSTRUCTIONS TO LOAD TDL FILE IN TALLY:
  1. Make a Text file of above code
  2. Save it in to your computer
  3. Copy the text file path including Name and extension (as – C:\Users\HP\Desktop\rec\Duplicate.txt)
  4. Open Tally Prime Software
  5. Click on Help and click on TDL & Addon  (for Tally Prime)
  6. Press F4 (to open a Box)
  7. Set Load TDL file on Startup – Yes
  8. Paste The path in blank space
  9. Press enter and save
  10. Now your Deactivate Duplicate Ledger and Stock Items TDL for Tally Prime is ready to use.

By implementing this Tally Prime TDL, businesses can take a proactive approach to safeguarding their vouchers to select wrong ledgers and stock items. Embrace this powerful TDL file and experience the transformative impact it can have on your accounting practices with Tally.

Own Voucher Header Tally Prime 3.0 TDL

Amazing Own Voucher Header Tally Prime 3.0 TDL | Voucher Modification TDL for Tally Prime 3.0

With this Own Voucher Header Tally Prime 3.0 TDL we can modify voucher as per our need.

Tally Prime 3.0, is the latest version of Tally Software, offers customization options with the help of TDL. Own Voucher Header TDL allows businesses to brand their vouchers with a unique header.

In this blog post, we’ll see this Voucher Modification TDL and how it can add a professional touch to your Tally Prime 3.0 experience.

Own Voucher Header Tally Prime 3.0 TDL:

With this Tally Prime 3.0 TDL we can add image or own texts in voucher heading. We can add Voucher Name, God prayer, or any other image asper requirement.

Also checkout daily task reminder tdl

Own Voucher Header Tally Prime 3.0 TDL

Own Voucher Header Tally Prime 3.0 TDL Code:

Use the voucher header to convey specific messages, promotions, reminders, or announcements.

[#Part:VCH Registration]
	Add:Part:Before:VCH Registration Details:OmNamah
[Part:OmNamah]
Line:om
;Graph Type:"C:\Users\ssonu\Downloads\omnamah.jpg"
[Line:om]
Field:om

[Field:om]
Set as:"Om Namah Shivay                 : "
Style:LWStyle
Skip:Yes

[Style:LWStyle]
Font:"Eras Bold ITC"

Voucher Modification TDL:

HOW TO USE TDL CODE:
  • Copy above TDL code and create a text file.
  • Save text file and load in Tally (Method provided below the code)
  • Change message in TDL file .
  • Also can add image (watch the video for more understanding).

This is best free TDL to have in your Tally. Must have TDL file for Tally ERP9 and Tally Prime that can use it for lifetime. This free TDL Code will perfectly work with Tally Prime.

Voucher Modification TDL for Tally Prime Video:

See the below video to learn how to add message and image in Tally Prime 3.0:

Watch above videos to learn :

  • How to use TDL files in Tally.
  • How to add message and Image in Tally Prime 3.0 Voucher.
  • How to create TDL file.
  • How to add own fields in Tally Prime 3.0.
  • More videos related to free TDL files on youtube/learnwell
  • Get More TDL files on https://e2t.in/
FOLLOW THE BELLOW INSTRUCTIONS TO LOAD TDL FILE IN TALLY:
  1. Make a Text file of above code
  2. Save it in to your computer
  3. Copy the text file path including Name and extension (as – C:\Users\HP\Desktop\rec\Voucher.txt)
  4. Open Tally Prime Software
  5. Click on Help and click on TDL & Addon  (for Tally Prime)
  6. Press F4 (to open a Box)
  7. Set Load TDL file on Startup – Yes
  8. Paste The path in blank space
  9. Press enter and save
  10. Now your Voucher Modification TDL for Tally Prime is ready to use.

By using this invaluable Tally Prime TDL, businesses can elevate their brand identity in their financial communications. Embrace this powerful TDL and experience the impactful difference it can make in your Tally Prime 3.0 experience.

Item Sales Summary TDL

Tally Prime 3.0 Free TDL : Item Sales Summary | Item Sales Summary TDL

This Item Sales Summary TDL will help you a lot to see Items summary with there GST details, HSN, Quantity, Average Rates, Closing etc.

Tally Prime 3.0, the latest iteration of the Tally Business software, brings a host of powerful features to streamline business operations. One standout addition is the Item Sales Summary TDL – a free Tally Prime TDL File that empowers users to gain deeper insights into their sales performance.

In this blog post, we’ll explore the significance of this Item Sales Summary TDL and how it can revolutionize your Tally Prime experience.

Item Sales Summary TDL:

The Item Sales Summary TDL is a custom Tally TDL file designed specifically for Tally Prime 3.0 users. It provides a comprehensive overview of item-wise sales, enabling businesses to make informed decisions based on detailed sales data.

Item Sales Summary TDL

Item Sales Summary TDL Code:

The TDL seamlessly integrates with Tally Prime 3.0, ensuring a smooth transition into your existing workflow.

Also checkout Daily Auto Reminder TDL with Image

[#Menu : Gateway of Tally]
Item : Item Sales Summary : Display :LearnwellItemSumm
[Report :LearnwellItemSumm]
Form :LearnwellItemSumm
Variable : SVFromDate,SVToDate
Set : SVFromDate : $$MonthStart:##SVFromdate
Set : SVToDate : $$MonthEnd:##SVFromdate
[Form :LearnwellItemSumm]
Part : LWSummTitle,LWSummItemTitle,LWSummItemDetail
Button : Change Period,Print Button,Export Button
Bottom Part : LWSummItemDetailBTM
Background :White
[Part : LWSummTitle]
Line :LWSummTitle
[Line :LWSummTitle]
Field : Simple Field
Local : Field : Simple Field : Set As : "Item Sales Summary for" + $$String:##SVFromDate +" to " + $$String:##SVToDate
Local : Field : Simple Field : Style : Normal Bold
[Part : LWSummItemTitle]
Use : LWSummItemDetail
Delete : Repeat
Delete : Scroll
Border : ColumnTitles
Local : Field : Default : Type : string
Local : Field : LWSummItemDetailItem : Set As : "Particulars"
Local : Field : LWHsn : Set As : "HSN Code"
Local : Field : LWGstperc : Set As : "GST Rate"
Local : Field : LWQtyTTl: Set As : "Sales Qty"
Local : Field : LWItmRate : Set As : "Avg. Rate"
Local : Field : LWAmtTTl : Set As : "Sales Value"
Local :Field : Default : Style : Small Bold
[Part :LWSummItemDetail]
Line : LWSummItemDetail
Repeat : LWSummItemDetail :LWCollSalesItems
Scroll : Vertical
Total : LWQtyTTl,LWAmtTTl
[Line :LWSummItemDetail]
Field : LWSummItemDetailItem,LWHsn,LWGstperc
Right Field : LWQtyTTl,LWItmRate,LWAmtTTl
Border : Thin bottom
[Field : LWSummItemDetailItem]
Set As : $Stockitem
Style : Small
Display : Item Monthly Summary
Variable : StockitemName
[Field : LWHsn]
Use: Name Field
Set as:$(Stockitem,$stockitem).GstDetails[Last].hsncode
Width:10
Align: Center
Set Always: Yes
Skip: Yes
[Field : LWGstperc]
Use: Number Field
Set as:$(Stockitem,$stockitem).GSTDetails[First].StatewiseDetails[1, @@IsAnyState].RateDetails[1, @@IsIGST].GSTRate
Format: Percentage
Width:10
Align: Center
Set Always: Yes
Skip: Yes
[Field : LWQtyTTl]
Use : Qty Primary Field
Style : Small
Set As : $BilledQtyToT
[Field : LWItmRate]
Use : Rate Price Field
Set as : $AmountToT / $BilledQtyToT
Style : Small
[Field : LWAmtTTl]
Use : Amount Field
Set As : $AmountToT
Style : Small
[Part : LWSummItemDetailBTM]
Use : LWSummItemDetail
Delete : Repeat
Delete : Scroll
Delete : Total
Border : Totals
Local : Field : LWSummItemDetailItem : Set As : "Total"
Local : Field : LWQtyTTl: Set As : $$Total:LWQtyTTl
Local : Field : LWAmtTTl : Set As : $$Total:LWAmtTTl
Local :Field : Default : Style : Small Bold
[Collection : LearnwellItemSummcoll]
Type : Vouchers : VoucherType
Child of : $$VchTypeSales
Belongs to : yes
Fetch : Date,Inventory Entries
[Collection : LWCollSalesItems]
Source Collection : LearnwellItemSummcoll
Walk : Inventory Entries
By : Stockitem : $StockitemName
Aggr Compute : BilledQtyToT : Sum : $BilledQty
Aggr Compute : AmountToT : Sum : $Amount

Item Sales Summary TDL:

HOW TO USE TDL CODE:
  • Copy above TDL code and create a text file.
  • Save text file and load in Tally (Method provided below the code)
  • Go to Tally Main Screen and in Gateway of Tally find Item Sales Summary Tab .
  • From item Sales Summary Tab you can see Item summary with there GST details.

This is best free TDL to have in your Tally. Must have TDL file for Tally ERP9 and Tally Prime that can use it for lifetime. This free TDL Code will perfectly work with Tally Prime.

Item Sales Summary TDL Video:

See the below video to learn how to use Item sales summary TDL in Tally Prime 3.0:

Watch above videos to learn :

  • How to use TDL files in Tally.
  • How to see item wise sales summary report.
  • How to use item sales summary tdl in tally prime 3.0
  • More videos related to free TDL files on youtube/learnwell
  • Get More TDL files on https://e2t.in/
FOLLOW THE BELLOW INSTRUCTIONS TO LOAD TDL FILE IN TALLY:
  1. Make a Text file of above code
  2. Save it in to your computer
  3. Copy the text file path including Name and extension (as – C:\Users\HP\Desktop\rec\salesummary.txt)
  4. Open Tally Prime Software
  5. Click on Help and click on TDL & Addon  (for Tally Prime)
  6. Press F4 (to open a Box)
  7. Set Load TDL file on Startup – Yes
  8. Paste The path in blank space
  9. Press enter and save
  10. Now your item sales summary TDL for Tally Prime is ready to use.

The Item Sales Summary TDL for Tally Prime 3.0 is a game-changer for businesses seeking to gain a deeper understanding of their sales performance. Its ability to provide detailed item-wise sales data not only facilitates informed decision-making but also enhances inventory management strategies.

Daily Auto Reminder TDL

2023 Amazing Daily Auto Reminder TDL for Tally Prime | Daily Auto Popup TDL

Here is best free Amazing Daily Auto Reminder TDL for Tally Prime , that can show messages with Auto Popup when opening Tally. Daily Auto Reminder TDL is a powerful TDL file that automates your reminder process, ensuring important tasks are never overlooked. And also will help in daily pray with the image of your god, while start working.

The Daily Auto Popup TDL for Tally Prime will be game-changer for accountants who seeking to elevate their task management processes.

Daily Auto Reminder TDL:

The Daily Auto Reminder TDL is designed to optimize task management within Tally Prime. It empowers users by automating the process of setting reminders for daily tasks, reducing the risk of oversight and improving overall productivity. And also can add images with this Daily Auto Popup TDL.

Daily Auto Reminder TDL

Daily Auto Reminder TDL Code:

No more missed deadlines or overlooked tasks. The Daily Auto Reminder TDL acts as your virtual assistant, keeping you on track.

Also checkout recyclebin TDL for Tally Prime

	
[System : Event]
Auto Refresh : TIMER : TRUE : Display : LearnWellTodoList
Schedule Refresh : Load Company : TRUE : START TIMER : Auto Refresh : 60

[#Menu:Gateway of Tally]
Add: ToolBar Button:Before:Import Button:LearnwellToDo
[Button : LearnwellToDo]
Title : $$LocaleString:"ToDo"
Key : Ctrl + T
Action : Alter : LearnWellTodoList
[Report:LearnWellTodoList]
    Form 	   	:LWTodo
	Object		: Company
[Form:LWTodo]
	Parts       : LWtodoHeading,LWtodoTitle, LWtodoDetails
	Background  : Light Lily Yellow
	Width : 70 % Page
	Height : 70 % Page
	Vertical Align : Center
	Horizontal Align : Center
[Part:LWtodoHeading]
	Line:LWtodoHeading
[Line:LWtodoHeading]
	Field: Name Field
	Local: Field : Name Field : Set as : "www.learnwells.com-ToDo List"
	Local: Field : Name Field : Style : Large Bold
	Local: Field : Name Field : Align : Center
	Local: Field : Name Field : Full Width : Yes
	Local: Field : Name Field : Color : Blue
	Local: Field : Name Field : Inactive : $$InExportMode
	Local: Field : Name Field : Skip : Yes
	Space Bottom : 0.25 cm
[Part: LWtodoTitle]
	Lines  	 	: LWtodoTitle
	Border  	: Column Titles
    [Line: LWtodoTitle]
        Use     : LWtodoDetails
	    Local   : Field : Default                   : Style : Small Bold
	    Local   : Field : Default                   : Skip  : Yes
	    Local   : Field : Default                   : Type  : String
		Local   : Field : Default                   : Delete: Storage
		Local   : Field : Default                   : Lines : 2
		Local   : Field : LWtodowork                : Set as: "ToDo/Works"
		Local   : Field : LWstrdt	     		    : Set as: "Start Date"
		Local   : Field : LWstrdt2	     		    : Set as: "End Date"
		Local   : Field : LWtodoremark	            : Set as: "Remark"
		Local   : Field : Default                   : Delete: Inactive
[Part: LWtodoDetails]
	Line        : LWtodoDetails
	Repeat      : LWtodoDetails : LWtodoDetails
	Scroll      : Vertical
	CommonBorder: Yes
	BreakOn     : $$IsEmpty:$LWwork
    [Line: LWtodoDetails]
		Field       : LWtodowork
		Right Field : LWstrdt, LWstrdt2,LWtodoremark
		Local       : Field : Default   : Style : Small Bold
	    [Field: LWtodowork]
			Use     : Name Field 
			Storage : LWwork
			Border  : Thin Left
			Width	:80
	    [Field: LWstrdt]
			Use 	: Short Date Field
			Storage : startdate
			Border  : Thin Left
			InActive: $VCurrentlyInService or $$IsEmpty:$LWwork
	    [Field : LWstrdt2]
			Use     : Short Date Field
			Storage : enddate
			Border  : Thin Left
			Inactive: $VCurrentlyInService or $$IsEmpty:$LWwork
		[Field : LWtodoremark]
			Use     : name Field
			Storage : remarks
			Border  : Thin Left
			Inactive: $VCurrentlyInService or $$IsEmpty:$LWwork

[System: UDF]
	LWtodoDetails			:Aggregate	: 3676
	LWwork			    	: String    : 3675
	startdate		    	: Date      : 3673
	enddate			    	: Date      : 3672
	remarks					:String		: 3674
[Collection: LWtodoDetails]  
	Type 	: LWtodoDetails : Company
	Childof : ##SVCurrentCompany
	Format 	: $LWwork, 50
	Title 	: "Learnwell ToDo"

;; www.Learnwells.com

Daily Auto Popup TDL:

HOW TO USE TDL CODE:
  • Copy above TDL code and create a text file.
  • Save text file and load in Tally (Method provided below the code)
  • It will remind after some time (time can set in TDL code) .
  • Add your reminder task and images (watch the video for more understanding).

This is best free TDL to have in your Tally. Must have TDL file for Tally ERP9 and Tally Prime that can use it for lifetime. This free TDL Code will perfectly work with Tally Prime.

Daily Auto Popup TDL for Tally Prime Video:

See the below video to learn how to add reminder tasks and how to add image in Tally Prime:

Watch above videos to learn :

  • How to use TDL files in Tally.
  • How to add reminder tasks in Tally.
  • How to add Image in reminder task.
  • How to set timer in tdl to see reminder.
  • More videos related to free TDL files on youtube/learnwell
  • Get More TDL files on https://e2t.in/
FOLLOW THE BELLOW INSTRUCTIONS TO LOAD TDL FILE IN TALLY:
  1. Make a Text file of above code
  2. Save it in to your computer
  3. Copy the text file path including Name and extension (as – C:\Users\HP\Desktop\rec\reminder.txt)
  4. Open Tally Prime Software
  5. Click on Help and click on TDL & Addon  (for Tally Prime)
  6. Press F4 (to open a Box)
  7. Set Load TDL file on Startup – Yes
  8. Paste The path in blank space
  9. Press enter and save
  10. Now your Daily Reminder TDL for Tally Prime is ready to use.

By implementing this Tally Prime TDL, businesses can unlock a new level of efficiency and productivity in their daily operations. Embrace this powerful tool and experience the transformative impact it can have on your Tally Prime experience.

Recyclebin for Tally Prime

2023 Free Must Have Tally TDL – Recyclebin for Tally Prime

Recyclebin for Tally Prime is a game-changing Tally TDL that provides a safety net for your critical data. This is the must have Tally TDL file for your Tally. With this we can add recyclebin in our Tally and use as Recycle Bin.

In this blog post, we’ll explore the significance of this must-have TDL for Tally Prime and how it can revolutionize your Tally data safety.

Recyclebin for Tally Prime:

If you’re a Tally user, you know how frustrating it can be when you accidentally delete an important voucher or transaction. But with Recyclebin TDL for Tally Prime, you never have to worry about losing your data again.

This Tally TDL automatically save deleted entries in recycle bin in your TallyPrime software. So whenever you delete a voucher or transaction, it goes straight to the recycle bin instead of being permanently deleted. Recyclebin for Tally Prime also allows you to restore deleted vouchers or transactions with just a few clicks.

Recyclebin for Tally Prime TDL code:

It acts as a buffer, preventing accidental deletions from becoming irreversible mistakes. This invaluable Tally TDL ensures that even if data is removed, it can be easily recovered, enhancing peace of mind and productivity.

Also Checkout Free Email Sender with Attachment in Bulk

Recyclebin for Tally Prime
[#Menu: GatewayofTally]
  Add: ToolBar Button:After:HelpButton:LearnwellRBPrime
  Control :@@locRecyclebin: $$Allow:Create:Vouchers
  
[Button : LearnwellRBPrime]
Title : $$LocaleString:"RecycleBin"
Key : Ctrl + 9
Action : Display : LW DelPrime

[#Form         :     Default]
Add: ToolBar Button:After:HelpButton:LearnwellRBPrime
[#Form         :    Daybook]
Add: ToolBar Button:After:HelpButton:LearnwellRBPrime
[#Menu        :    Main Menu]
Add: ToolBar Button:After:HelpButton:LearnwellRBPrime
[#Menu        :    Default]
Add: ToolBar Button:After:HelpButton:LearnwellRBPrime
[#Form         :    Voucher]
Add: ToolBar Button:After:HelpButton:LearnwellRBPrime
[Report: LW DelPrime]
  Use: Voucher Register
  Title   : "Recycle Bin"
  Local: Line: DSP Vchdetail: Empty: NOT $fldDeleted
  Set: FamilyVoucherFlag: Yes
  Set: IsRestoreMode: Yes
  Set: SV To Date : $$YearEnd:##SVCurrentDate 
  Set: lConfirmation: Yes

[#Form: Voucher]
  Local: Line : VCH NarrPrompt: Add: Fields: Recycle Bin
  Set Always: RecycleBinFlag: If ##IsRestoreMode then ##RecyclebinFlag else No
 
[Field: Recycle Bin]
  Use: Logical field
  Storage: fldDeleted
  Set as: If ##IsRestoreMode then No else ##RecyclebinFlag
  Set Always: Yes                                         
  Type: Logical 
  Invisible: Yes

[#Collection: DayBook Vouchers of Company]
  Fetch	: fldDeleted 
  
[#Key: BottomToolBarBtn3_Delete]
  Title   : $$LocaleString:"Delete"
  Option: RbinFormDelete: if ($$IsVoucher AND NOT ##IsRestoreMode) then Yes else No

[#Key: BottomToolBarBtn3]  
  Title   : $$LocaleString:"Delete"
  Option: RbinDeleteLineObject: Yes
  
[#Key: Delete Line Object]
  Key     : Alt+D
  Option: RbinDeleteLineObject: Yes
 
[#Key: Delete Line ObjectEx]
  Key     : Alt+D
  Option: RbinDeleteLineObject: Yes
  
[#Key: Form Delete]
  Key : Alt+D
  Option: RbinFormDelete: Yes

[!Key: RbinFormDelete]
  Key: Alt+D
  Action: Alter: Rpt Confirmation

[!Key: RbinDeleteLineObject]
  Key: Alt+D
  Action: Alter Object

[Key: Restore from Bin]
  Key: CTRL+R
  Action: Alter Object

[Report: Rpt Confirmation]
  Add: Form: frm Confirmation
  Variable: lConfirmation
  Set: lConfirmation: Yes
  Title: "Confirm"
	
[Form: frm Confirmation]
  Add: Part: LWhead,LWtt, LWdoubl
  Add: Bottom Part: LWlower
  Full Width  : No
  No Confirm  : Yes
  Space Left  : 5
  Space Right : 5
  Space Top   : 2
  Space Bottom: 1
  Width: 25% screen
  Height: 25% screen

[Part: LWhead]
  Horizontal Align: Centre
  Lines : ln Heading

[Part: LWtt]
  Horizontal Align: Centre
  Lines : Form SubTitle
  Local : Field : Form SubTitle : Info : $$LocaleString:"Delete?? [Yes/No]"

[Part: LWdoubl]
  Horizontal Align: Centre
  Lines : ln Confirmation

[Part: LWlower] 
  Horizontal Align: Centre
  Lines : ln Caption1

[Line: ln Heading]
  Add: Field : fldHeading 

[Line: ln Confirmation]
  Add: Field: LearnWellC,LearnWellR,LearnWellO

[Line: ln Caption1]
  Add: Field: fldCaption1

[Field: LearnWellC]
  Use: Logical Field
  Set as: ##lConfirmation          
  Modifies: lConfirmation

[Field: LearnWellR]
  Use: Logical Field
  Set as: #LearnWellC
  Set Always: Yes
  Modifies: RecycleBinFlag
  Skip: Yes
  Invisible: Yes

[Field: LearnWellO]
  Use: Logical Field
  Set as: #LearnWellC
  Set Always: Yes
  Modifies: OptionalFlag
  Skip: Yes
  Invisible: Yes

[Field: fldHeading]
  Info: "Tally-RECYCLE BIN"
  Color:Blue
  Style:Bold

[Field: fldCaption1]
  Info: "www.Learnwells.com"
  Color:Red
  Style:Bold

[#Report: Daybook]
  Local: Line: DSP VchDetail: Empty : $fldDeleted
  Set: IsRestoreMode: No

[#Report: Ledger Vouchers]
  Local: Line: DSP VchDetail: Empty : $fldDeleted
  Set: IsRestoreMode: No

[#Line: DSP VchDetail]
  Add: Option: DSP VchDetail Restore: $fldDeleted

[!Line: DSP VchDetail Restore]
  Add: Keys: Restore from Bin

[#Field: VCH Optional]
  Option: Rbin VCH Delete: ##OptionalFlag and NOT ##IsRestoreMode
  Option: Rbin VCH Restore: ##OptionalFlag and ##IsRestoreMode 

[!Field: Rbin VCH Delete]

  Style: My Style
  Set as: if #Recyclebin then "PRESS ENTER to DELETE" else @UseOptStr
  Skip: if #Recyclebin then No else Yes
  Color:Red
  
[Style: My Style]
  Font: Verdana
  Height: 18
  Bold: Yes
  

[!Field: Rbin VCH Restore]


  Add: Fields: Long Prompt,LearnWellC,FlgLWr,FlgLWrf,FlgLWop,FlgLWfld
  Local: Field: Long Prompt: Info: "PRESS ENTER to RESTORE"
  Local: Field: Long Prompt: Full Width: Yes
  Local: Field: Long Prompt: Align: Right
  Local: Field: Long Prompt: Style: My Style
  Color: Red
[Field: FlgLWr]
  Use: Logical field
  Type: Logical : Forced
  Modifies: RecyclebinFlag
  Set as: NOT #LearnWellC
  Set Always: Yes                                        
  Invisible: Yes
  Skip: Yes

[Field: FlgLWrf]
  Use: Logical field
  Type: Logical 
  Storage: fldDeleted
  Set as: #FlgLWr
  Set Always: Yes                                     
  Invisible: Yes
  Skip: Yes

[Field: FlgLWop]
  Use: Logical field
  Type: Logical 
  Modifies: OptionalFlag
  Set as: #FlgLWr
  Set Always: Yes                                
  Invisible: Yes
  Skip: Yes

[Field: FlgLWfld]
  Use         : Logical Field
  Storage     : Is Optional
  Set as      : #FlgLWop
  Set always  : Yes
  Invisible   : Yes
  Skip        : Yes

[#Form: Voucher]
  Option: RbinVoucher: ##OptionalFlag

[!Form: RbinVoucher]
  Key: SaveVoucher

[Key: SaveVoucher]
  Key: Enter
  Action: Form Accept

[#Field: Plain VCH Date]
  Option: Rbin Plain VCH Date: ##OptionalFlag

[!Field: RBin Plain VCH Date]
  Skip: if #RecycleBin then Yes else No
  
[System: Variable]
  RecycleBinFlag: "No"
  IsRestoreMode: "No"
  lConfirmation: "No"

[System: Formula]
  locRecyclebin : $$LocaleString:"Recycle Bin"

[System: UDF]
  fldDeleted: Logical : 1

[Variable: RecycleBinFlag]
  Type: Logical
  Volatile: Yes
  Persistent: No

[Variable: IsRestoreMode]
  Type: Logical
  Volatile: No
  Persistent: no

[Variable: lConfirmation]
  Type: Logical
  Persistent: No
  Volatile : Yes
  Default: No

Recycle bin for Tally Prime TDL:

HOW TO USE TDL CODE:
  • Copy above TDL code and create a text file.
  • Save text file and load in Tally (Method provided below the code)
  • Go to delete any entry in Tally Prime .
  • It will save in recyclebin.
  • Latter you can restore entry from recyclebin to tally.

This is best free TDL to have in your Tally. Must have TDL file for Tally ERP9 and Tally Prime that can use it for lifetime. This free TDL Code will perfectly work with Tally Prime.

Recyclebin for Tally Prime Video:

See the below video to learn how to delete and restore entries in Tally through recyclebin TDL for Tally Prime:

Watch above videos to learn :

  • How to use TDL files in Tally.
  • How to See recyclebin folder in Tally.
  • How to delete entry in tally to store in recycle bin.
  • How to restore entry from recyclebin to tally voucher.
  • More videos related to free TDL files on youtube/learnwell
  • Get More TDL files on https://e2t.in/
FOLLOW THE BELLOW INSTRUCTIONS TO LOAD TDL FILE IN TALLY:
  1. Make a Text file of above code
  2. Save it in to your computer
  3. Copy the text file path including Name and extension (as – C:\Users\HP\Desktop\rec\recyclebin.txt)
  4. Open Tally Prime Software
  5. Click on Help and click on TDL & Addon  (for Tally Prime)
  6. Press F4 (to open a Box)
  7. Set Load TDL file on Startup – Yes
  8. Paste The path in blank space
  9. Press enter and save
  10. Now your recycelbin TDL for Tally Prime is ready to use.

Like Aadhar Number we can add any additional details in Party Ledger and Invoice Print.