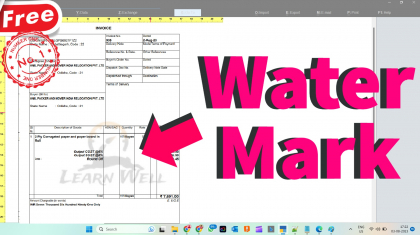
Watermark on PDF files and Invoices in Bulk

2023 Most Powerful Code to Add Watermark on PDF files and Invoices in Bulk | Watermark TDL for Tally

In this blog post I will provide you all a Most Powerful Code to Add Watermark on PDF files and Invoices in Bulk. In the digital age, protecting and branding your PDF files is essential to maintain the integrity and ownership of your valuable content. Adding watermarks to PDF files not only adds a layer of security but also enhances the professional appeal of your documents. However, manually adding watermarks to multiple PDF files can be time-consuming and tedious. Thankfully, Python offers powerful libraries that enable us to automate this process efficiently.

And Tally, the widely-used accounting and business management software, offers a plethora of features that streamline financial operations for businesses across the globe. However, when it comes to securing sensitive documents or adding branding elements to reports, Tally might require additional customizations. People always asks for Watermark TDL for Tally, but it is not possible to add Watermark in Tally invoices through TDL, but with this python method we can add watermark in Tally Invoices along with statements or in any other Tally reports.

In this blog post, we will explore how to add watermarks to PDF files in bulk using Python.

Understanding Watermark on PDF files:

A watermark is an overlay image or text that is superimposed on a document to signify its origin, ownership, or confidential status. In this context, we will focus on adding transparent image-based watermarks to PDF files.

Installing Python for Watermark on PDF files and Invoices:

To install Python for adding watermarks to PDF files and invoices, follow these simple steps:

Download Python: Visit the official Python website (https://www.python.org/) and download the latest version of Python suitable for your operating system (Windows, macOS, or Linux).

Install Python: Run the downloaded Python installer and follow the on-screen instructions to install Python on your computer. Make sure to check the option “Add Python X.X to PATH” during installation for easier command-line access.

Install Required Libraries for Watermark on PDF files and Invoices:

Open your command-line interface (Command Prompt on Windows or Terminal on macOS/Linux) and install the necessary Python libraries using the “pip” command: pip install PyPDF2 reportlab

Python Code for for Watermark on PDF files and Invoices :

import os
import PyPDF2

def add_watermark(input_pdf_path, output_pdf_path, watermark_pdf_path):
    with open(input_pdf_path, 'rb') as input_pdf:
        pdf_reader = PyPDF2.PdfReader(input_pdf)
        pdf_writer = PyPDF2.PdfWriter()

        watermark_pdf = PyPDF2.PdfReader(watermark_pdf_path)
        watermark_page = watermark_pdf.pages[0]

        for page_num in range(len(pdf_reader.pages)):
            page = pdf_reader.pages[page_num]
            page.merge_page(watermark_page)
            pdf_writer.add_page(page)

        with open(output_pdf_path, 'wb') as output_pdf:
            pdf_writer.write(output_pdf)

if __name__ == "__main__":
    input_folder = r"C:\Users\ssonu\Downloads\PDF"
    output_folder = r"C:\Users\ssonu\Downloads\output"
    watermark_pdf_path = r"C:\Users\ssonu\Downloads\logo.pdf"

    # Create the output folder if it doesn't exist
    if not os.path.exists(output_folder):
        os.makedirs(output_folder)

    # Iterate through all PDF files in the input folder
    for file_name in os.listdir(input_folder):
        if file_name.endswith(".pdf"):
            input_pdf_path = os.path.join(input_folder, file_name)
            output_pdf_path = os.path.join(output_folder, file_name)
            add_watermark(input_pdf_path, output_pdf_path, watermark_pdf_path)

How to Use Python Code to Add Watermark in PDF files and Tally Invoices:

Follow below steps to add watermark in pdf files and in Tally Invoices:

  1. Create a Separate folder in computer.
  2. Add Python code file in this folder
  3. Create Input and Output subfolders
  4. Create a watermark logo for watermarking, and also put in this folder.
  5. Add raw PDF files in input folder, for that you want to create watermark.
  6. Change Path in Python code asper your files and input, output locations.
  7. Open CMD and run as administrator
  8. Type pushd your folder location and press enter
  9. Type Python Pythonfilename.py and press enter
  10. Your all pdf files having in input folder will be save in output folder with logo.
Watermark in PDF files and Tally Invoices

How to use as Watermark TDL for Tally:

To use this method as watermark TDL for Tally, Save all Tally Invoices in PDF form in your Input folder and next follow above all steps. After Process completion watermark will be added in all Tally Invoices.

Also get Auto Receipt with Sales Voucher

How to Use Watermark on PDF files and Invoices in Bulk and How to use as Watermark TDL for Tally Video:

Watch the below video to see How to Use Watermark on PDF files and Invoices in Bulk and How to use as Watermark TDL for Tally :

Watch above videos to learn :

  • How to create logo for watermark.
  • How to create folders.
  • How to use python code in CMD (Command Prompt)
  • How to use pushd in python.
  • How to run python code file through CMD
  • More videos related to free TDL files on youtube/learnwell
  • Get More TDL files on https://e2t.in/

Conclusion:

Automating the process of adding watermarks to PDF files in bulk using Python and the PyPDF2 and Pillow libraries can save you valuable time and effort. Whether you want to protect your documents or add branding elements to them, this approach simplifies the process and enhances your PDF files’ overall appeal. Feel free to customize the script further to suit your specific needs, such as handling different image formats or configuring watermark positions. Empower your PDF management tasks with Python’s capabilities, and ensure your documents remain secure and professionally branded.

FAQ – Watermark on PDF files and Invoices in Bulk:

What is Python, and why is it used for watermarking PDF files and invoices?

Python is a popular and versatile programming language known for its simplicity and readability. It is widely used for various tasks, including automating processes like watermarking PDF files and invoices. Python’s rich ecosystem of libraries, such as PyPDF2 and Pillow, makes it an excellent choice for handling PDF manipulation and image processing.

Do I need programming knowledge to use Python for watermarking?

Basic understanding of Python programming would be helpful, but you can also find ready-made scripts and tutorials online that you can customize for your watermarking needs. With some practice, even beginners can implement watermarking with Python.

How do I install Python on my computer?

You can download the latest version of Python from the official Python website (https://www.python.org/) and run the installer for your operating system. During installation, make sure to check the option “Add Python X.X to PATH” for easy command-line access.

What are the required Python libraries for watermarking PDF files and invoices?

You need to install two libraries: PyPDF2 for PDF manipulation and Pillow for image processing. Use the “pip” command to install them as follows:

Copy code
pip install PyPDF2
pip install Pillow

How can I create a watermark image for use in the watermarking process?

You can design a watermark as a transparent PNG image using graphic design software like Adobe Photoshop or free alternatives like GIMP. Save the image in the same directory as your Python script.

Can I automate the watermarking process for multiple PDF files and invoices?

Yes, that’s one of the significant advantages of using Python for watermarking. You can create a Python script that handles the watermarking process in bulk, saving you time and effort.

Will watermarking PDF files and invoices affect their original content?

No, when you add a watermark to a PDF file or invoice using Python, the original content remains intact. The watermark is simply overlaid on the document without modifying the underlying data.

Is watermarking with Python a secure method for document protection?

While watermarking enhances document security and authenticity, it is not a foolproof method for protecting highly sensitive information. For robust security, consider additional encryption or access control measures.

Can I customize the appearance and position of the watermark on PDF files and invoices?

Yes, Python allows extensive customization of watermark appearance, such as transparency, size, position, and rotation. You can adjust these parameters in your Python script to suit your preferences.

Is Python watermarking suitable for large-scale document processing?

Python is efficient for various tasks, but large-scale document processing may require additional optimization. If dealing with a massive number of files, consider parallel processing or cloud-based solutions.

Auto Receipt with Sales Entry TDL

2023 Best and Amazing Auto Receipt with Sales Entry TDL

Tally has long been recognized as the go-to accounting and business software in India and several other Asian countries. Its robust features and user-friendly interface have made it an indispensable tool for countless businesses, both big and small. However, did you know that you can unlock even more power and efficiency from Tally through customization?

In this article, we present an innovative solution that takes Tally’s capabilities to the next level – the “Auto Receipt with Sales Entry TDL.” By incorporating this TDL into Tally, you can revolutionize your data entry and reporting system, making it more efficient and effective than ever before.

This TDL file is designed to work seamlessly with Tally Prime 3.0, Tally Prime, and Tally ERP 9, providing you with the convenience of automating receipt entries along with sales invoicing.

What is the “Auto Receipt with Sales Entry TDL”?

The “Auto Receipt with Sales Entry TDL” is a powerful TDL file created for Tally users to enhance their invoicing and receipt recording experience. When you create a sales invoice using Tally, this TDL allows you to input received amount details with different payment modes against the specific invoice. Once the sales voucher is saved, a popup message will prompt, asking if you wish to create receipt entries for the same invoice. If you choose “Yes,” the receipt entries will be automatically generated, saving you valuable time and effort.

Auto Receipt with Sales Entry TDL

The Power of Receipt Entry at Sales Time:

At the heart of this Auto Receipt with Sales Entry TDL lies the concept of recording receipt entries at the time of creating sales invoices. This seemingly small adjustment brings about a wealth of benefits that can significantly improve your financial management process.

Streamlined Outstanding Clearances:

By capturing receipt details while invoicing, you can ensure that every sale is promptly associated with its corresponding payment. This approach streamlines the process of clearing outstanding balances, reducing the likelihood of funds getting stuck in the system.

Accurate Bill-to-Bill Payments:

Receipt entry at sales time enables accurate bill-to-bill matching. This means that every invoice is immediately linked to its payment, allowing for a clear and transparent payment reconciliation process.

Continuous Bank and Cash Reconciliation:

With receipt entries entered alongside sales invoices, your bank and cash accounts are automatically updated. This real-time updating ensures that your financial records are always up-to-date and accurate.

Enhanced Sales Voucher Reconciliation:

The “Auto Receipt with Sales Entry TDL” brings another significant advantage – the receipt records are held directly within the sales voucher. When it comes to future sales voucher reconciliation, all relevant payment information is readily available for quick and efficient matching.

Comprehensive Payment Mode Tracking:

This Auto Receipt with Sales Entry TDL includes a dedicated section to record payment modes, such as cash, credit, cards, UPI, and cheques, along with their respective amounts. This invaluable feature simplifies the process of conveying payment details to customers during account reconciliation.

Time-Saving Automation:

Manually entering receipt details after invoicing can be tedious, especially when dealing with multiple transactions. This Auto Receipt with Sales Entry TDL automates the receipt entry process, eliminating the need for redundant data entry tasks.

Reduced Errors:

Automation significantly reduces the chances of human errors that might occur during manual data entry. By automating the receipt entries, you ensure accuracy and maintain the integrity of your financial data.

Enhanced Productivity:

By streamlining the invoicing and receipt recording workflow, you and your accounting team can focus on other critical tasks..

Better Cash Flow Management:

The “Auto Receipt with Sales Entry TDL” facilitates faster receipt recording, leading to better cash flow management and improved financial planning.

Auto Receipt with Sales Entry TDL Code:

  [#Form: Sales Color]
        Add :  Part : At End  :LearnwellReceiptMode
		On : Form Accept : yes : Form Accept
		On : Form Accept : yes : Call : WantReceipt
    [Part :LearnwellReceiptMode]
        Line         :LearnwellRCPLine, LearnwellRCPLineDtl
        Bottom Line : LearnwellRCPLineTotal
        Total        : LearnwellRCPLineTotalDtl
        Height        : 25% Page
        Repeat         : LearnwellRCPLineDtl : LWRecMode
        BreakOn     : $$IsEndofList:$LWRecModes
        Vertical    : Yes
        Scroll      : Vertical
        Invisible    : Not @@IsSales

        [Line :LearnwellRCPLine]
            Fields : LearnwellRecFldTtl, LearnwellRecFldDtl,LearnwellRcBnk,LearnwellDateT,LearnwellInstr,LearnwellRcParty,LearnwellVCHT,LearnwellNarrT
             Border        : Thin Bottom         
            [Field : LearnwellRecFldTtl]
                Use            : Name Field
                Set As        : "Payment Mode "
                Skip        : Yes
                Width         : 10% Page
                Space Left    : 1% Page

            [Field : LearnwellRecFldDtl]
                Use            : Name Field
                Set As        : "Amount"
                Skip        : Yes
                Width         : 7% Page
				Space Left    : 1% Page
			[Field:LearnwellRcBnk]
				Use            : Name Field
                Set As        : "Bank/Cash Name"
                Skip        : Yes
                Width         : 10% Page
			[Field:LearnwellRcParty]
				Use            : Name Field
                Set As        : "Party Ledger"
                Skip        : Yes
                Width         : 10% Page
			[Field:LearnwellDateT]
				Use            : Name Field
                Set As        : "Date"
                Skip        : Yes
                Width         : 5% Page
			[Field:LearnwellVCHT]
				Use            : Name Field
                Set As        : "VoucherType"
                Skip        : Yes
                Width         : 7% Page
			[Field:LearnwellNarrT]
				Use            : Name Field
                Set As        : "Narration"
                Skip        : Yes
                Width         : 10% Page
			[Field:LearnwellInstr]
				Use            : Name Field
                Set As        : "Inst/Cheque No."
                Skip        : Yes
                Width         : 7% Page
        [Line : LearnwellRCPLineDtl]
            Fields : LearnwellRecFldDtl1, LearnwellRCPLineTotalDtl,LearnwellRcBnkdt,LearnwellDateD,LearnwellInstrD,LearnwellRcPartydt1,LearnwellRcPartydt,LWQuickVCD,LearnwellNarrD

            [Field : LearnwellRecFldDtl1]
                Use            : Name Field
                Storage     : LWRecModes
                Set As        : $LWRecModes
                Table        : RecModes
                ShowTable    : Always
                Key            : RecModes
                Width         : 10% Page
           
            [Field : LearnwellRCPLineTotalDtl]
                Use            : Amount Field
                Storage        : LWRecModemt
                Set As        : $LWRecModemt
                Set Always    : Yes
                Width         : 7% Page
                Inactive    : $$IsEndofList:$LWRecModes
                Skip        : If $$IsEndofList:$LWRecModes Then Yes Else No
                Border        : Thin Bottom
                Validate    : Not $$IsEmpty:$LWRecModemt
				
			[Field:LearnwellRcBnkdt]
				Type : String
				Table : LearnwellLedgerColl, EndOfList
				Storage :LWRecModebnk
				Use : Name Field
				Set always : Yes
				Show Table : Always
				Case : Title Case
				Width : 10% Page
				Align : Left
			
			[Field:LearnwellRcPartydt1]
				Type : String
				Table : LearnwellLedgerColl, EndOfList
				Storage :LedgerName
				Use : Name Field
				Set as:$PartyName
				Set always : Yes
				Show Table : Always
				Case : Title Case
				Width : 10% Page
				Align : Left
			[Field:LearnwellRcPartydt]
				Type : String
				Storage :LWRecModeparty
				Use : Name Field
				Set as:#LearnwellRcPartydt1
				Set always : Yes
				Width : 10% Page
				Align : Left
				Invisible: Yes
			[Field:LearnwellDateD]
				Type : Date
				Use : Short Date Field
				Storage : Date
				Width : @@ShortWidth
				Set as:$Date
				Width:5% Page
				Align : Left
			[Field:LWQuickVCD]
				Type : String
				Use : Name Field
				Set always : Yes
				Storage : LWQuickVCD
				Set as:"Receipt"
				Width:5% Page
				Align : Left
			[Field:LearnwellNarrD]
				Type : String
				Use : Name Field
				Storage : Narration
				Full Width : Yes
				Set as:"Being Amount Recived Against Inv No. " + $VoucherNumber
				Align : Left
				Width:10% Page
			[Field:LearnwellInstrD]
				Type : String
				Use : Name Field
				Storage : Instrument
				Width   : 7% Page
				Align : Left
				
        [Line : LearnwellRCPLineTotal]
            Fields       : InvLearnwellrec1, InvLearnwellrec2
           
            [Field : InvLearnwellrec1]
                Use            : Medium Prompt
                Set As        : "TOTAL : "
                Width         : 10% Page
                Space Left    : 1% Page
                Style        : Large Bold
               
            [Field : InvLearnwellrec2]
                Use            : Amount Field
                Width         : 7% Page
                Set As        : $$Total:LearnwellRCPLineTotalDtl
                Style        : Large Bold
                Set Always    : Yes
                ReadOnly     : Yes
                Control        : InvLearnwellrectotalcont : If $Amount = #InvLearnwellrec2 then No Else Yes
                Border        : Thin Bottom
				
[Collection: LearnwellLedgerColl]
Title : "List of Ledgers"
Type : Ledger
Belongs to : yes
Format : $Name,30
Align : Right
Full Height : Yes

;===WWW.LEARNWELLS.COM==;

[Button :CreateRecMode]
Key : Ctrl+M
Title : "Receipt Modes"
Action :Alter:RecModes
[#Form         :    Voucher]
    Add:Button:At End:CreateRecMode

[Report    : RecModes]
    Form    : RecModes
    Object    : Company
    Title    : "Receipt Mode"

[Form    : RecModes]
    FullHeight    : Yes
    Part        : RecModes

    [Part    : RecModes]
        Line    : RecModesMTLn, RecModesMLn
        Repeat    : RecModesMLn : RecModes
        BreakOn : $$IsEmpty:$RecModes
        Scroll    : Vertical

        [Line    : RecModesMTLn]
            Border    : Column Titles
            Field    : RecModesMTFld

            [Field    : RecModesMTFld]
                Use        : Name Field
                Set As    : "Payment Mode"
                Align    : Center

        [Line    : RecModesMLn]
            Field    : RecModesMFld

            [Field    : RecModesMFld]
                Use        : Name Field
                Storage    : RecModes
                Scroll  : Vertical

[Key : RecModes]
    Key     : Alt+C
    Action     : Alter : RecModes

;==www.learnwells.com==;
    [Collection    : RecModes]
            Type    : RecModes : Company
            ChildOf    : ##SVCurrentCompany
            Format    : $RecModes, 15,
             Collection : EndofList
            Title    : "Payment Mode"
			Fetch:LWRecModes 
			Fetch:LWRecModemt
    [Collection    : LWRecModes]
            Compute    : CLWRecModes     : $LWRecModes
            Compute    : CLWRecModemt  : $LWRecModemt
            Format    : $LWRecModes
            Format    : $LWRecModemt
			Fetch:LWRecModes 
			Fetch:LWRecModemt
	[Collection: LWRecMode]
	Title : "Bulk Payment Entry"
	Type : LearnWellQuickEntry : Company
	Child Of : ##SVCurrentCompany
    [System : UDF]
        RecModes                  : String : 3824
        LWRecModes            : String : 3825
        LWRecModemt        : Amount : 3826
		LWRecModebnk	:String:3828
		LWRecModeparty:String:3829
		Date:Date:3830
		LWQuickVCD:String:3831
		Narration : String:3832
		LWRecMode    : Aggregate : 3827
		LearnWellQuickEntry : Aggregate :3833
		Instrument : String :3835
		
	[System: UDF]
	LedgerName : String :3834
	[System: Variable]
	[Variable : LearnWellGETD]
	Type: Number
		
;;www.learnwells.com


[Function: LearnwellRecEntry]
Parameter : LearnWellVCGT : String : ##SVVoucherType
Variable : SVVoucherType : String
Variable : LWLDate : Date
Variable : LWLDrL : String
Variable : LWLCrL : String
Variable : LWLAMt : Amount
Variable : LWLNarr : String
Variable : LWLBnkt: String
Variable : LWLInst: String
Variable : LearnWellGETD : Number: 1
001 : Start Batch Post : 10
005 : START PROGRESS : ($$NumItems:LWRecMode) : "In process" : @@CmpMailName : "Voucher Creation in Process"
007 : WALK COLLECTION : LWRecMode
010 : SET : LWLDate : $$Date:$Date
010a : Set : LWLBnkt :""
015 : SET : LWLBnkt :$LWQuickVCD
020 : SET : LWLDrL : $LWRecModebnk
030 : SET : LWLCrL : $LWRecModeparty
040 : SET : LWLAMt : $$AsAmount:$LWRecModemt
045 : SET : LWLNarr : $Narration
046 : SET : LWLInst : $Instrument
050 : SET : SVViewName : $$SysName:AcctgVchView
060 : NEW OBJECT : Voucher
070 : SET VALUE : Date : ##LWLDate
080 : SET VALUE : VoucherTypeName :##LWLBnkt
080a : Log: #LWQuickVCD
090 : SET VALUE : Narration : $Narration
110 : INSERT COLLECTION OBJECT : AllLedgerEntries
120 : SET VALUE : Ledger Name : ##LWLCrL
140 : SET VALUE : IsDeemedPositive : "No"
141	: SET VALUE : Amount : ##LWLAMt
142 : INSERT COLLECTION OBJECT :BankAllocations
143 : SET TARGET: BankAllocations [1]
144	: SET VALUE :INSTRUMENTNUMBER:##LWLInst
145	: SET VALUE :INSTRUMENTDATE:##LWLDate
146	: Set Value : UniqueReferenceNumber : $$MakeTallyUniqueID
147 : Set Value : Name : $$MakeUniqueID
148 : Set Value : Payment Mode : "Transacted"
149 : SET TARGET : ..
150 : SET TARGET : ..
150a : LOG : $$String:##LWLDrL
160 : INSERT COLLECTION OBJECT : AllLedgerEntries
170 : SET VALUE : Ledger Name : ##LWLDrL
180 : SET VALUE : Amount : ##LWLAMt
190 : SET VALUE : IsDeemedPositive : "Yes"
191	: SET VALUE : Amount : ##LWLAMt * (-1)
200 : SET TARGET : ..
210 : SET VALUE : PersistedView : ##SVViewName
220 : CREATE TARGET
230 : INCREMENT : LearnWellGETD
230a : SHOW PROGRESS : ##LearnWellGETD
240 : END WALK
260 : END PROGRESS
280 : RETURN
290 : End Batch Post


[Function:WantReceipt]
20 : QUERYBOX : "Want to Create Receipt Entry Also?" : Yes:No
30 : If:$$LastResult
40 : Call: LearnwellRecEntry
;60 : MSGBox : "Status":"Receipt Successful"
65 : Return
70 : End If


Also checkout AutoBackup TDL for Tally Prime 3.0 and Tally Prime

How to Use Auto Receipt with Sales Entry TDL Code in Tally:

  • Copy above TDL code and create a text file.
  • Save text file and load in Tally (Method provided below the code)
  • Go to Tally voucher and Create a Sales voucher.
  • At Voucher end you will find Payment Mode Section.
  • Here Write all Receipt related details and save voucher.
  • After saving voucher there a Query box will show “You want to take receipt entries also?”, Press Yes.
  • Your sales voucher will be created along with receipt entries.

This is best free TDL to have in your Tally. It will support Tally Prime 3.0, Tally Prime, Tally ERP9, that can be use for lifetime. This free TDL Code will perfectly work with old Tally Prime also.

Auto Receipt with Sales Entry TDL Code Tally Usage Video:

See the below video to learn how to load tdl in tally and record receipt entries with sales invoice at invoicing time.

Watch above videos to learn :

  • How to record receipt when invoicing.
  • How to Load TDL files in Tally.
  • How to add different payment modes in Tally.
  • How to use Query Box after saving sales invoice.
  • How to add receipt other details.
  • More videos related to free TDL files on youtube/learnwell
  • Get More TDL files on https://e2t.in/

FOLLOW BELLOW INSTRUCTIONS TO LOAD TDL FILE IN TALLY:

  1. Make a Text file of above code
  2. Save it in to your computer
  3. Copy the text file path including Name and extension (as – C:\Users\HP\Desktop\rec\SalesTimeReceipt.txt)
  4. Open Tally Prime Software
  5. Click on Help and click on TDL & Addon (for Tally Prime)
  6. Press F4 (to open a Box)
  7. Set Load TDL file on Startup – Yes
  8. Paste The path in blank space
  9. Press enter and save
  10. Now your Auto Receipt with Sales Entry TDL is ready to use.

Conclusion:

The “Auto Receipt with Sales Entry TDL” is a game-changer for Tally users who wish to streamline their invoicing and receipt recording processes. By automating receipt entries alongside sales invoicing, this TDL significantly reduces manual efforts, enhances accuracy, and improves overall productivity. Best of all, the TDL is available for lifetime use free of charge, making it a valuable tool for businesses of all sizes.

FAQ: Auto Receipt with Sales Entry TDL:

What is the “Auto Receipt with Sales Entry TDL”?

The “Auto Receipt with Sales Entry TDL” is a Tally Definition Language file designed to automate receipt entries while creating sales invoices in Tally. It streamlines outstanding clearances, enhances bill-to-bill payment matching, and ensures continuous bank and cash reconciliation.

Is the TDL compatible with Tally Prime 3.0, Tally Prime, and Tally ERP 9?

Yes, the “Auto Receipt with Sales Entry TDL” is compatible with Tally Prime 3.0, Tally Prime, and Tally ERP 9. It can be used across different versions of Tally to enhance your accounting efficiency.

How does the Auto Receipt with Sales Entry TDL simplify the receipt entry process?

By capturing receipt details at the time of creating sales invoices, the TDL eliminates the need for separate receipt entries. This results in streamlined outstanding clearance and ensures every sale is associated with its corresponding payment.

What are the benefits of recording receipt entries at sales time?

  1. Clear outstanding balances promptly, reducing the chance of funds getting stuck.
  2. Enable accurate bill-to-bill payment matching for transparent reconciliation.
  3. Maintain continuous bank and cash reconciliation for up-to-date financial records.

Can I customize the Auto Receipt with Sales Entry TDL to suit my business requirements?

As the TDL provides a section for payment modes, advanced users can customize it to align with their specific business needs. Customization allows businesses to tailor the TDL according to their preferred payment methods.

Can I still create manual receipt entries if needed?

While the TDL automates receipt entries, you can still create manual entries if required. The TDL provides a convenient automated option, but users retain the flexibility to input data manually whenever necessary.

Empower your Tally software with the “Auto Receipt with Sales Entry TDL” to simplify your accounting process, improve data accuracy, and streamline financial management. Enjoy the benefits of automated receipt recording and elevate your Tally experience to new heights!

Auto Backup TDL for Tally Prime 3.0

Amazing Auto Backup TDL for Tally Prime 3.0

In this blog post, we will learn about how to enable data backup with the help of Auto Backup TDL for Tally Prime 3.0, which eliminates the need for manual backups by automatically creating backups while opening or shutting a company data. Data security is important for any business; and Tally Prime 3.0, being a widely-used accounting software, must ensure that its users can protect their valuable financial data effortlessly. This TDL requires no additional settings and is easy to implement, providing a seamless experience for Tally users.

Understanding the Auto Backup TDL for Tally Prime 3.0 :

The Auto Backup TDL is a powerful extension to Tally Prime 3.0 that enhances data protection by automating the backup process. Once loaded into Tally, the TDL takes care of automatically creating backups of the company data every time it is opened or closed. This means that Tally will prompt users to create a backup every time they access a company, reducing the risk of data loss significantly.

The Convenience of No Additional Settings:

One of the most attractive features of the Auto Backup TDL for Tally Prime 3.0 is its user-friendly nature. Unlike other backup solutions that may require complex configurations, this TDL works seamlessly without any additional settings. By simply loading the TDL file into Tally Prime 3.0, users can enable the auto backup feature immediately. This simplicity is particularly beneficial for small businesses or users with limited technical knowledge, making data security accessible to all.

Auto backup tdl for Tally Prime 3.0

Auto Backup TDL for Tally Prime 3.0 TDL Code:

[System: Events]
TSPL Smp CmpLoadEvent2 : Load Company : NOT $$IsRemoteCompany : Call : Backup Function
TSPL Smp CmpCloseEvent : Close Company : NOT $$IsRemoteCompany : Call : Backup Function

[Function: Backup Function]
Variable : Backup Det Var: String
00 : IF : ##EnableAutoBackup
10 : IF : ##AutoBackupPrompt
20 : QUERYBOX : "Backup Company ?" : Yes:No
30 : IF : $$LastResult
40 : CALL : Backup Company
50 : ENDIF
60 : ELSE :
70 : CALL : Backup Company
80 : ENDIF
90 : ENDIF

[Function: Backup Company]
10 : SET : BackupDetVar : @@DestPath + ", " + ##SVCurrentPath + ", " + ##SVCurrentCompany + +
", " + @@CoNumber
20 : BACKUP COMPANY : "," : ##BackupDetVar
30 : SET : SVBackupPath : @@DestPath
;;www.learnwells.com
[System: Formula]
DestPath : ##DestinationPath + "\" + @@DateForm + "\" + @@TimeForm
CoNumber : $$String:($CompanyNumber:Company:##SVCurrentCompany):5
DateForm : $$String:$$MachineDate
TimeForm : @@HrsForm + @@MtsForm
HrsForm : If $$StringPart:$$MachineTime:0:2 CONTAINS ":" +
Then $$StringPart:$$MachineTime:0:1 +
Else $$StringPart:$$MachineTime:0:2
MtsForm : if $$StringPart:$$MachineTime:0:2 CONTAINS ":" +
Then $$StringPart:$$MachineTime:2:2 +
Else $$StringPart:$$MachineTime:3:2
;www.learnwells.com
[Variable: EnableAutoBackup]
Type : Logical
Persistent : Yes
[Variable: DestinationPath]
Type : String
Persistent : Yes
[Variable: AutoBackupPrompt]
Type : Logical
Persistent : Yes
[System: Variable]
EnableAutoBackup: Yes
DestinationPath : "C:\Users\ssonu\Files\Autobackup"
AutoBackupPrompt: Yes
;;www.learnwells.com
 

Also checkout Voucher Modification TDL for Tally Prime

HOW TO USE TDL CODE:

  • Copy above TDL code and create a text file.
  • Save text file and load in Tally (Method provided below the code)
  • Change destination path in TDL code. (Watch below video for more details)
  • Go to shut a company or open a new company.
  • Your Tally will ask to take backup of company.
  • Press Yes to generate backup or Press No to back to the company.
  • Your backup will be created at specified path with date and time.

This is best free TDL to have in your Tally. Tally Prime 3.0 that can use it for lifetime. This free TDL Code will perfectly work with old Tally Prime also.

Auto Backup TDL for Tally Prime 3.0 Video:

See the below video to learn how to load tdl in tally and take auto backup of companies data.

Watch above videos to learn :

  • How to change backup path in Autobackup TDL file
  • How to Load TDL files in Tally.
  • How to take backup of companies after loading Auto backup TDL in Tally Prime
  • How to See Backup Data with date and Time.
  • How to restore backup in Tally Prime 3.0
  • More videos related to free TDL files on youtube/learnwell
  • Get More TDL files on https://e2t.in/

FOLLOW BELLOW INSTRUCTIONS TO LOAD TDL FILE IN TALLY:

  1. Make a Text file of above code
  2. Save it in to your computer
  3. Copy the text file path including Name and extension (as – C:\Users\HP\Desktop\rec\autobackup.txt)
  4. Open Tally Prime Software
  5. Click on Help and click on TDL & Addon (for Tally Prime)
  6. Press F4 (to open a Box)
  7. Set Load TDL file on Startup – Yes
  8. Paste The path in blank space
  9. Press enter and save
  10. Now your Autobackup TDL for Tally Prime 3.0 is ready to use.

Conclusion:

Data security is a top priority for businesses, and the Auto Backup TDL for Tally Prime 3.0 is a game-changer in ensuring the protection of financial data. With its simplicity and efficiency, this TDL allows users to enable automatic backups without any complex configurations. By loading the TDL file into Tally Prime 3.0, users can rest assured that their company data will always be safeguarded, minimizing the risk of data loss.

Incorporating the Auto Backup TDL into Tally Prime 3.0 is a proactive step towards securing vital financial information. Whether you are a small business owner or a seasoned accounting professional, the Auto Backup TDL is a must-have addition to Tally Prime 3.0 for enhanced data security. So, make the smart choice today and ensure your valuable data is always protected with this innovative Auto Backup TDL!

FAQ – Auto Backup TDL for Tally Prime 3.0:

What is the Auto Backup TDL for Tally Prime 3.0?

The Auto Backup TDL for Tally Prime 3.0 is an extension for Tally Prime 3.0, designed to automate the backup process of company data. It creates backups automatically when you open or shut down a company in Tally, ensuring the security and integrity of your financial data.

How does the Auto Backup TDL for Tally Prime 3.0 work?

Once the Auto Backup TDL is loaded into Tally Prime 3.0, it monitors the actions of opening or closing a company data. When you access a company or close it, the TDL automatically triggers the backup process, prompting you to save a backup file.

Do I need to configure the Auto Backup TDL for Tally Prime 3.0 after installation?

No, the Auto Backup TDL is designed for simplicity. Once you load the TDL file into Tally Prime 3.0, it starts working without any additional settings. This user-friendly feature makes data security accessible to all Tally users.

What are the benefits of using the Auto Backup TDL?

The Auto Backup TDL simplifies data security in Tally Prime 3.0. Its key benefits include:

  1. Automatic backups on company data startup and shutdown.
  2. No need for manual backup creation; the TDL handles it for you.
  3. User-friendly and requires no complex configurations.
  4. Reduces the risk of data loss due to system crashes or power failures.

Is the Auto Backup TDL compatible with Tally Prime 3.0 only?

The Auto Backup TDL is specifically designed for Tally Prime 3.0 but you can use it for old Tally Prime also. It may not be compatible with other accounting software.

Can I customize the Auto Backup TDL for Tally Prime 3.0 according to my business needs?

Yes, the Auto Backup TDL allows customization to suit your specific backup requirements. Advanced users can modify the TDL to align with their business data protection strategies.

Does the Auto Backup TDL for Tally Prime 3.0 replace regular manual backups?

While the Auto Backup TDL automates the backup process, it is still recommended to create manual backups periodically, especially before performing critical operations or system updates.

Is the Auto Backup TDL suitable for large enterprises with vast data sets?

Yes, the Auto Backup TDL for Tally Prime 3.0 can benefit businesses of all sizes. However, for large enterprises.

Excel to Tally Prime 3.0 Ecommerce Import

Best Excel to Tally Prime 3.0 Ecommerce Import

If you do Ecommerce Business and need a Best Excel to Tally Prime 3.0 Ecommerce Import Software then you are in right place. TallyPrime 3.0 is a popular accounting software widely used for its reliability and comprehensive features. However, entering large volumes of e-commerce data manually into Tally can be time-consuming and prone to errors. To address this challenge, the Excel to Tally Prime 3.0 Ecommerce Import Utility offers a simple, quick, and reliable solution. This blog post explores the key features and benefits of this powerful software that streamlines the import process for various e-commerce data types.

Easy and Quick Excel to Tally Prime 3.0 Ecommerce Import:

Learnwell’s Excel to Tally Prime 3.0 Ecommerce Import Utility allows users to effortlessly import their e-commerce data into TallyPrime 3.0. It supports multiple data types, including Sales, Returns, Settlements, Masters, and Vouchers, with every intricate detail preserved.

Compatibility with Multi GST Option in Tally Prime 3.0:

This versatile utility extends its support not only to single GST option but also to multi GST option of Tally Prime 3.0.

Excel to Tally Prime 3.0 Ecommerce Import

Click here for Older version Excel to Tally Ecommerce data import software

Real-time Connection with Tally:

The utility establishes a real-time connection with Tally, enabling seamless data transfer between Excel and TallyPrime 3.0.

Master and Voucher Creation in a Single Sheet:

With a user-friendly interface, the utility allows for Master and Voucher creation within the same sheet, reducing complexity and streamlining the data entry process.

Flexible Data Formats:

The utility supports various data formats, including Text, CSV, and Excel, allowing users to import data directly into the sheet.

Auto Calculation and Validation:

Automated calculation fields for Cell address, Round off, Taxable Value, etc., along with a Validate Button, ensure data accuracy and prevent potential errors.

Bulk Import:

The utility empowers users to import up to 25000 entries with a single click, significantly reducing data entry time.

Multi-GST and Single GST Option:

Whether your business operates under Multi-GST (Business in Multiple States) or Single GST, the utility is well-equipped to handle both scenarios flawlessly.

Lifetime Use and Free Support:

Users can benefit from lifetime access to the utility without any renewal requirements. Additionally, free support ensures any queries or issues are promptly addressed.

Voucher Sheet Features:

The Voucher sheet contains numerous features, including:

  • Full detailed inventory vouchers and vouchers without inventory in the same sheet.
  • Buttons for clear, import, validate, post master, and post voucher for added convenience.
  • Supportive formats for various e-commerce platforms like Amazon, Flipkart, Meesho, Snapdeal, Udaan, Simsim, Glowroad, Moglix, WMall, Paytm, Shopee, Myntra, Shop101, Ajio, Jiomart, and more.
  • TCS and GST effects considered in the data entries.
  • Lifetime usability with no restrictions on dates.
  • Support for manual and automatic voucher numbering with reference numbers.
  • Automatic calculation of debit and credit values.
  • Party state and place of supply details.
  • Support for bill-wise details and GST information for credit and debit notes.

Settlement Sheet Features:

The Settlement sheet includes:

  • Special settlement vouchers with multiple reference entries.
  • Importing text, CSV, and Excel files directly into the sheet.
  • Automatic calculations and summarization of data.
  • Buttons for clear, import, validate, post master, and post voucher for added convenience.
  • Integration with GSTR 2A and 3B reports.
  • Masters created simultaneously with entry time.

Bank-VCH Sheet Features:

The Bank-VCH sheet boasts:

  • Simple bank import format for easy data entry.
  • Automatic voucher selection and separate contra voucher type.
  • Unlimited date usage for added flexibility.
  • Entries with reconciliation for accuracy.
  • Debit and credit ledger options in the same column.

Support Details:

Conclusion:

The Excel to Tally Prime 3.0 Ecommerce Import Utility is an indispensable tool for e-commerce businesses using TallyPrime 3.0. With its seamless data transfer capabilities, real-time connection with Tally, and support for various e-commerce data types, this utility significantly enhances efficiency and accuracy in managing financial data. Whether you deal with multi-GST or single GST, this utility can handle it all. Embrace the power of this utility to unlock a streamlined and error-free e-commerce data entry process in Tally.

FAQ – Excel to Tally Prime 3.0 Ecommerce Import Utility:

What is the Excel to Tally Prime 3.0 Ecommerce Import Utility?

The Excel to Tally Prime 3.0 Ecommerce Import Utility is a software tool provided by Learnwell designed to facilitate the seamless import of e-commerce data into TallyPrime 3.0 accounting software. It streamlines the process of entering Sales, Returns, Settlements, Masters, and Vouchers with every detail, saving time and reducing the likelihood of errors.

Which versions of Tally does this utility support?

This utility works perfectly with Tally Prime 3.0. If you want for older version of Tally like Tally ERP 9, Tally Prime, then Learnwell has another version, you can go through. Whether you are using the older versions or the most recent one, you can take advantage of the utility’s features.

Can I import data from different e-commerce platforms?

Yes, the Excel to Tally Prime 3.0 Ecommerce Import Utility supports various e-commerce platforms, such as Amazon, Flipkart, Meesho, Glowroad, Snapdeal, Udaan, Paytm, Shopee, Jio Mart, Ajio, and more. The utility provides supportive formats for each platform, ensuring a smooth and consistent data import process.

Is the utility capable of handling GST and multi-GST scenarios?

Absolutely! The utility is designed to work perfectly with Tally Prime 3.0 in both Multi-GST and Single GST options. It takes into account all necessary GST details for accurate reporting and compliance. You can enter your company all state’s GST Number and State names.

How many entries can I import at once using the utility?

The Excel to Tally Prime 3.0 Ecommerce Import Utility offers efficient bulk import capabilities. You can import up to 25000 entries with just one click, significantly reducing the time and effort required for data entry. Then after importing this 25000 import next 25000.

Is the utility user-friendly for non-technical users?

Yes, the utility comes with a user-friendly interface and straightforward functionalities, making it accessible and easy to use even for non-technical users. The import process is simplified, and the utility provides step-by-step guidance to ensure a smooth experience. Also you can get online support through Teamviewer, Anydesk etc.

Does the utility require renewal or subscription fees?

No, the utility offers lifetime use, and there are no renewal or subscription fees involved. Once you acquire the utility, you can use it indefinitely without any additional charges.

What kind of support is available for the utility?

The Excel to Tally Prime 3.0 Ecommerce Import Utility comes with free support. If you encounter any issues or have questions about the utility’s functionality, the support team is readily available to assist you.

Can I import settlement data and manage bank transactions with the utility?

Yes, the utility provides dedicated sheets for settlement entries and bank transactions. You can import settlement data with ease and manage bank receipts and expenses directly in the Bank Voucher sheet.

Does the utility allow for modifications as per my Tally Master data?

Yes, the utility offers free updates and modifications based on your Tally Master data. This ensures that your ledgers and item names from Tally are accurately reflected in the utility for seamless data integration.

Keyboard Shortcuts TallyPrime VS Tally ERP9

Keyboard Shortcuts TallyPrime VS Tally ERP9

Keyboard Shortcuts TallyPrime VS Tally ERP9. Keyboard shortcuts play a crucial role in speeding up work processes. While Tally ERP 9 is an older version, people are accustomed to its shortcut keys. Tally Prime, being a newer version, has made some changes to the keyboard shortcuts, but many of the keys remain the same as in Tally ERP 9. Here is a comparison of the shortcut keys and their uses:

Keyboard Shortcuts TallyPrime VS Tally ERP9

Keyboard Shortcuts TallyPrime VS Tally ERP9 PDF:

ActionShortcut in Tally PrimeLocation in Tally PrimeShortcut in Tally.ERP 9
To go back to the previous screen by closing the currently open screen To remove inputs that is provided/selected for a fieldEscNAEsc
To move to the first/last menu in a sectionCtrl+Up/DownNACtrl+Up/Down
To move to the left-most/right-most drop-down top menuCtrl+Left/RightNANone
To move from any line to the first line in a listHome & PgUpNAHome & PgUp
To from any point in a field to the beginning of the text in that fieldHomeNAHome
To move from any line to the last line in a listEnd & PgDnNAEnd & PgDn
To move from any point in a field to theEndNAEnd
end of the text in that field   
To move one line up in a list To move to the previous fieldUp arrowNAUp arrow
To move one line down in a list To move to the next fieldDown arrowNADown arrow
To move: One position left in a text field To the previous column on the left                To the previous menu on the leftLeft arrowNALeft arrow
To move: One position right in a text field To the next column on the right To the next menu on the rightRight arrowNARight arrow
To rewrite dataCtrl+Alt+RNACtrl+Alt+R
To quit the applicationAlt+F4NANone
To view the build informationCtrl+Alt+BNACtrl+Alt+B
To view TDL/Add-on detailsCtrl+Alt+TNACtrl+Alt+T
To navigate to the next artifact in the context To increment the Report date or next report in a sequence of reports displayed+NA+
To navigate to the previous artifact in the context To decrement Report date or previous report in a sequence of reports displayedNA
    
To accept or save a screenCtrl+ANACtrl+A
To expand or collapse a group in a tableAlt+EnterNAAlt+Enter
To move to the last field or last lineCtrl+EndNACtrl+End
To move to the first field or first lineCtrl+HomeNACtrl+Home
To open or hide calculator panelCtrl+NNACtrl+N (to Open) Ctrl+M (to Hide)
To hide or show the details in a tableAlt+TNAAlt+T
To open Company Features screenF11Top menuF11
To primarily open a report, and create masters and vouchers in the flow of work.Alt+GTop menuNone
To switch to a different report, and create masters and vouchers in the flow of work.Ctrl+GTop menuNone
To open Company top menuAlt+KTop menuNone
To open TallyHelp topic based on the context of the screen that is openCtrl+F1Top menuAlt+H
To open the company menu with the list of actions related to managing your companyAlt+KTop menuNone
To open the list of actions applicable to managing the company dataAlt+YTop menuNone
To open the list of actions applicable to sharing or exchanging your company dataAlt+ZTop menuNone
To open the import menu for importing masters, transaction, and bank statementsAlt+OTop menuNone
To open the e-mail menu for sendingAlt+MTop menuNone
transactions or reports   
To open the print menu for printing transactions or reports.Alt+PTop menuNone
To open the export menu for exporting masters, transactions, or reportsAlt+ETop menuNone
To select the display language that is applicable across all screensCtrl+KTop menuAlt+G
To select the data entry language that is applicable to all screensCtrl+WTop menuAlt+K
To export the current voucher or reportCtrl+ETop menuAlt+E
To e-mail the current voucher or reportCtrl+MTop menuAlt+M
To print the current voucher or reportCtrl+PTop menuAlt+P
To open the Help menuF1Top menuNone
To open TallyHelp topic based on the context of the screen that is openCtrl+F1Top menuAlt+H
To change the date of voucher entry or period for reportsF2Right buttonF2
To change the date of voucher entry or period for reportsAlt+F2Right buttonAlt+F2
To switch to another company from the list of open companiesF3Right buttonF3
To select and open another company located in the same folder or other data pathsAlt+F3Right buttonAlt+F3
To shut the currently loaded companiesCtrl+F3Right buttonAlt+F1
To open the list of configurations applicable for the report/viewF12Right buttonF12
To exit a screen or the applicationCtrl+QBottom barCtrl+Q

Keyboard Shortcuts – Reports

ActionsShortcuts in Tally PrimeLocation in Tally PrimeShortcuts in Tally.ERP 9
To insert a voucher in a reportAlt+IBottom barAlt+I
To create an entry in the report, by duplicating a voucherAlt+2Bottom barAlt+2
To delete an entry from a reportAlt+DBottom barAlt+D
To add a voucher in a reportAlt+ABottom barAlt+A
To cancel a voucher from a reportAlt+XBottom barAlt+X
To remove a line entry from a reportCtrl+RBottom barAlt+R
To display all hidden line entries, if they were removedAlt+UBottom barCtrl+U
To display the last hidden line (If multiple lines were hidden, pressing this shortcut repeatedly will restore the last hidden line first and follow the sequence)Ctrl+UBottom barAlt+U
To drill-down and open a voucher or master from the last level details of a reportEnterBottom barEnter
To drill-down and open a voucher for displayCtrl+EnterBottom barEnter
To alter a master during voucher entry or from drill-down of a reportCtrl+EnterBottom barCtrl+Enter
To select/deselect a line in a reportSpacebarBottom barSpace bar
To select or deselect a line in a reportShift+SpacebarBottom barShift+Spacebar
To select or deselect all lines in aCtrl+SpacebarBottom barCtrl+Spacebar
report   
To view the report in detailed or condensed formatAlt+F1 Alt+F5Right buttonAlt+F1
To open the GST PortalAlt+VRight buttonCtrl+O
To add a new columnAlt+CRight buttonAlt+C
To alter a columnAlt+ARight buttonAlt+A
To delete a columnAlt+DRight buttonAlt+D
To auto repeat columnsAlt+NRight buttonAlt+N
To filter data in a report, with a selected range of conditionsAlt+F12Right buttonAlt+F12
To calculate balances using vouchers that satisfy the selected conditionsCtrl+F12Right buttonCtrl+F12
To views values in different ways in a reportCtrl+BRight buttonNone
To change view – display report details in different views To navigate to Voucher View from Summary reports To navigate to post-dated cheque related transactions reportCtrl+HRight buttonF7/F8/F9 Alt+T
To view the exceptions related to a reportCtrl+JRight buttonNone
To drill down from a line in a reportEnterNAEnter
To expand or collapse information in a reportShift+EnterNAShift+Enter
To select or deselect lines till the endCtrl+Shift+EndNACtrl+Shift+End
To select or deselect lines till the topCtrl+Shift+HomeNACtrl+Shift+Home
    
To invert selection of line items in a reportCtrl+Alt+INACtrl+Alt+I
To perform linear selection/deselection multiple lines in a reportShift+Up/DownNANone

Keyboard Shortcuts – Vouchers & Masters

ActionShortcut in Tally PrimeLocation in Tally PrimeShortcut in Tally.ERP 9
To delete a voucherAlt+DBottom barAlt+D
To cancel a voucherAlt+XBottom barAlt+X
To remove item/ledger line in a voucherCtrl+DBottom barCtrl+D
To mark a voucher as Post-DatedCtrl+TRight buttonCtrl+T
To autofill detailsCtrl+FRight buttonCtrl+A
To change mode – open vouchers in different modesCtrl+HRight buttonCtrl+V (As Voucher mode) Alt+I (As Invoice mode)
To open the Stock Query report for the selected stock itemAlt+SRight buttonAlt+S
To mark a voucher as OptionalCtrl+LRight buttonCtrl+L
To add more details to a master or voucher for the current instanceCtrl+IRight buttonNone
To define stat adjustments during voucher entryAlt+JRight buttonAlt+J
To view list of all vouchers or mastersF10Right buttonNone
To retrieve Narration from the previous ledger during voucher entryAlt+RNAAlt+R
To open the calculator panel from Amount field during voucher entryAlt+CNAAlt+C
To open a manufacturing journal from the Quantity field of a journal voucherAlt+VNAAlt+V
To retrieve the Narration from the previous voucher, for the same voucher typeCtrl+RNACtrl+R
To go to the next input fieldTabNATab
To go to the previous input fieldShift+TabNAShift+Tab
To remove the value typedBackspaceNABackspace
To create a master, on the flyAlt+CNAAlt+C
To open the calculator panelAlt+CNAAlt+C
To insert the base currency symbol in an input field.Alt+4 Ctrl+4NACtrl+4
To open the previously saved master or voucher To scroll up in reportsPage UpNAPage Up
To open the next master or voucher To scroll down in reportsPage DownNAPage Down
To copy text from an input fieldCtrl+C Ctrl+Alt+CNACtrl+Alt+C
To paste input copied from a text field.Ctrl+V Ctrl+Alt+VNACtrl+Alt+V

Keyboard Shortcuts to Open Vouchers

ActionShortcut in Tally PrimeLocation in Tally PrimeShortcut in Tally.ERP 9
To open Contra voucherF4F10 > Accounting VouchersF4
To open Payment voucherF5F10 > Accounting VouchersF5
To open Receipt voucherF6F10 > Accounting VouchersF6
To open Journal voucherF7F10 > Accounting VouchersF7
To open Stock Journal voucherAlt+F7F10 > Inventory VouchersAlt+F7
To open Physical StockCtrl+F7F10 > Inventory VouchersAlt+F10
To open Sales voucherF8F10 > Accounting VouchersF8
To open Delivery NoteAlt+F8F10 > Inventory VouchersAlt+F8
To open Sales OrderCtrl+F8F10 > Order VouchersNone
To open Purchase voucherF9F10 > Accounting VouchersF9
To open Receipt NoteAlt+F9F10 > Inventory VouchersAlt+F9
To open Purchase OrderCtrl+F9F10 > Order VouchersNone
To open Credit NoteAlt+F6F10 > Accounting VouchersCtrl+F8
To open Debit NoteAlt+F5F10 > Accounting VouchersCtrl+F9
To open Payroll voucherCtrl+F4F10 > Payroll VouchersNone
    
To open Rejection In voucherCtrl+F6F10 > Inventory VouchersCtrl+F6
To open Rejection Out voucherCtrl+F5F10 > Inventory VouchersAlt+F6
Excel to Tally Import Utility full course

Excel to Tally Import Utility full Course with Code

This is first Excel to Tally Import Utility full Course. As businesses grow, working tend to move from manual processes to automated systems, which can help to increase efficiency, reduce errors, and save time. Tally is a popular accounting software used by many businesses across the world. Excel, on the other hand, is a widely used spreadsheet software. Integrating Excel with Tally can help businesses to streamline their accounting and finance processes.

In this blog post, we will cover a comprehensive Excel to Tally Data Import Course that will help you to learn how to import data from Excel to Tally. We will learn below things and create a full flagged Excel to Tally Software.

Excel to Tally Import Utility full Course Schedule:

DayCovering Topics
1Understanding Tally Masters and Vouchers
2Understanding Excel and Excel VBA
3Understanding Tally XML Master
4Understanding Tally XML Voucher
5Create Your 1st Excel to Tally XML Generator Software for Masters
6Create Your 1st Excel to Tally XML Generator Software for Vouchers Without Item
7Practice and Reasoning Questions About Excel to Tally Import VBA Code
8Create Your 1st Excel to Tally XML Generator Software for Vouchers With Item
9Create Your 1st Excel to Tally Direct Posting Software for Masters
10Create Your 1st Excel to Tally Direct Posting Software for Vouchers
11Practice: Create Accounting Vouchers Sheet : Payment, Receipt, Contra, Journal etc.
12Practice: Create Invoicing Vouchers Sheet : Sales, Purchase, Debit Note, Credit Note  etc.
13Practice: Create Invoicing Vouchers with Inventory Sheet : Sales, Purchase, Debit Note, Credit Note  etc.
14Practice and Reasoning Questions About Excel To Tally Voucher Import Types and Code
15Practice: Create Excel To Tally Bank Import Sheet
16Practice: Create Excel to Tally Stock Journal and Manufacutring Journal Sheet
17Practice: Create Excel to Tally Order Vouchers Sheet : Sales Order, Purchase Order
18Practice: Create Excel to Tally Notes Vouchers Sheet : Receipt Notes, Delivery Notes
19Exam : Create Excel to Tally Software using provided Templates
20Certification : Providing Certificates

Excel to Tally Data Integration Course Price and Registration form:

This comprehensive course on how to import data from Excel to Tally is priced at INR 51,000. However, for a limited time, we are offering a discount of over 90%, bringing the cost down to just INR 4,999. This discount is available to all participants who register for the course during the promotional period. We believe that this course offers tremendous value to businesses and individuals who want to learn excel to tally data integration coding. With this course, participants will gain valuable skills and knowledge that can help them increase their productivity, reduce errors, and save time. So don’t wait any longer, register for the course today to take advantage of this incredible offer!

Excel to Tally Import Utility full course

Also checkout Ecommerce Data Reconciliation Utility

Excel to Tally Course Schedule Details:

Excel to Tally Course: Understanding Tally Masters and Vouchers:

The first step in this course is to understand Tally Masters and Vouchers. Tally Masters are the different types of accounts, groups, and ledgers that you can create in Tally. Vouchers, on the other hand, are the transactions that you record in Tally. Understanding Tally Masters and Vouchers is crucial as it lays the foundation for creating an Excel to Tally data import tool.

Excel to Tally Course: Understanding Excel and Excel VBA:

The next step is to understand Excel and Excel VBA (Visual Basic for Applications). Excel is a powerful spreadsheet software that can be used to create complex worksheets and charts. Excel VBA is a programming language that is used to automate tasks in Excel. Understanding Excel and Excel VBA is important as it will help you to create macros that can automate the process of creating Tally XML files from Excel.

Excel to Tally Course: Understanding Tally XML for Masters and Vouchers:

Once you have a good understanding of Tally Masters and Vouchers and Excel and Excel VBA, the next step is to understand Tally XML of Masters and Vouchers. Tally XML is necessary to import Masters and Vouchers data. You will learn when, how and which file to be create and what is use of xml schema in Tally, and how to loop xml for multiple masters and vouchers using Excel VBA.

Excel to Tally Course: Create Your 1st Excel to Tally XML Generator Software:

In this section, you will learn how to create your first Excel to Tally XML Generator software for Masters and Vouchers creation. You will learn how to use Excel VBA to create a tool that can generate Tally XML files from Excel data.

Excel to Tally Course: Create Your 1st Excel to Tally Direct Posting Software:

In this section, you will learn how to create your first Excel to Tally Direct Posting software. You will learn how to use Excel VBA to create a tool that can directly post Masters and Vouchers data to Tally.

Excel to Tally Course: Practice and Create Excel to Tally Import Sheets for Different Uses:

Participants will have the opportunity to practice and create Excel to Tally import sheets for different uses, such as accounting vouchers, invoicing vouchers, bank import sheets, and stock journal sheets, among others. By working on practical examples and exercises, participants will be able to apply their knowledge and skills to real-life scenarios. This will help them gain a deeper understanding of the concepts and techniques covered in the course and build their confidence in using Excel and Tally for data import. With this practical experience, participants will be able to create customized import sheets that meet their specific needs and requirements, making their accounting and financial reporting processes more efficient and effective.

FAQ:

What level of proficiency do I need in Excel and Tally to take this course?

This course is designed for beginners, and no prior deep knowledge of Excel or Tally is required. However, participants with some basic familiarity with Excel and Tally may find it easier to follow along.

What software do I need to complete this excel to tally data integration course?

Participants will need a computer with Microsoft Excel installed and access to Tally accounting software.

Is this excel to tally data integration course self-paced?

Yes, this course is self-paced, and participants can complete it at their own speed. However, it is recommended to follow the course schedule to ensure a comprehensive learning experience.

What type of support is available to participants during the course?

Participants will connect online through google meet and any questions they may have during the course. Additionally, the course includes practical examples and exercises to reinforce the learning.

Will I receive a certificate upon completion of the excel to tally data integration course?

Yes, participants who complete the course and pass the certification exam will receive a certificate of completion, attesting to their newly acquired skills and knowledge.

How long does the excel to tally data integration course take to complete?

The course typically takes 20 days to complete, depending on the participant’s pace. In 10 days can create excel to tally Import software and in next 10 days can practice and make Excel sheets for software.

Conclusion:

This course provides an in-depth understanding of how to import data from Excel to Tally, a vital skill for businesses and individuals who need to manage their finances efficiently. Participants will gain practical experience in creating customized import sheets for different uses, including accounting vouchers, invoicing vouchers, bank import sheets, and stock journal sheets, among others. Enroll today and take the first step towards becoming an expert in Excel to Tally data import!

Ecommerce Reconciliation Utility

2023 Best Automatic Ultimate Ecommerce Reconciliation Utility

Here is 2023 best automatic Ultimate Ecommerce Reconciliation Utility that will reconcile all your ecommerce platform data like Amazon, Flipkart, Meesho, Myntra etc. with one click.

As ecommerce businesses grow and expand, it becomes increasingly difficult to keep track of all the financial transactions and payment reconciliations. With multiple sales channels, payment methods, and platforms, managing finances can quickly become overwhelming. That’s why having an automated reconciliation utility like the Ultimate Ecommerce Reconciliation is so important.

This utility is designed to reconcile all types of ecommerce platforms like Amazon, Flipkart, Meesho, Myntra, etc. with their payments. It makes it easy to reconcile data order wise and stock item wise with just one click.

Also try Excel to Tally – Ultimate Ecommerce Import

Ecommerce Reconciliation Utility

Ultimate Benefits of Ultimate Ecommerce Reconciliation Utility:

Simple Excel file with VBA coding:

One of the key benefits of the Ultimate Ecommerce Reconciliation utility is that it is made in Excel and can be used with any version of Excel. There is no need for any installation, making it very easy to use. The utility also includes simple macro buttons in the Excel ribbon, which makes the reconciliation process much faster.

Direct Data Loading Feature:

Another great feature of the Ultimate Ecommerce Reconciliation utility is the data loading facility. With just one click, users can load sales and settlement files through the direct selection option. The utility then automatically compiles the sales and settlement data into an All Order Sheet, making it very convenient for users.

Validating Option for Calculations:

The Validate Option is another useful feature that provides item and order-wise profit loss reconciliation, tax calculation, extra fees deduction, and more. Users can update item purchase costs to generate item-wise net profit, which makes it easier to track profitability on a per-item basis.

Summary Generator Button:

In addition to the core features, the Ultimate Ecommerce Reconciliation utility also includes a Summary button that creates reports of pending orders, paid orders, and a summarized report that includes sales details, settlement details, profit and loss details, and percentage. This makes it very easy for ecommerce businesses to generate reports and get a clear picture of their financial health.

Other Benefits of Ultimate Ecommerce Reconciliation Software:

One of the great things about the Ultimate Ecommerce Reconciliation utility is that it comes with several other benefits as well.

  • Firstly, users can use it for a lifetime, with no renewal required.
  • Secondly, any updates or additional ecommerce platforms added to the utility will be free.
  • Lastly, online support is provided with tools like Teamviewer, Anydesk, and Googlemeet, which makes it very easy for users to get help when they need it.

Why Use Ecommerce Reconciliation Software?

Certainly! In addition to the benefits mentioned earlier, here are some more advantages of using Ecommerce Reconciliation Software:

  1. Saves Time: The manual process of reconciling sales and payment data can be time-consuming and prone to errors. With the Ultimate Ecommerce Reconciliation utility, all the data is automatically compiled and reconciled, which saves a lot of time and reduces the risk of errors.
  2. Increases Accuracy: The utility automatically calculates taxes, fees, and other costs, which increases the accuracy of the reconciliation process. Users can be confident that the numbers are correct, and they can make informed decisions based on the data.
  3. Improves Cash Flow Management: With the ability to reconcile sales and payment data quickly and accurately, ecommerce businesses can better manage their cash flow. They can identify payment delays or discrepancies and take appropriate action to ensure they are getting paid on time.
  4. Provides Valuable Insights: The utility provides detailed reports on sales, settlements, and profitability, which can provide valuable insights into the ecommerce business’s financial health. This can help businesses make informed decisions about pricing, inventory management, and other financial matters.

Conclusion:

In conclusion, if you’re an ecommerce business looking for an automated reconciliation utility that can handle multiple ecommerce platforms and payment methods, then the Ultimate Ecommerce Reconciliation utility is a great option to consider. It’s easy to use, includes several helpful features, and comes with a lifetime license and online support.

How to Download Ultimate Ecommerce Reconciliation utility:

You can download by clicking on blow button:

  1. Click on above download link.
  2. A payment gateway will be open.
  3. Fill you Email and contact details.
  4. Press Next to choose payment methods.
  5. After payment click on Download link.
  6. Software will be downloaded on your computer.
  7. A confirmation mail will be send on your website.

For more details feel free to contact Mr. Ashish (Mo.No. +91 – 9131810293 Email: learnwells@outlook.com)

FAQ:

What is the Ultimate Ecommerce Reconciliation utility?

The Ultimate Ecommerce Reconciliation utility is an Excel-based tool that helps ecommerce businesses reconcile their sales and payment data from various platforms, including Amazon, Flipkart, Meesho, Myntra, and more.

Is the Ultimate Ecommerce Reconciliation utility easy to use?

Yes, the utility is designed to be user-friendly and easy to use. It comes with macro buttons in the Excel ribbon that allow users to reconcile data quickly and easily.

Do I need to have any technical knowledge to use the utility?

No, you do not need any technical knowledge to use the utility. It is designed to be simple and straightforward, with clear instructions provided.

Can the utility handle multiple Ecommerce platforms?

Yes, the utility can handle data from multiple Ecommerce platforms.

Can I use the utility on any version of Excel?

Yes, the utility can be used on any version of Excel. No installation is required.

Is there any renewal fee or additional cost to use the utility?

No, there is no renewal fee or additional cost to use the utility. Once you purchase it, you can use it for as long as you like.

Is online support available for the Ultimate Ecommerce Reconciliation utility?

Yes, online support is available for the utility. Support can be provided through Teamviewer, Anydesk, Googlemeet, or other online platforms.

Is my data secure when using the utility?

Yes, the utility is designed to be secure and to protect your data. It does not collect or store any personal or sensitive information, and all data remains on your local computer.

Voucher Modification TDL for Tally Prime

2023 Best Voucher Modification TDL for Tally Prime and ERP9 | Add MRP, Last Sale Price, Last Purchase Price etc. in Voucher Column, Invoice print and in Stock Summary of Tally

With this Voucher Modification TDL for Tally Prime and ERP9 code we can add and see every item MRP, Last Sale Price, Last Purchase Price etc. in columns of a voucher. This free TDL code will help us to do right entries. And also can print MRP etc. it in invoices. And with this free TDL also we can see MRP in stock summary reports.

Best Tally TDL for Tally Prime and Tally ERP9 to see item important details at voucher entry time, in invoice print, in stock summary.

This Voucher and Invoice Modification TDL for Tally Prime and Tally ERP9 is a very useful TDL that can help to modify vouchers and invoices by adding your own fields and will prevent any possible errors of wrong amount entry in vouchers. And also it will help at time of new voucher creation by adding items MRP rate, Last Sales and Last Purchase prices etc. that can be print in Invoice.

In this post, we will provide an overview of Voucher and invoice Modification TDL and how to use it in Tally Prime and ERP9.

Voucher Modification TDL for Tally Prime

Voucher Modification TDL for Tally Prime and ERP9 Code:

This code using item MRP and Last sale price and last Purchase Price will prevent mistakes while creating vouchers in Tally. This will help you to see item mrp, last sales price, last purchase price at voucher entry time.

Also checkout fast entry TDL for Tally


[#Line: DSP AccLine]
Option:LearnwellSMr
[!Line:LearnwellSMr]
add:field:LearnwellSMRP
invisible:##DSPShowInwards
[Field:LearnwellSMRP]
Use : Name Field
Set as :$MRPDetails[Last].MRPRateDetails[Last].MRPRate
width:15
color:red
Align:Right


[#Line : EI ColumnOne]
Option 	: LearnwellVCHmrp     
[!Line: LearnwellVCHmrp]	
Add	: Right Fields	: At Beginning	: LWMrpT
[Field : LWMrpT]
Info	: "MRP"
Align	: Centre
Width	: 10
Style	: Small bold
[#Line : EI ColumnTwo]
Option  : LearnwellVCHmrp2  
[!Line:  LearnwellVCHmrp2  ]
Add	: Right Fields	: At Beginning	: LWMrpT
Local	: Field	: LWMrpT	: Info	: " "


[#Line : EI InvInfo]							
	Option  : LearnwellVCHmrpIN   
[#Line : CI InvInfo]							
	Option  : LearnwellVCHmrpIN  
[!Line: LearnwellVCHmrpIN]
Add	: Right Fields	: At Beginning : LWMrpV
[Field : LWMrpV]
Use	: Name Field
Set As: $StockItemMRPRate
Align	: Centre
Border  : Thin Left Right
Width	: 10
Skip	: YES


[#Line: ExpInv Column1]
Add : left Field : After :EXPINV DescTitle : LWMrpV
Local : Field : LWMrpV : Info : "MRP"
Local : Field : LWMrpV : Delete : Storage
Local : Field : LWMrpV : Type : String
Local : Field : LWMrpV : align : Center
Local : Field : LWMrpV : Width : 10
Local : Field : LWMrpV : Style : small normal
Local : Field : LWMrpV : border : thin left
[#Line :ExpInv InvDetails]
add : left Fields : after : EXPINV Desc :OWNFIELDMRP
[ Field : OWNFIELDMRP]
use : Name Field
Set as :$StockItemMRPRate
Set Always : Yes
Width : 10
Align : Center
Border : Thin Left

	
Voucher Modification TDL for Tally Prime

Voucher Modification TDL for Tally Prime and ERP9 to Add MRP, Last Sale Price, Last Purchase Price etc. in Voucher Column, Invoice print and in Stock Summary:

HOW TO USE TDL CODE:
  • Copy above TDL code and create a text file.
  • Save text file and load in Tally (Method provided below the code)
  • Go to create a Voucher.
  • You will find item MRP etc. will appear after selecting item in voucher.
  • Also can print all extra details in Invoice.
  • Also can add all extra details in Stock summary report.

This is best free TDL to have in your Tally. Must have TDL file for Tally ERP9 and Tally Prime that can use it for lifetime. This free TDL Code will perfectly work with Tally Prime.

Tally TDL to add MRP and Last Rate in Voucher Video:

See the below video to learn how to add MRP and Last Sale Price and Last Purchase Price in Voucher:

Tally TDL to add MRP and Last Rate in Invoice Video:

See the below video to learn how to print MRP and Last Sale Price and Last Purchase Price in Invoice:

Tally TDL to add MRP and Last Rate in Stock summary report Video:

See the below video to learn how to print MRP and Last Sale Price and Last Purchase Price in Stock summary:

Watch above videos to learn :

  • How to Create TDL files for Tally.
  • How to Load TDL files in Tally.
  • How to add MRP, Last Sale Price, Last Purchase Price etc. in Voucher and Invoice and in Stock Summary.
  • How to See the TDL effects in Tally.
  • More videos related to free TDL files on youtube/learnwell
  • Get More TDL files on https://e2t.in/
FOLLOW THE BELLOW INSTRUCTIONS TO LOAD TDL FILE IN TALLY:
  1. Make a Text file of above code
  2. Save it in to your computer
  3. Copy the text file path including Name and extension (as – C:\Users\HP\Desktop\rec\MRP.txt)
  4. Open Tally Prime Software
  5. Click on Help and click on TDL & Addon  (for Tally Prime)
  6. Press F4 (to open a Box)
  7. Set Load TDL file on Startup – Yes
  8. Paste The path in blank space
  9. Press enter and save
  10. Now your Voucher and Invoice modification TDL for Tally Prime and ERP9 is ready to use.

By Adding MRP, Last Sale Price, Last Purchase Price etc. in Voucher Column, Invoice print and in Stock Summary will help to prevent wrong entries and creating a professional invoice. This Free TDL is a valuable TDL for Tally that can help streamline the data entry process and increase efficiency.

FAQ:

What is MRP in Tally?

MRP stands for Maximum Retail Price. It is the maximum price that a product can be sold to a customer. In Tally, MRP can be added as a column in vouchers, invoice prints, and stock summaries through TDL.

How can I add the MRP column in Tally vouchers?

To add the MRP column in Tally vouchers, we need to create a TDL file. By creating TDL files for tally we can modify Tally vouchers and can add own fields. You can follow this video to learn how to add MRP in Tally voucher through TDL code.

Can I print the MRP column on my invoices in Tally?

Yes, you can print the MRP column on your invoices in Tally by customizing the invoice print format. Go to the printing configuration option and add the MRP column. And also can add MRP or other things in invoice through TDL file. Watch this video to see how to add own field in Invoice Print.

What is Last Sale Price in Tally?

Last Sale Price is the price at which a product was last sold. In Tally, the Last Sale Price can be added as a column in vouchers, invoice prints, and stock summaries through TDL code.

What is Last Purchase Price in Tally?

Last Purchase Price is the price at which a product was last purchased. In Tally, the Last Purchase Price can be added as a column in vouchers, invoice prints, and stock summaries through TDL Code.

Can I view the MRP, Last Sale Price, and Last Purchase Price columns in the Stock Summary of Tally?

Yes, you can view the MRP, Last Sale Price, and Last Purchase Price columns in the Stock Summary of Tally by customizing the Stock Summary report. To customize Tally reports you can use TDL files provided by Learnwell

Fast entry TDL

2023 Best Fast Entry TDL for Tally | Make Data Entry Faster with Fast Entry TDL

With Fast Entry TDL we can quickly enter transactions using a trigger key. This feature speeds up the data entry process by reducing the number of steps required to record transactions. It can be accessed by loading this TDL in Tally, which can be customized according to the user’s preference. This free TDL is particularly useful for businesses with high volumes of transactions, as it saves time and reduces the chances of errors.

In this post, we will delve into the details of Fast Entry TDL, including how it works and how to set it up in Tally. We’ll also discuss the benefits of using this feature, such as increased productivity, reduced errors, and improved accuracy. Whether you’re new to Tally or a seasoned user, this post will provide valuable insights into how Fast Entry TDL can help streamline your data entry process.

Fast entry TDL

Fast Entry TDL for Tally Code:

This code using Trigger Key can help to save entries faster. This will help you to do all type reparative entries for Tally Prime or Tally Erp9.

Also add Logos in Statements and Invoices with Logo TDL

[#Line:DSP VCHDyBkDetail]
Key:LearnwellDouble
[Key:LearnwellDouble]
title:"Voucher Entry"
Key:Left Double Click
Action:Call:LearnwellVoucher

[Function:LearnwellVoucher]
10:Trigger Key:Alt+2, CTRL+A

How to use Faster Entry TDL for Tally:

HOW TO USE TDL CODE:
  • Copy above TDL code and create a text file.
  • Save text file and load in Tally (Method provided below the code)
  • Go to Daybook and double click on entries.
  • You will find that entries going double.

This is best free TDL to have in your Tally. Must have TDL file for Tally ERP9 and Tally Prime that can use it for lifetime. This free TDL Code will perfectly work with Tally Prime.

Tally TDL to add Logo in Invoice and Statements Video:

See the below video for more details:

Watch above video to learn :

  • How to Create TDL files for Tally.
  • How to Load TDL files in Tally.
  • How to use Trigger Key for Tally.
  • How to double click on entries to do Fast entry.
  • How to See the effect of this TDL.
  • More videos related TDL files on youtube/learnwell
  • Get More TDL files on https://e2t.in/
FOLLOW THE BELLOW INSTRUCTIONS TO LOAD TDL FILE IN TALLY:
  1. Make a Text file of above code
  2. Save it in to your computer
  3. Copy the text file path including Name and extension (as – C:\Users\HP\Desktop\rec\Logo.txt)
  4. Open Tally Prime Software
  5. Click on Help and click on TDL & Addon  (for Tally Prime)
  6. Press F4 (to open a Box)
  7. Set Load TDL file on Startup – Yes
  8. Paste The path in blank space
  9. Press enter and save
  10. Now your Fast Entry TDL for Tally is ready to use.

Fast Entry TDL is a valuable TDL for Tally that can help streamline the data entry process and increase efficiency. By reducing the number of steps required to enter transactions, this feature saves time and reduces the chances of errors.

FAQ:

What is Faster Entry TDL in Tally?

Faster Entry TDL is a TDL for Tally that allows users to enter transactions quickly and efficiently by using a trigger key.

How does Faster Entry TDL work?

Faster Entry TDL works by reducing the number of steps required to enter transactions. By pressing a designated trigger key, users can access the Faster Entry TDL by double click, where they can enter transaction details with double clicks.

Can the trigger key for Faster Entry TDL be customized?

Yes, the trigger key for Faster Entry TDL can be customized according to the user’s preference.

What types of transactions can be entered using Faster Entry TDL?

Faster Entry TDL can be used for a variety of transactions, including invoices, payments, and more.

What are the benefits of using Faster Entry TDL in Tally?

The benefits of using Fastest Entry TDL in Tally include increased productivity, reduced errors, and improved accuracy. This TDL also saves time by reducing the number of steps required to complete transactions.

Logo TDL for Tally

2023 Best Logo TDL for Tally | Add Logo Everywhere in Tally

Today I have best logo TDL for Tally, that can change your company value and authenticity. In today’s digital age, creating a strong brand identity and standing out in the market is more important than ever. One key aspect of building a successful brand is having a recognizable logo that represents the company’s authenticity and values.

And if you maintain your business books and accounting in Tally, then it is most important to provide statements, invoices and other prints with logo.

With this Tally TDL code we can add company logo everywhere. We can add logo in ledgers statement, group statement, in trial balance, profit loss account and also in Balance sheet.

This is a very useful logo TDL for Tally Prime and Tally ERP9 to add Logo everywhere in Tally.

Logo TDL for Tally

Logo TDL for Tally Code:

This code can add logo in ledgers statement, group statement, in trial balance, profit loss account and also in Balance sheet etc.

Before using this code load a logo in Tally. For more details watch below video:

Also get TDL to increase size of voucher fields in Tally

[#Form:Normal Ledger]
Add:Part:At Beginning:LearnwellLogo

[#Form:Group Summary]
Add:Part:At Beginning:LearnwellLogo

[#Form:Profit and Loss]
Add:Part:At Beginning:LearnwellLogo

[#Form:Balance Sheet]
Add:Part:At Beginning:LearnwellLogo


[Part:LearnwellLogo]
Line:Empty
Invisible:Not $$InPrintMode
Graph Type:$LogoPath:Company:##SVCurrentCompany
Width:10% Page
Height:10% Page

How to use Logo TDL for Tally:

HOW TO USE TDL CODE:
  • Copy above TDL code and create a text file.
  • Save text file then load in Tally Prime (Method provided below the code)
  • Load a Company logo in Tally.
  • Now go to print statements or invoices.
  • You will find Logo of company with statements and invoices.

This is best free TDL to have in your Tally. Must have TDL file for Tally ERP9 and Tally Prime that can use it for lifetime. This free TDL Code will perfectly work with Tally Prime.

Tally TDL to add Logo in Invoice and Statements Video:

See the below video for more details:

Watch above video to learn :

  • How to Create TDL files for Tally.
  • How to Load TDL files in Tally.
  • How to modify Voucher fields through TDL code.
  • How to add Logo in Tally.
  • How to See the effect of this TDL.
  • More videos related TDL files on youtube/learnwell
  • Get More TDL files on https://e2t.in/
FOLLOW THE BELLOW INSTRUCTIONS TO LOAD TDL FILE IN TALLY:
  1. Make a Text file of above code
  2. Save it in to your computer
  3. Copy the text file path including Name and extension (as – C:\Users\HP\Desktop\rec\Logo.txt)
  4. Open Tally Prime Software
  5. Click on Help and click on TDL & Addon  (for Tally Prime)
  6. Press F4 (to open a Box)
  7. Set Load TDL file on Startup – Yes
  8. Paste The path in blank space
  9. Press enter and save
  10. Now your Logo TDL for Tally is ready to use.

Overall, Logo TDL for Tally is a valuable TDL file for businesses that use Tally accounting software. By harnessing the full potential of Logo TDL and Tally, businesses can print invoices and statements with company logo that meets their unique needs and helps to establish a strong, authentic brand identity.

FAQ:

How do I print invoices with logo in Tally using Logo TDL for Tally?

To print invoices in Tally with logo using Logo TDL, you will first need to load a company logo in Tally and then load above TDL code in Tally. Once the Logo and TDL loaded in Tally, you can use it to print invoices with company logo.

Can I customize the layout of my invoices in Tally using Logo TDL?

Yes, you can customize the layout of your invoices in Tally using Logo TDL. This can include modifying the placement of logo, adding custom logos or images.

Is it possible to print statements with logo in Tally using Logo TDL?

Yes, it is possible to print statements with company logo in Tally using Logo TDL for Tally. Similar to invoices, you can create a custom statement template with logo and use it to print.

Can I export my invoices and statements with logo as PDFs in Tally using Logo TDL?

Yes, you can export your invoices and statements as PDFs with logo in Tally using Logo TDL. Once the template is created, you can select the “Export” option from the invoice or statement screen in Tally and choose to save the document as a PDF.

What are the advantages of printing invoices and statements with logo in Tally using Logo TDL for Tally?

The advantages of printing invoices and statements in Tally using Logo TDL include the ability to add company logo in format, and export the documents with logo in PDF. This will help maintain authenticity of company.